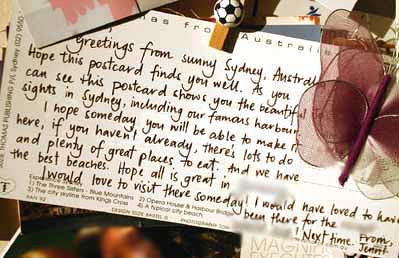
Mission Accomplished: Postcard Sent

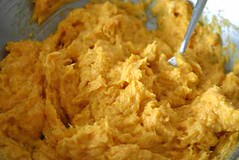
I found this great panoramic postcard showing all the quintessential sights of the wonderful city of Sydney. I hope my blogger will like it.
Can't wait to see the postcard I'll be getting!

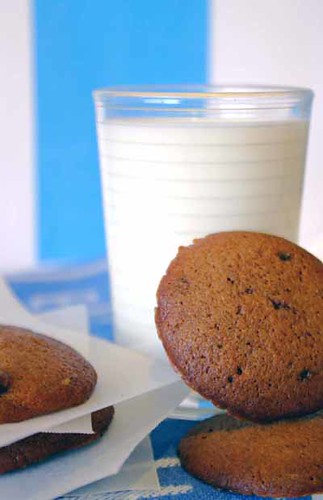
To dunk or not to dunk; I say, dunk all you want. Dunk breakfast, noon and night; coffee, tea or milk. Before you make all those vague expressions at the computer screen (you probably already have), I am talking about dunking your cookies, crackers, biscuits and the like into a drink. Whatever your preference, dunkers and non-dunkers alike are all accepted here at Milk and Cookies. The Romans did it with their biscotti and I’m sure the Victorian nobilities snuck in a few dips here and there during afternoon tea while no one was watching; everyone dunks don’t they?
Reading this discussion-thread got me thinking about the whole nature of dunking and the protocol surrounding its execution. Should you dunk in public? Or should dunking be confined to the privacy of your own home? Should those happy to dunk, impose their dunking views on those who are opposed to dunking?
I was initially taken aback by this fellow’s predicament. He was pro-dunking, although his girlfriend and her family were vehemently antagonistic towards any sort of dunking. A quandary of immense proportions I know. But when she imposes her non-dunking stance on him, is this then a violation of his freedom to be himself? Why should he alter his dunking behaviour for her and her family?
In this Western, pluralistic, post-modern society of ours, you would think that this type of strict social decorum had been done away with. Perhaps the company I keep is not high-brow and highfalutin enough to empathise with this family so antagonistic towards dunking, and perhaps I’ve been hanging out with the Eliza Doolittles of this world, but I was under the impression that this kind of social breeding had been, well ‘bred out’, apparently not. I realize that there is nothing wrong with being civil and refined, I am all for chivalry, good manners, not burping at the dinner table, the whole shebang. But snobbery, no. And this is what this young man’s predicament looked like.
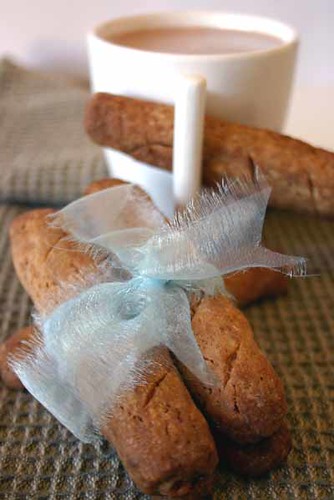
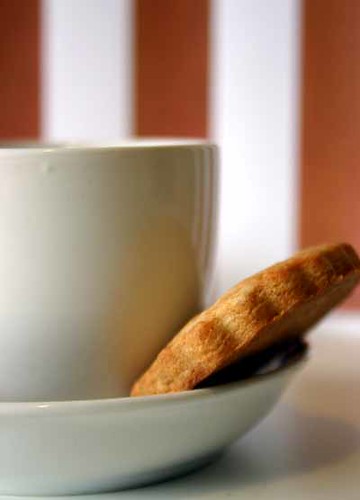
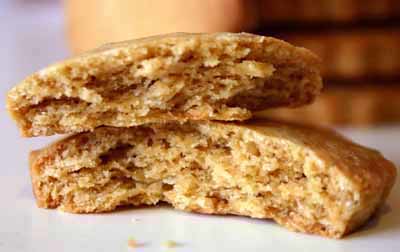
However, I digress and I have probably lost you on all these tangential thoughts? The only reason why this discussion provoked such a response was because I had just finished baking these biscuits especially for dunking and I had thoroughly enjoyed sitting on my couch, feet propped up on the coffee table dunking away to my heart’s content. I felt under threat, like my cookie-habits had just been attacked. Although I am unmoved and resolve that even if I do choose to dunk, this does not in any way undermine my civility.
In fact I felt very cultured while eating these biscuits. Too hard to eat without submerging them into some form of liquid, these biscuits will allow you to enjoy dunking as proper etiquette. I hate to bake a biscuit that causes segregation, but simply put, there is no other way to enjoy them than to plunge them straight into a hot drink. By all means attempt to eat them dry as a bone, but I assure you, you will require the services of a dental surgeon afterwards. You have been warned.
Nonetheless I should get on with the recipe. Who knew I could talk so much about dunking a cookie? Yet again I have underestimated how verbose I can be about such trivial things. So whether you’re going to dunk or risk ruining your choppers, here is the recipe.
Milky Dipping Sticks
Recipe from Donna Hay
(makes 25 sticks)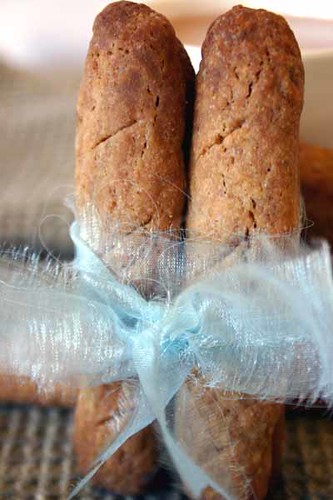
185g unsalted butter
2/3 cup caster sugar
1½ tsp vanilla extract
3 cups plain all-purpose flour
2/3 cup malted milk powder
1 egg
Preheat the oven to 160°C. Line a baking tray with parchment paper.
Beat butter, sugar and vanilla extract until smooth.
Add flour, malt powder and egg and beat until incorporated and a smooth dough forms.
Refrigerate for 30 minutes.
Roll 1½ teaspoons of the dough into balls. Place on a lightly floured surface and roll each ball into 10cm logs.
Mark small slits in each log at 1cm intervals and place on baking tray.
Bake for 30 minutes or until golden brown.
Cool on trays for 15 minutes, then transfer to a wire rack.
Serve as a dunking biscuit with hot drinks.
This morning at 7:30am, I left work, stepped outside and was met by what I can only describe as a torrential downpour. The street was flooded with water and the mesh awning above the front entrance was caving in under the weight of all the water it had collected. As I made a swift bee line for the car, I noticed how incredibly beautiful it actually was. I raced back up the front step to get a better view.
The striking thing about this portrait was that despite all the rain, the sun was still shining incredibly brightly. The scene was nothing short of surreal. It was the most glorious display of nature I could only imagine and was the perfect reception back into the land-of-the-living after another round of night shifts. The sky was lit with brilliant hues of yellow and orange and the deafening sound of pattering rain was strangely exhilarating. Like witnessing a violent thunderstorm I was awed by this exquisite act of nature. There were no words to describe it other than breathtaking.
Every time these nightly shift rotations come around I always dread stepping out and seeing what a beautiful day I am missing because I’ll be asleep for most of it. But after witnessing this natural display, all the cares, the fatigue and the hunger suddenly dissipated. It was dreamy. I only wish I had my camera at the time as it really doesn’t seem like my words are adequately capturing the moment, but luckily the image will be forever etched into my memory.
To top off this natural exhibition; on my way home whilst driving down the motorway, I literally drove through the end of a rainbow! It was extraordinary; I have never seen the end of a rainbow before, but I actually saw the point where the arc reaches its end. The highway runs through a patch of national park and this was the exact spot where the rainbow ended. Okay, so I’ve just pulled an overnighter but I wasn’t delusional, I wasn’t on crack and this isn’t some sort of fanciful pretence. I saw the end of the rainbow. No pot of gold though.
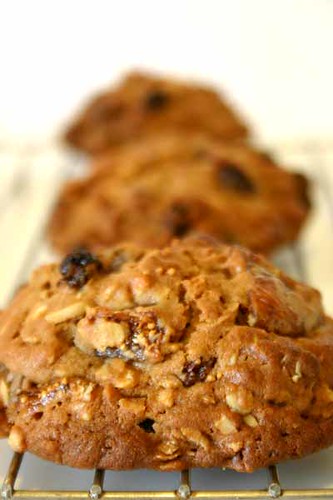
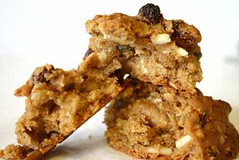
And so it was that this glorious morning motivated me to bake these cookies. Funnily enough the cookies turned out in the same shade as that of the morning sky, so I thought it appropriate to name them after this morning.
These cookies have everything. A spot of morning cleaning uncovered a whole bunch of ingredients I had forgotten about in my pantry, so I decided to use them. I bought some dried fruits not long ago and somehow they were pushed to the back of the cupboard and were left there to almost deteriorate; happens all the time in this house*. I still have a jar of expired Vegemite, and even though I bought a new jar, I still cannot bring myself to throw out the old jar. The silly things I do. All this gratuitous wastage was really getting to me so I decided to use as many of the dried fruits as possible.
The cookies turned out like muesli cookies; sweet enough to be a cookie but had enough fibre to make it a muesli. There's nothing like a cookie for breakfast, and after the cookies, well I slept snugly for 10 hours straight.
Morning Glory
¾ cup unsalted butter
1 cup soft brown sugar
¼ cup dark muscovado sugar
¼ cup honey
1 tsp vanilla extract
1 egg
1 cup plain all-purpose flour
¼ tsp baking soda
¼ tsp baking powder
1/8 tsp salt
1 tsp cinnamon ground
1 tsp all spice
½ tsp ground ginger
1 cup rolled oats
¼ cup chopped almonds
¼ cup chopped walnuts
½ cup sultanas
¼ cup dried apricots, chopped
½ cup dried figs, chopped
Preheat oven to 180˚C. Line a baking sheet with parchment paper.
Sift together flour, baking soda, baking powder, salt, cinnamon, all spice and ground ginger in a bowl and set aside.
Cream butter and sugars until light and fluffy. Add vanilla and egg and beat until well blended.
Gently incorporate flour mixture to the batter.
Add the rolled oats, almonds, walnuts, sultanas, apricots and figs and mix until all ingredients are well combined.
Scoop out the batter using an ice cream scoop onto the prepared baking sheet, spacing them about 5cm apart.
Bake for 15-18 minutes, less if cookies are smaller. When cookies are done, remove baking sheet from oven and let cool for 5 minutes.
Transfer cookies to a wire rack and cool further.
Glorious
Why were these cookies so expensive you ask? Well because they were made with imported French cultured butter that costs $6.95 a block, and with fair-trade organic unrefined cane sugar from the Philippines and organic stone-milled flour. Before you judge me, I know you have if at least only once, been guilty of the same offence. Now don’t make me ask you how many cookbooks you own, and yes I'm talking to you.
What can I say; consumerism runs rampant in this household, and prudence is not a virtue I possess. I’m aware that there are certain costs you incur through the process of food blogging, but I think I need to draw the line with $6.95 butter; it wasn’t even a whole block! Butter in Australia come in 250g blocks, and this was only half a block! You might be thinking, “You bought the bloody butter, why are you complaining?” Well I am having this gripe because the butter was incorrectly priced; they were sitting innocently under a ticket marked $3.95, which would already have been quite steep for butter. But of course I still buy it, in fact I buy two. I thought to myself, it’s French, it’s cultured, it has fancy packaging and a name I can’t pronounce, it has to be good. So I buy this good butter thinking it was this price ($3.95) only to arrive home, check the receipt and be gob smacked at the actual price of the butter ($6.95).
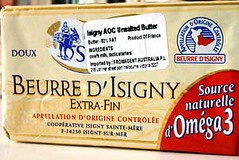
Lamenting the fact that I had just bought $13.90 worth of churned cow’s milk, the butter consequently sat in my refrigerator untouched for days, dubbed “too good to use”. I would open the fridge door and look at the butter, occasionally take it out, smell it, then promptly put in back in the fridge lest oxidation ruin it. There was no way I was going to ruin these two sticks of very expensive butter. If I had a mantelpiece or a glass cabinet, this is where they would be proudly displayed. It’s too bad I can't wear them or drive them pompously down the street to show off, because well, it’s butter. Nevertheless very expensive butter. At least when I buy an utterly cute, yet overly priced pair of Marc Jacob flats I can put them on and publicly parade them for everyone to covet. Unfortunately there’s no straightforward covet-strategy for butter.
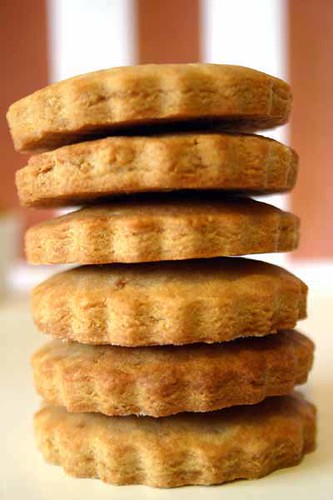
Not to demonise this improperly priced stick of Saint Mêre Beurre D’Isigny, in its defence I must add that it is without contest the best butter I have tasted- so creamy, rich and smooth, with subtle hints of nuttiness. Its taste transcends any other butter I have encountered, not that this is difficult here in Australia, we’re not really known for our butter. With the exception of Gympie Farm Cultured Butter, I cannot say I recall any high quality Australian butters. Suffice to say, after tasting this Beurre D’Isigny I was persuaded to make use of its exquisite taste by making Shortbread.
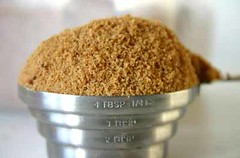
Since frugality has been lost on these cookies, I decided to also make use of my equally costly Alter Eco Organic Unrefined Cane Sugar from the Philippines. I have yet to meet a sugar I didn’t like; this one is pleasantly mild, not overly cloying and melts easily. The sugar is described as “naturally moist and has a rich taste with hints of vanilla”, quite like Muscovado sugar although not as robust in flavour.
It is evident that buying overindulgent, superfluous foodstuffs is my vice. I don’t know what it is but the allure of buying these sorts of things is a compulsion I find hard to control. Mustering the strength to say no to purchasing sugars from Barbados and vanilla beans from Madagascar is just too difficult for this poor defenceless baker. It appears that every time I go to the markets I am duped into buying a new type of ingredient all to the dismay of G, who has never understood my attraction to such acquisitions. Not that he is one to judge; the same manner of self restraint I apply to food shopping he does with wrist-watches. The man cannot stop buying watches.
Despite the occasional bout of buyer’s remorse, I think as long as there are exotic foodstuffs available, the shopping will certainly continue. Just keep me away from the David Jones Foodhall.
Shortbread
(makes 20 small cookies)
Adapted from this recipe
1¼ cup flour
1/3 cup unsalted butter, cut into cubes
2 tsp baking powder
1/8 tsp salt
1/3 cup ground cane sugar
3 egg yolks
1 tsp vanilla extract
Using your fingers, rub together the flour and butter until it resembles coarse meal.
Add the baking powder and salt and mix to combine.
In another bowl, mix the egg yolks, sugar and vanilla until smooth. Add this mixture to the flour and mix until blended.
Roll dough into a ball and cover in plastic film and refrigerate for 2 hours.
Preheat oven to 180˚C. Line a baking sheet with parchment paper.
Roll your dough to a thickness of 0.5cm.
Cut out shapes from dough using a cookie cutter.
Place on prepared baking sheet and bake for 15-20 minutes.
Remove from oven and allow to cool on a wire rack.
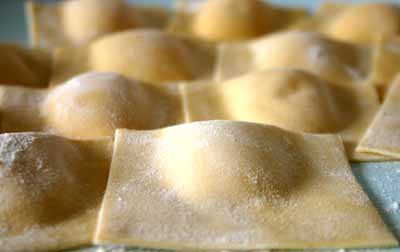
To finish off what I started, here is what came of the ravioli that I created yesterday. I set aside a container of the raw stuff and placed it in the freezer specifically for days where I was not in the disposition to labour over a great meal. Those kinds of days are quite seldom as I do enjoy cooking and being in the kitchen. However, I did not anticipate one of "those days" coming so soon, it goes to show that Kevin Coster was right about something, "if you build it, they will come".
So, after a long day like today, where misadventures were aplenty- flat tyres, incompetent telephone operators, departing relatives, no sleep, you get the picture. It was nice to come home and know that the extent of food preparation required, equated to simply boiling a pot of water.
Furthermore, in a lovely turn from our day’s ill-fortune, the lovely Italian lady next door dropped off some of her famous tomato sugo. This little act of charity turned our unassuming dinner into to a sweet and delightful experience where we could forget the quandaries of the day, simply to let them evaporate at each bite.
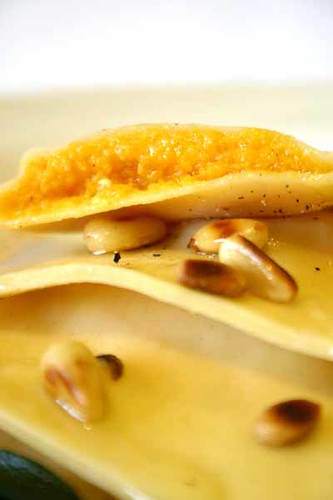
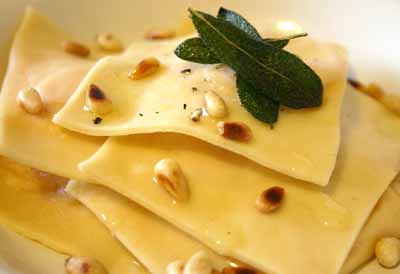
And so it was, Ravioli, two ways. I opted for mine to be simply drizzled with a splatter of extra virgin olive oil some toasted pine nuts and cracked black pepper; while G opted for his ravioli with generous lashings of Santina’s tomato sugo. It was perfect.
Unfortunately, no photos of the tomato sugo, G eats too fast.
When your mother gives you a pasta machine for your birthday what do you do? Well the obvious answer is to make pasta of course, but before this could transpire I had to silence the sniggering taunts from other family members who laughed at the prospect of me making my own pasta. For someone who previously had little interest or experience in cooking before, they were quite bemused at how I had acquired such a novel distraction in so little a time. Apparently, I somehow went from being completely detached from everything associated with food and the culinary arts to suddenly knowing the difference between Chanterelles and Portobellos.
The fact is, I have always been surrounded by food and have had the benefit of a rich culinary upbringing, but until very recently I never embraced it. Now in my twenties, you can see why it was such a surprise to many when I begin heralding the wonders of homemade shortcrust pastry and start spouting French cooking techniques previously unheard of, coming from these lips.
Seven months after my birthday, the pasta machine remains unused. Until today that is. I decided that today would be the day that I would break in my seven-month old, mint condition pasta machine by making some egg-pasta ravioli. After tasting Pastabilities’ Butternut Pumpkin, Sage and Goat’s Cheese Ravioli, I vowed that if I were ever to make ravioli, I would endeavour to replicate this particular one.
The filling seemed fairly straightforward as all the ingredients were included in the name of the ravioli. And indeed it was simply a matter or combining all these ingredients together. A few taste tests here and there, a few sprinkles of salt here and there and it was done. The filling was velvety and delicate; the hints of sage with the creamy pumpkin tasted blissful. The three ingredients all mingled together, mutually enhancing each others’ flavour. The burnt butter also added an exquisite touch of nuttiness to the filling.
And so it appears that it is they, the doubters that have egg on their faces, as that it was they that were so rapt about my egg pasta ravioli, so much so that they were eating bowlfuls of it. It is only right that it is I, that gets the last laugh. Making pasta can so so much fun.
Egg Pasta 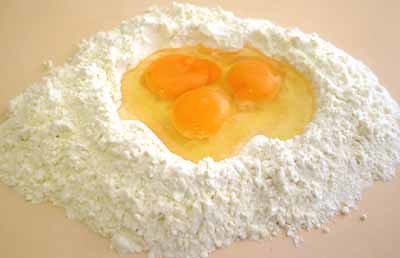
250g "00" Italian Pasta flour
2 large, fresh, free-range eggs
1 egg yolk
Place flour in a mound on a dry flat surface.
Create a well in the centre of the flour, and crack the eggs and yolk into the well.
Using your fingers or a fork, gently mix the eggs slowly incorporating more and more flour until you create a smooth dough.
Keep kneading the dough with your hands until it becomes smooth and elastic.
Shape dough into a ball and wrap in clear plastic and refrigerate for 30 minutes.
NOTE: Use organic or free-range eggs when possible and it is important to use the freshest eggs that you can obtain.
Also if available, use Italian “00” flour as that they are especially milled for pastas and contain the proper amount of gluten to achieve the desired consistency for pasta dough.
Butternut Pumpkin, Sage Butter and Goat’s Cheese Filling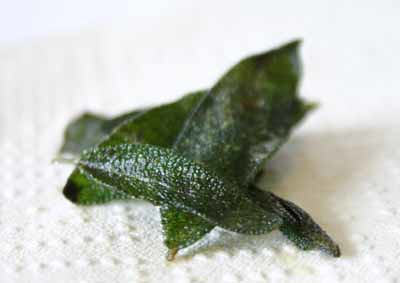
500g Butternut Pumpkin
25g unsalted butter
8-10 sage leaves
60g goat’s cheese (chévre)
sea salt
Roast the butternut pumpkin in the oven for 40 minutes, or until soft at 190°C.
When the pumpkin is cooked, spoon out the flesh and place in a bowl.
Make a well in the centre of the bowl for the excess water to drain into.
Allow pumpkin to cool and drain for 20 minutes, and then remove the excess water.
Meanwhile, place butter and sage leaves in a small saucepan and fry until sage leaves are crisp and butter has browned.
Remove the sage leaves and pour the butter into the bowl with the pumpkin.
Add the goat’s cheese and a pinch of sea salt and combine until the mixture reaches a smooth consistency.
Set aside until ready to fill ravioli.
Rolling the Pasta Sheets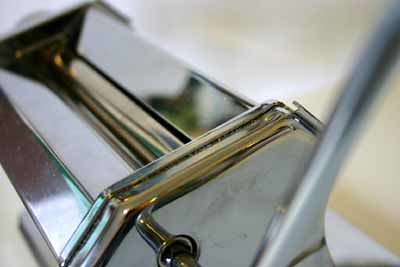
Divide the dough into four portions and work with one portion at a time, keeping the others covered.
Take one portion of dough and knead until smooth, roughly flatten the dough with a rolling pin.
Lightly dust with flour on both sides before running through the machine.
Using the pasta machine at its widest setting (highest number), roll the dough through, ensuring that it remains in one piece.
You may want to fold this sheet over and run it through the machine again, at the same setting to ensure you have a smooth texture.
Continue running the sheets of pasta through each setting (decreasing in number), until you achieve the desired thickness (with my pasta machine, I rolled the pasta through, until the number 2 setting).
NOTE: Remember to dust the pasta sheets on both sides to prevent it from sticking.
Also make sure you have adequate bench space for the pasta sheets to lie flat on the bench.
Assembling the Ravioli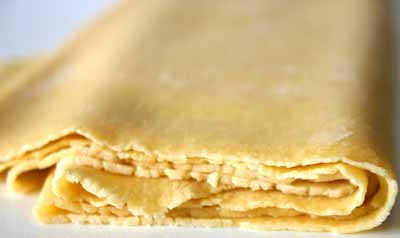
Lay your pasta sheets on a flour-dusted surface.
Heap a good amount of filling onto the centre of each sheet at one end. Repeat this all the way along the sheet at 5cm intervals.
Using a pastry brush, dipped in a little water, evenly brush the pasta around the mounds of filling.
Fold the pasta sheet over, covering the mounds until the two ends meet.
Push out any air by cupping the filling and extracting the little air bubbles that form.
Using a knife, pizza cutter or crinkly cutter, trim the sides of the ravioli.
The ravioli is now ready to be cooked or they can be stored in the freezer, in a container dusted with flour for up to 4 weeks.
Butternut Pumpkin, Sage Butter and Goat's Cheese Filling
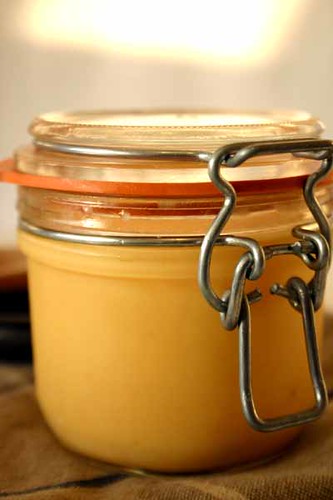
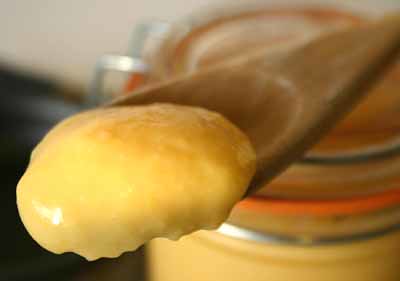
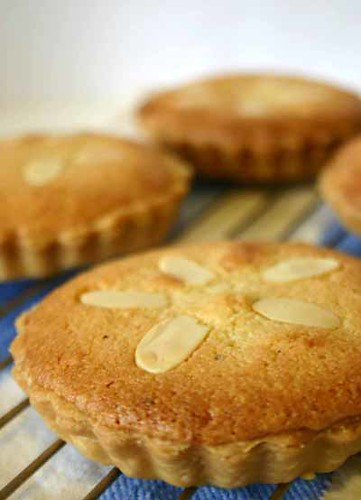
sunny perfection
There are simple pleasures in life that I dare not take for granted. There are the obvious ones like enjoying a lazy Sunday afternoon at home or swimming in the ocean on a blistering hot summer’s day or sleeping in past nine when you know everyone else has gone to work.
And perhaps there are certainly other pleasures that one comes to discover for themselves. Like getting a series of green lights when you are running late for an imporatant meeting, or maybe its running around the house in your underwear because you know that you have it all to yourself, or possibly it's when you crane your neck all the way back just to slurp the last drops of melted gelato that have trickled to the bottom of the cone. These, I think are the stuff of life.
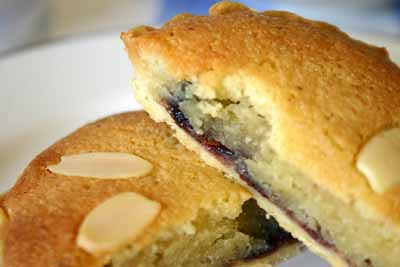
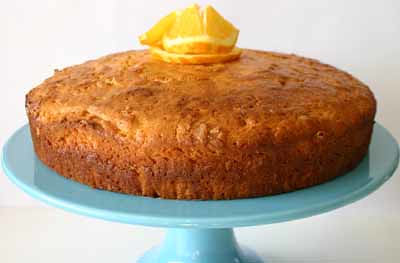
So if we are speaking of life's simple pleasures, then I must include this recipe for Orange Yoghurt Cake, because the pleasure one derrives from eating this cake far exceeds any guilt brought on by consuming more calories than one can expend. Ever since that palatal epiphany I experienced with these creations, I have been fanatically swift to add zests into my batters. I'm like a mad woman, opportunistic and relentless, continually seeking ways in which I can sneak in, I mean incorporate, any type of zest into a recipe.
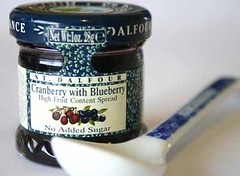
It certainly has been for the better, as that I find zests actually impart more robust flavours as opposed to juice which, for the most part adds a slight sharpness to batter rather than a delicate tang. What's more, zests provide baked goods with intense hints of aromatic flavour that cannot be achieved by juice alone. I also like to add that using a high quality, full-fat yoghurt adds to the depth of flavour to this cake, none of that cheap artificially sweetened stuff will do. So of course I used my favourite youghurt, as I always have a tub ready in my fridge.
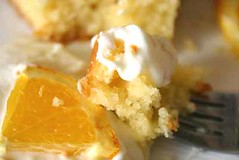
So, as far as culinary delights go, this cake is hard to overlook. Paired with some fresh slices of fruit or with a dollop of your favourite yoghurt, it's rapturous. Admitedly, I do gush quite a fair bit about many a dessert but this one in particular I, ashamedly admit, have daydreams about. Yes, it's quite embarrasing and I am blushing as we speak, but what better pleasure is there than to dream about cake? Anyway, before I lose you all, here is the recipe.
Orange Yoghurt Cake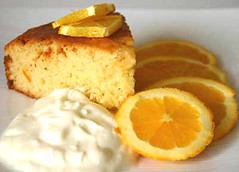
2 cups plain all-purpose flour
2 tsp baking powder
a pinch of salt
125g unsalted butter
1 cup caster sugar
zest from 2 oranges
½ tsp vanilla extract
2 eggs
juice from 1 orange
¾ cup full fat yoghurt
Preheat oven to 180˚C. Line a round baking tin with parchment paper.
Sift the flour, baking powder and salt into a bowl and set aside.
Cream the butter and sugar until light and fluffy.
Add the orange zest and mix until combined.
Add the eggs, one at a time mixing thoroughly after each addition.
Then add the orange juice and yoghurt and mix until smooth.
Slowly add the flour mixture to the batter and mix until incorporated, be careful not to overwork the batter.
Pour mixture into lined baking tin and spread batter to the edges. Bake for about 50-60 minutes.
Pierce cake with a toothpick and if it comes away clean then the cake is done.
Rest in its tin for 5 minutes then cool on a wire rack.
Serve with slices of oranges and a dollop of yoghurt or whipped cream.
irresistible!
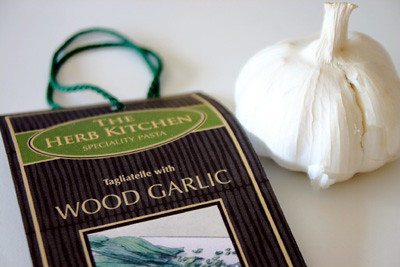
For me Wood Garlic elicits imaginings of lush green woods and enchanted forests. Its mythical characteristic evokes a sense old-worldliness, like it stepped straight out of the pages of a fairytale. It may also have something to do with the fact that Wood Garlic; also know as Ramsons, Wild Garlic or Bear Garlic is commonly found in dark thickly wooded forests. And attached to this, is traditional folklore that believed it to ward away evil spirits and venomous creatures, commonly attributed to its strong pungent odour that permeated the surrounding air. There are forests in England and Ireland that are carpeted with blossoming Wood Garlic, and although the flowers are quite beautiful and have been likened to the Lily-of-the-Valley, its offensive odour deters many from picking them or even walking by them.
Cooking the leaves do reduced its pungency and only a small amount is used as it is quite potent. So I was quite surprised to find a pack of Wood Garlic flavoured Tagliatelle while browsing the aisles of Aldi Supermarkets with my mother. Of all places, this would not have been where I would have expected to find such a delicacy, as I had never been aware of Wood Garlic in the past, however I was adequately intrigued and decided to purchase it.
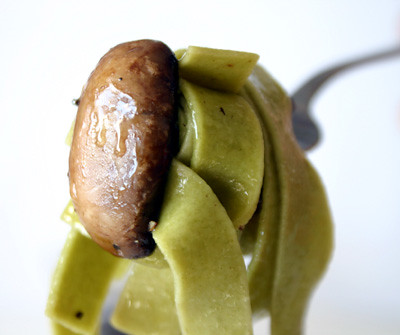
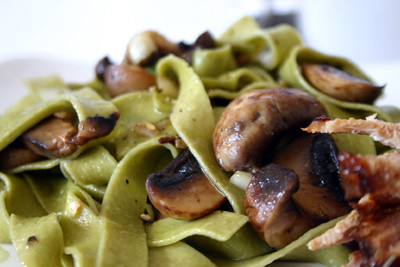
My researched uncovered, the smell and taste of Wood Garlic had been known to be powerful, so a simple unadulterated pasta dish was what I deemed appropriate. A quick glance into the fridge unearthed some Swiss Brown Mushrooms that seemed fit for the task.
The pasta is simple and satisfying and is best kept that way. The wood garlic itself was not at all overpowering as its descriptions suggest. There are slight nuances of garlic and musky flavours, but nothing at all of the odour and pungency that the plant is believed to possess.
Wood Garlic Tagliatelle with Swiss Brown Mushrooms
1 pack Wood Garlic Tagliatelle
250g Swiss Brown Mushrooms sliced thickly
1 clove garlic, peeled and chopped
1 tsp chilli flakes
sea salt and pepper
extra-virgin olive oil
Cook pasta, as per packet instructions.
Place some oil in a frying pan over medium heat and add the garlic.
When the garlic is half cooked add the sea salt and chilli flakes.
Then add the mushrooms and stir until the mushrooms have absorbed the oil and have cooked.
Turn the heat off and then add the cooked and drained pasta to the pan and stir until the mushrooms are combined.
Serve with a drizzle of olive oil and some cracked pepper
An occupational hazard that ensues from deciding to initiate and ultimately maintain a food blog, are the surplus calories that you consume as a result. I shudder to think how many calories I have consumed so far. And I shudder even more at the thought of the extra calories that I have not yet expended since the inception of this blog.
As that blogging is relatively passive act, and all you are excercising are your cerebral muscles and at best your jaw muscles; it has the potential to send you obese. Okay, maybe not this drastic, but it could go awry if no discipline is exercised on my part.
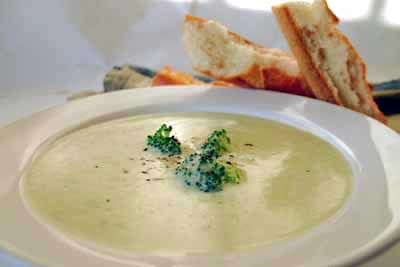
So here to counter the effects of premature aging from all the sugar and butter I have been having in the last two months is a quick and easy recipe for Broccoli Soup. It is no surprise, I obtained this recipe from Donna Hay’s cookbook, 10-Minute-Meals, as I am a big fan. I realise that having cream in the soup doesn’t make it low-fat, but this is where I draw the line. I personally do no think there is anything unhealthy about dairy products, cream included. I believe it is absolutely essential to a healthy diet. I have been eating and drinking all things dairy for as long as I can remember and this certainly has never contributed to any type of weight gain or unhealthiness. But this is just my personal opinion and it is best to leave it at that. Here is the recipe
Broccoli Soup
(serves 2)
2 cups chicken or vegetable stock
2 Sebago or any other starchy potatoes, peeled and diced
150g broccoli, cut into fairly large florets
2/3 cup single cream
sea salt and black pepper
100g broccoli, extra, chopped
Place the stock, potatoes and broccoli in a saucepan over high heat and cook covered, for 5 minutes or until the vegetables are soft. Puree the soup with a stick mixer or in a blender until smooth. Return to the saucepan and add the cream, salt and pepper and extra broccoli and cook over medium heat for 3 minutes or until the broccoli is tender. Ladle the soup into bowls and serve with crusty bread.

Milk and Cookies will be off the blogosphere for a short time as she is working at a conference at the Acer Arena, Sydney Olympic Park for the next seven days! She and her trusty sidekick monkey will be taking part in directing live events, shooting lots of action and eating lots of bad conference food. So no posts for the time being, but I hope you enjoy the Mille-Feuille in the meantime. Will be back very soon!
My first day of school was in 1986, I was 5. This was also the year when I got my first set of stiches (on my head) after a bathing mishap. The doctor covered the stiches up with a pretty pink bow so no one would notice. His trick worked.
My first best friend was called Peachy. We used to play with the other kids in the neighbourhood and gang-up on the mean snooty little girl that lived across the street. She thought she was better than us but we taught her a lesson after a game of hide and seek.
My first time to ever set foot in another country was when we immigrated to Australia in April 1988. It smelled different when we got off the plane; but surprisingly not a kangaroo in sight.
My first job was working the registers at the local Hungry Jack’s in 1995. This lasted a total of eight weeks. It was the school holidays and serving greasy food was not on my list of things-to-do-during-the-summer.
My first time ever skipping school was in Year 9, 1996. Incidentally, my very first detention class was also this year. We were made to scrape bubble gum off the seats.
My first driving lesson was in 1998, at 17, and despite my parents’ uncertainty regarding my driving skills, I got my licence soon after that. Surely enough, I had my first accident the following year.
My first time catching a wave was at Whale Beach, in 1999. It felt like hours of paddling, but catching a barrel wave that lasted for what seemed like infinity made it worth the wait and the sore arms afterwards.
My first time in a New York City Yellow Taxi was in 2003, en route to Chelsea. The driver threatened to run down and kill a cyclist that had brushed against his vehicle. The chase lasted for about ten minutes until I alighted prematurely on Broadway. I told him to keep the change.
My first job after graduating was in 2004, and two years later I am still happily working there. The on-site chef's cuisine keeps me from straying.
My first post for Milk and Cookies was this year in May, forty-seven posts later and I am still baking.
And lastly, my first attempt at Mille-Feuille was yesterday. The outcome wasn’t a vast success but making it and getting to eat it after was enjoyment enough.
* * * * *
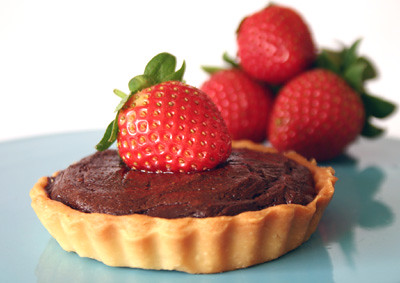
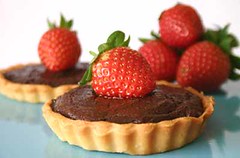
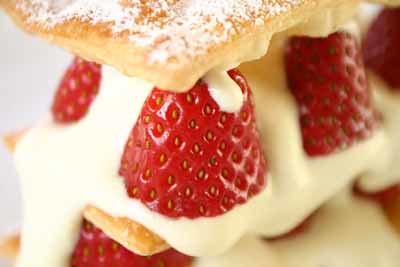
I decided to make both a dessert and savoury mille-feuille, namely a Strawberry Mille-Feuille and a Vegetable and Chévre Mille-Feuille. The initial challenge was to not get the puff pastry to, well, puff up so much. This proved to be quite a feat as that the usual inclination and intended objective of puff pastry is essentially to puff up. So after much trial and error and many wasted sheets of pastry, I perfected my technique in rolling the pastry out as thin as possible then stabbing each piece with a fork several times and finally brushing some egg wash over the top.
I obtained a recipe for vanilla cream custard over the internet; however I forget where exactly I procured it. And to say the least, I would not recommend following this particular recipe as that it contained several inconsistencies, like asking for eggs to be beaten into the mixture, although there is no mention of eggs whatsoever in the ingredient list. This forced me to improvise and only follow the recipe when absolutely feasible.
The custard turned out quite gorgeously at the start- thick, glossy and aromatic; that is until I left the stove for a split second and caused the cornflour to clump up at the bottom of the saucepan. Although the mixture was still smooth and aromatic, the custard had become runny, which spreading it without spilling over utterly impossible. It became a sort of circus balancing act; the strawberries did their best to precariously support the layers of pastry on top.
Although my Strawberry Mille-Fueille was fraught with some difficulty, the Vegetable and Chévre version proved less problematic. I found that a vegetable mille-feuile lends open to interpretation, you could substitute the filling with a myriad of other things such as mushrooms, asparagus, sweet potato and artichoke, to name a few. I also find goat’s cheese to be a good complement to vegetables as that it has a soft and mild taste that tends not to overwhelm other flavours but augment them.
As this is a first, it is inevitably a cause for celebration. So I would like to celebrate with you, my first stab at making mille-feuille! Bon Apetite!
Strawberry Mille-Feuille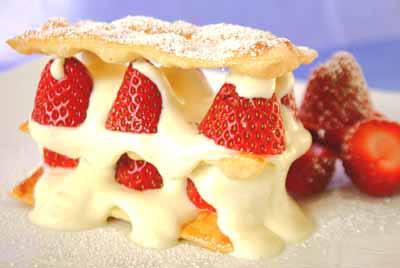
1-2 sheets puff pastry
1 punnet strawberries, washed and sliced in half.
200ml full cream milk, plus 1 tsp extra
4 tsp caster sugar
1 vanilla pod, split lengthways and beans scraped
3 tbsp cornflour
2 eggs (one for the filling, another for an egg wash)
100ml whipped cream
icing sugar for dusting
Filling:
In a saucepan, over low to medium heat, bring the milk, 3 tbsp sugar and vanilla beans to a gentle simmer.
In another bowl, add the egg, remaining sugar and whisk until smooth. Then add the cornflour and 1 tsp of milk to thin, and whisk until the mixture becomes smooth and consistent. Add this mixture to the milk stirring constantly for about 3 minutes, or until the custard thickens.
Take saucepan off the heat and beat in the whipped cream, until fully incorporated in the custard.
Pour into another bowl and place in the refrigerator to chill.
Puff Pastry:
Preheat oven to 190°C and line a baking tray with parchment paper.
Meanwhile, roll pastry sheets out onto a lightly floured surface until they are approximately 2mm in thickness. Cut out identical sized rectangles from the pastry and dust lightly with flour. Pierce each piece with a fork a few times, and brush with the egg wash.Lay each piece of pastry on a prepared baking sheet and dust with some icing sugar.
Bake in the oven for about 20 minutes, or until the pastry has browned.
Once cooked, remove from the oven and place straight onto a wire rack to cool so that pastry does not puff up.
Assemble the mille-feuille:
Take the filling out of the refrigerator.
Take a layer of puff pastry as your base, and then spread a layer of custard on top. Place on a serving plate.
After, line this layer with strawberries.
Alternating between layers of puff pastry, custard and strawberries, build until you have three layers of pastry,
Dust the tops of the mille-feuille with some icing sugar and decorate with some fresh strawberries on the side.
Vegetable and Chévre Mille-Feuille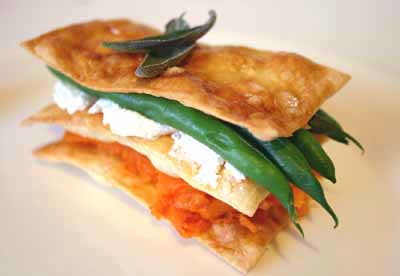
1-2 sheets puff pastry
500g butternut pumpkin
200g green beans
200g mild chévre
1 sprig of fresh thyme, plus 1 tbsp, chopped finely
sea salt
black pepper
extra virgin olive oil
Puff Pastry:
Prepare the puff pastry as in the above recipe, omitting the icing sugar and replacing with sea salt.
Vegetable Filling:
Place the butternut pumpkin and a sprig of fresh thyme in a baking tray and coat with olive oil and some sea salt and in the oven for approximately 30-40 minutes at 220°C.
Place the chévre in a mixing bowl and mix in the chopped thyme.
Add a little sea salt and freshly cracked pepper to taste. Set aside.
Bring a medium pot of salted water to a rolling boil.
Blanch the green beans for about 1 minute, or until their colour brightens.
Drain the beans when cooked.
Assemble the mille-feuille:
Take a layer of puff pastry as your base, and then spread a layer of chévre on top.
Scoop out some roasted pumpkin and place a thick layer on top of the chévre. Drizzle a small amount of extra virgin olive oil.
Place another layer of pastry on top and spread a layer of chévre on it.
Line with green beans lengthways and drizzle some olive oil over themPlace a teaspoon dollop of chévre on top of the green beans, in the middle of the layer to act as fastener, and then place the top layer of puff pastry over this. Top with some fresh herbs.

It’s been 17 days and not a cupcake in sight. I’m quite proud of myself in fact; the restraint exercised over the past seventeen days in this household can be, neither rivalled nor denied. I don’t think anyone in this house has ever deprived themselves of any food for this long, and I mean any food. If we want it, we buy it, we make it and we eat it.
I challenged myself to go on a self-imposed cupcake sabbatical in order to set off on other non-cupcake endeavours. So far it has been a successful mission. I haven’t made anything overly notable or extraordinary; or more precisely, nothing yet from this cookbook or anything from this remarkable blog, although I think I have been fairing well.
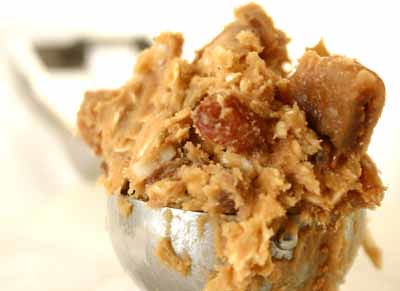
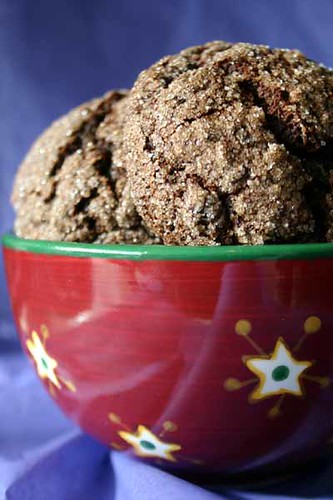
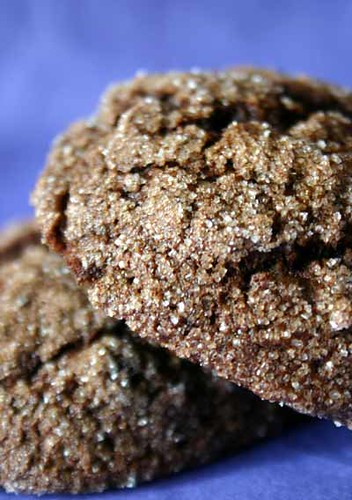
So today the urge to bake cupcakes was particularly strong, but my resolve to steer clear of them (for a season) was even stronger. So I decided to make Muscovado Sugar Cookies instead, as there was a surplus of sugar in my pantry and besides, who doesn’t like sugar, really. There may be some of you that are thinking, “Actually, no, I don’t like sugar all that much”, but I will speculate that you are in the minority. And besides this isn’t your typical, commonplace, find-it-in-every-pantry type of sugar, this is Muscovado sugar. What I consider to be the Dom Pérignon of sugars.
Muscovado Sugar is characterised by its chewy texture and robust molasses flavour. Unlike other brown sugars that achieve their brown colour from the addition of molasses to white sugar, Muscovado acquires its taste and colour from the juices extracted directly from the sugar cane. Its sweetness is not as potent as other refined sugars and it possesses a distinctive and matchless taste. This sugar, I have been known to pick and eat straight out of the jar, it’s that good.
As for the cookies, they emerge from the oven soft and flimsy, it is when they cool completely that the sugary crunch becomes evident. I like to eat around the small dark muscovado erruptions on the cookie surface, and save it till last. I like my last bite to be savouring the burnt sugar crispiness in these little explosions. It's those simple little things that make eating these biscuits a delight.
Muscovado Sugar Cookies
(makes approx 30 cookies)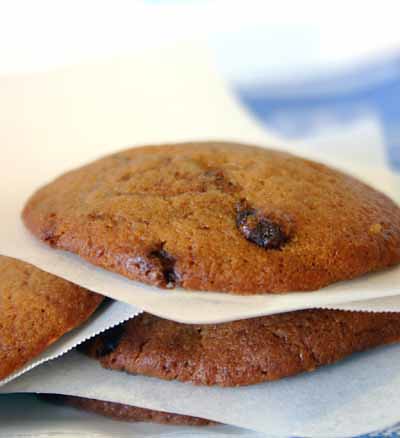
1 cup butter
2/3 cup dark muscovado sugar
½ cup granulated sugar
2 eggs
1 tsp vanilla extract
1½ cups plain all-purpose flour
¼ tsp baking soda
1 cup semisweet chocolate chips (optional)
Preheat oven to 180°C, and line one baking sheet with parchment paper.
Cream butter and sugars until the batter lightens in colour and becomes fluffy.
Add the egg and vanilla extract and beat until blended.
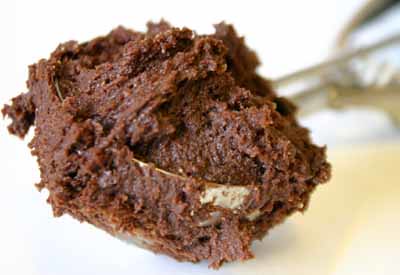
Slowly add the flour and baking soda and mix until flour is incorpoarted. The batter will be quite wet.
Add the chocolate chips (if using).
Drop 1 tbsp amount of batter onto a prepared baking sheet and bake for about 12-15 minutes.
When cookies are done, take them out of the oven and transfer them to a wire rack. The cookies will be very soft, so be carefully when lifting them off the tray. Let cool on a wire rack until cookies crisp up.
NOTE: There really is no substitute for the unique taste of Muscovado sugar, although if you want to make conventional sugar cookies, just replace the Muscovado with soft brown sugar.
A good quality brand of Muscovado you can use is Billington's which is a UK brand that specialises in unrefined cane sugars. They are available in Sydney at most specialty gourmet and health conscious stores like Macro Wholefoods and Aboutlife in Balmain.
Store the Muscovado Sugar in an airtight container as that, although it keeps for a long time, is prone to drying out. So to avoid your precious sugar from cementing into a brick find a good home for it. If you do, it will last you a very long time.