Tuesday, July 31, 2007

Another day, Another Donna Hay

Rustic Vanilla Pear and Almond Tart

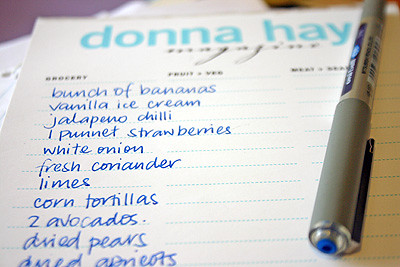
Issue 8. It's the one I'm having a love affair with at the moment. And yes, you guessed right, it's a Donna Hay Magazine- the autumn issue, number 8.

So far I have baked this, this and this from issue 8 and it’s not stopping there. Somehow Miss Hay has managed to compile all of my favourite cold weather recipes into this one issue. There’s a lot more where that came from and there’s still a gaggle of recipes I have book marked and there’s still a whole month of winter left. You still haven’t seen all of issue 8.

Butter, Almond filling, Pie weights, Pear Tarts

And obviously you haven’t seen the last of Donna Hay. If I could paint a picture of how I want my dream kitchen to look like, well it would look like a Donna Hay Magazine- clean and crisp, modern with a few vintage twists. I absolutely love her taste, and not to mention the eye candy in every issue, it’s food porn at its grandest. And I actually hate calling it food porn, because it sounds rather vulgar, but unfortunately it is probably the most apt way of describing it.

Anyway, enough of the love struck fanatical prose about Miss Hay. I don’t know how I went through the whole season of autumn without making anything using pears. Luckily I found these beautiful beurre bosc pears at Aboutlife, still at their peak. I usually start looking for pears as soon as autumn rolls in, however this season it seems as if my attention was directed elsewhere. So here I am to rectify this gross neglect.

Beurre Bosc pears

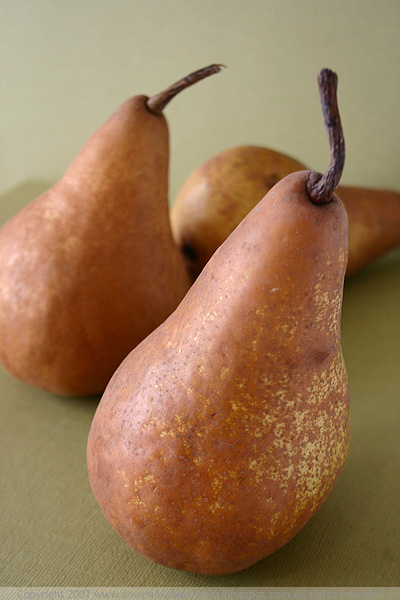
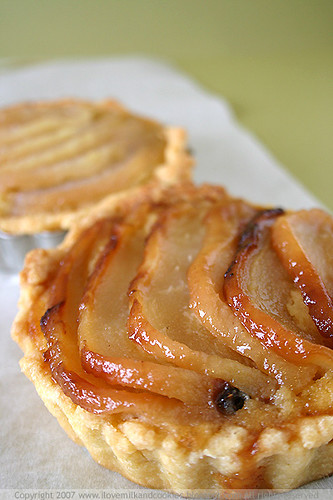
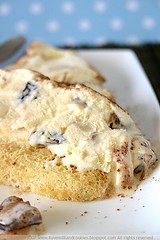
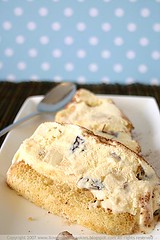
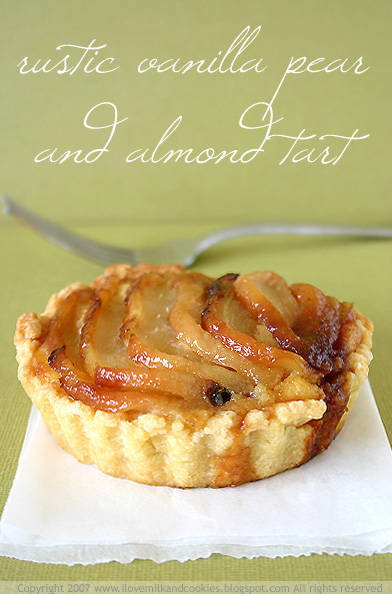
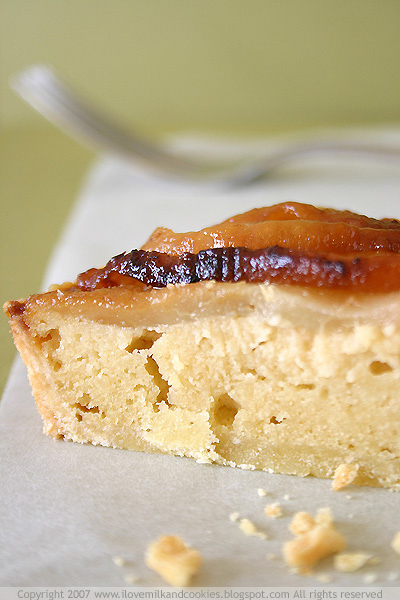
Beurre Bosc pears are characterised by their unique rich yellow russeted skin, its creamy firm and juicy flesh, which makes it ideal for desserts, especially poaching. This tart starts off, with pears that are poached in a vanilla syrup and then arranged over pastry filled with almond frangipane.

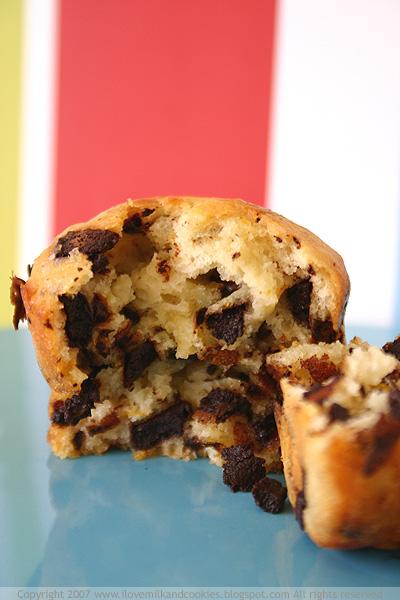
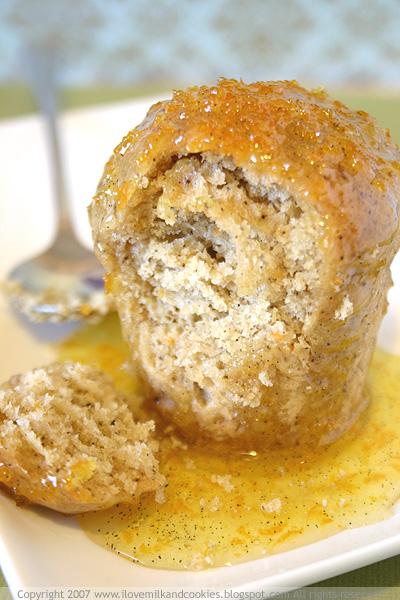
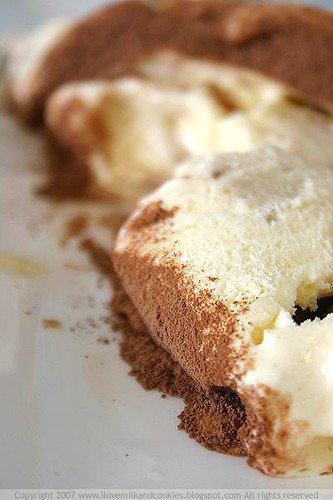
The tart is decadent without being too much, if you know what I mean. The almond filling is spongy and light but provides that little bit of richness while the vanilla-soaked pears provides the sugar rush. It’s a great combination of flavours and textures.

Inside

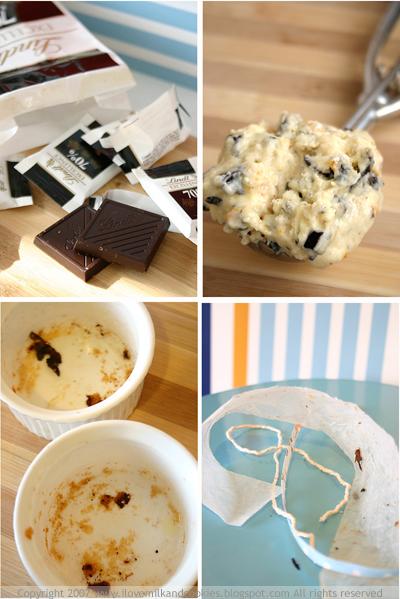
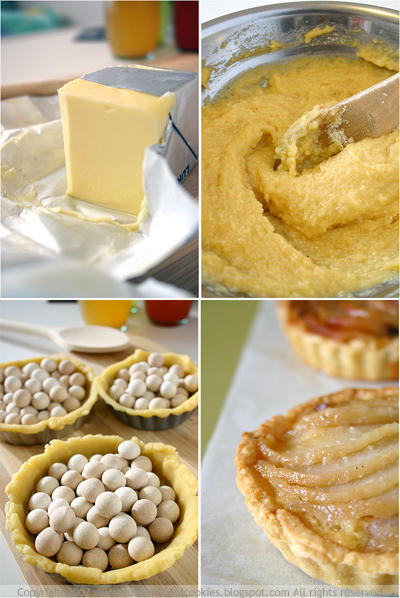
Making the tart is quite therapeutic too. Poaching the pears perfumes the air with a beautiful fragrance of vanilla and making the pastry, as in, massaging and rolling out the dough can be quite a soothing exercise. As long as you aren’t making these tarts in a hurry, the whole process, although somewhat lengthy can be satisfying in the end. Especially when the reward at the end is biting into one of the tarts.

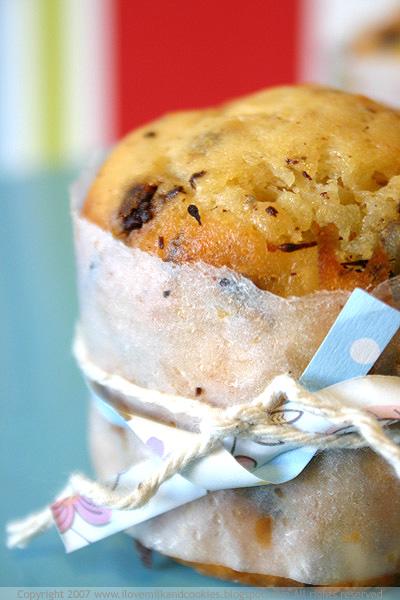
I never knew pastry making to be so relaxing; tart making for me usually ends in a big fluster where I am all wound up at the end, barely enjoying the finished result. I have never had much finesse with pastry, but this time because, I left the tarts rather unfinished-rustic, so to speak, I wasn’t so hung up about them looking so pretty like I normally do. I never seem to make pretty tart cases anyway and I thought there was no reason to force it now. So the guise of these un-pretty tarts is, rustic. And that works for me. But if you are a pastry virtuoso, then by all means, pretty the tart up.

Pear Tart, light or dark

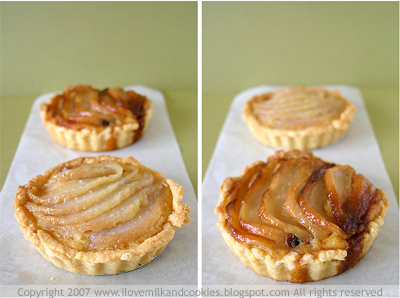
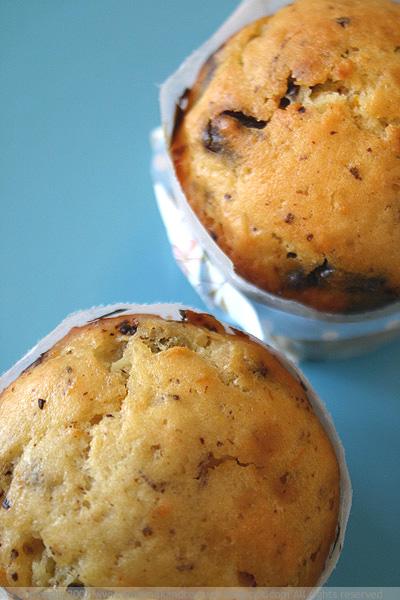
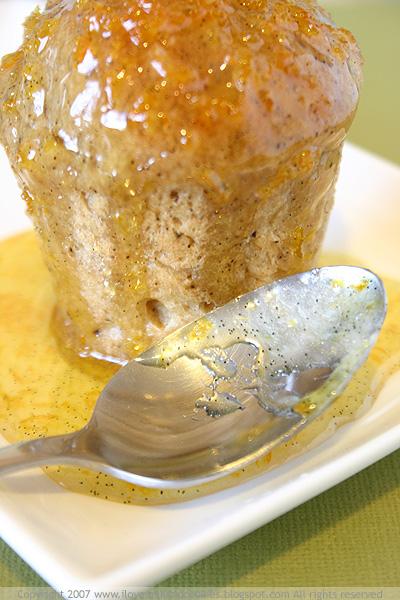
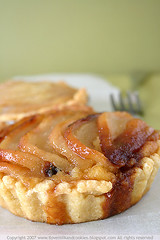
The tarts come out of the oven golden and aromatic. You can bake them slightly longer and brush the tops with the extra vanilla syrup to get more caramelised pears, or you can just leave them as is. I made both and preferred the more caramelised version, but really it's up to you. If you ever try these tarts, try to use beurre bosc pears, as they are perfect for this type of cooking.


Rustic Vanilla Pear and Almond Tarts
adapted from Donna Hay Magazine (Issue 8)
serves 6

Rustic Vanilla Pear and Almond Tart

FOR THE PASTRY
145g unsalted butted, chilled an cubed
2 cups plain all-purpose flour
¼ cup caster sugar
2 tbsp ice water

FOR THE PEARS
3 cups water
1 cup sugar
1 vanilla bean, split in half (or 1 tsp pure vanilla extract)
¼ cup maple syrup
3 beurre bosc pears, halved and cored

FOR THE FILLING
75g unsalted butter
½ cup caster sugar
1 egg
1 cup almond meal
2 tbsp plain all-purpose flour
1½ tbsp Bailey’s Irish Crème

TO MAKE THE PASTRY
Place the butter, flour and sugar in the bowl of a food processor and pulse until the mixture resembles coarse breadcrumbs.
While the motor is running, add enough iced water to form a soft dough.
Shape into a ball and wrap in plastic.
Refrigerate for 30 minutes.

POACHING THE PEARS
Place the water, sugar, vanilla bean or extract and maple syrup in a medium saucepan over medium-low heat.
Stir until the sugar is dissolved, then simmer for 5 minutes.
Add the pears and simmer for 15 minutes or until tender.
Remove from the saucepan and allow to cool on a chopping board.

Preheat the oven to 180°C.
Roll out pastry between two sheets of parchment paper to 3mm thick and line 6 tart tins.
Allow for some dough to overhang on the edges.
Line the pastry with baking paper and fill with pie weights.
Bake for 10-12 minutes, then remove the weights and paper and bake for another 10 minutes or until just light brown.
Remove pastry shells from the oven and set aside to cool.

TO MAKE THE ALMOND FILLING
Place the butter and sugar in a bowl and beat until light and creamy.
Beat in the egg and then fold in the almond meal, flour and Bailey’s.
Spread the filling over the pastry making sure you cover the base completely.
Slice the poached pears and arrange them over the almond filling.
Bake the tart for 50 minutes.
(Alternatively you can brush the tarts with the left over syrup and bake them a little longer or until the pears are slightly caramelised.)

Serve at room temperature with a thick dollop of cream.

Rustic Vanilla Pear and Almond Tart

Friday, July 27, 2007

Pooch Pampering

Doggie Biscuits


Now, I have been quite loyal in providing my family and friends, and even you my dear readers with as many toothsome morsels as I can. There’s been a lot of fodder exchanged on this blog and, many a meal has been passed around but somehow I have been forgetting one thing. What about man’s best friend?

Well, it seems that my dog Jack has expressed his discontent at the way that I have catered to everyone else’s taste buds, but never his. Now we do feed him good (dog) food and even try to be creative by adding combinations to his normally boring cans of food. However it’s been far and few between the treats that really matter- the kind that comes from the heart.

So when I stumbled upon this recipe on Chubby Hubby that he made for his puppy’s birthday, I knew it was Jack's sixth sense spurring me to bake these for him. Now I usually make a point to taste everything I make so that I can faithfully recount it for you on the blog. But this time I thought I would leave it up to Jack.

The making of a doggie biscuit, satisfied customer

As I mentioned, the recipe was taken from Chubby's blog, which in turn was adapted from a Three Dog Bakery Cookbook. The original recipe also includes raisins and pecans, although these two ingredients have been known to cause adverse reactions in some canines, so I decided to omit them. Just to err on the side of caution and perhaps avoid a trip to the veterinarian. Jack hates that place.

The biscuits are also perfect for older, or should I say more mature-aged dogs as the biscuits are not extremely crisp. If your dogs like something a little harder to chew on, bake the biscuits for a few extra minutes but don’t over bake them, as the outsides will burn. I also added a ½-cup of wheat germ as this aids in curbing bad breath.

So for today's post it's all about pampering your pooch. Next time, it’s back to satisfying the taste buds of the two-legged kind- Pears and Tarts.


Ginger’s Fourth of July Snaps

adapted from this blog, which got the recipe from the cookbook Three Dog Bakery
makes 25 ten-cm doggie bones

Doggie Biscuits

¼ cup olive oil
½ cup (unsulfured) molasses
2 tablespoons honey
½ cup water
2¾ cups plain flour
½ cup wheat germ
1 tsp baking soda
¼ tsp ground cinnamon
½ tsp ground nutmeg
2 tbsp ground ginger

Preheat oven to 180°C.
Combine the oil, molasses, honey and water in a bowl. (It is advisable to pour the oil first in order to prevent the molasses and honey sticking to the bowl. Do the same with the measuring spoon.) Stir to combine.
In a large bowl, combine the flour, wheat germ, baking soda, cinnamon, nutmeg and ginger.
Whisk to blend evenly before pouring the wet ingredients into the dry mixture. Stir to combine.
On a lightly floured surface, knead the dough. It should come together easily.
Shape it into a ball. Cut a quarter of the dough and keep the rest of it under a damp kitchen towel.
Roll out dough to a ½-cm thickness and then use your cutter to cut out shapes.
The scraps can be gathered into a ball and rolled out again. Repeat with the remaining dough.
Bake for 15-20 minutes or until they are a medium brown colour; don’t let them burn.
Let them cool on a rack and store in an airtight container.

Monday, July 23, 2007

Kinda-a Surprise

Brioche

You know how I have that strained relationship with yeast? Well, I think that relationship might be on the mend. We have never worked well together before but now things are looking up for us and we might actually make a great team. How do I know this? Well, by the way that these brioches have turned out (a big cheesy big cheesy grin erupts on my face).


These are my first ever attempt at brioche. I always thought that they were quite complex to make, but then I thought about it and wondered why I ever hesitated in making them in the first place. Okay, so croissants are complex and puff pastry doesn't even seem to be in my capacity right now, but in comparison brioche is a cinch. And I'm not getting ahead of myself, nor am I overestimating my ability and I am by no means a yeast-baking expert. This post is merely an expression of exclaimed joy and astonishment over how successful this current yeast venture has been. Especially when most times the opposite has been the case.

Proofing

Most of those embarrassing mishaps with yeast were fortunately, undocumented as they were made circa 2005, which means they were pre-blogging days and thank goodness for that. It's just lucky for my ego that my yeast ventures during my blogging days have been somewhat successful and to an extent edible. And I don't know why I keep recalling my past failures when it seems that my baking with yeast has actually been improving at each attempt.

For someone who has been "yeastily challenged" it's a promising thing. Especially when my place of foodie-veneration is the bakery, it was such a shameful thing that I couldn't work with yeast. But now that things are changing and the outcome of this latest gamble has been kind of a surprise and I am actually plucking up the courage to bake more with it.

Brioche Surprise

The chocolate inside is obviously a slight departure from the established norm of how brioches are normally made. Although it was when I was out shopping and I saw those little confectioneries that Ferrero still make that gave rise to the idea of putting the chocolates inside. It was the Kinder Surprise eggs that sparked my thoughts, and thanks to those little sweets, these brioches were made even more tastier. I only put a small 5.5g portion of chocolate in there so as not to overtake the brioche itself, as I still wanted the bread to be the star attraction, although it's nice to bite into a piece of bread and find a little hidden surprise inside.

Just as when you were a kid , you would crack open that egg to find that little toy, and you would with sheer delight and enthusiasm assemble that thing and create something out of a few pieces of moulded plastic. I remember by best creation ever assembled from a Kinder Surprise was a helicopter. It even had actual rotating blades, and as a kid that was rather impressive. I guess now as a adult, finding chocolate in your bread is just as exciting as a helicopter in an egg. I guess, things don't really change when you get older, you're just a bigger kid.

This recipe was an amalgamation of a number of different recipes and methods, so I don't exactly know if this was a fluke or it this adaptation actually does work. If you give it a try, let me know if it is a success for you too. Here is the recipe.


Brioche Surprise
makes 8

Brioche... Surprise Inside Brioche Surprise

1 package active dry yeast (7g)
1/3 cup warm milk
2 tbsp raw sugar
1¾ cups all-purpose flour
80g unsalted butter, softened and cut into small cubes
2 eggs
a pinch salt
8 pieces of dark chocolate about 5-10g each

GLAZE
1 egg for glaze
1 tsp milk

In a small bowl, dissolve yeast and sugar in the warm milk. Allow yeast to activate for a minute or two. When bubbles begin to appear on the surface then it is ready.
Meanwhile, in a bowl of a food processor or mixer (with dough hook attached) combine flour and salt.
With the motor running slowly add the yeast mixture.
Then add the butter one at a time waiting for each piece to be blended into the dough.
Then add the eggs one at a time and mix until the dough starts to come away from the sides of the bowl.
Place the dough into a bowl and cover with plastic wrap or a damp tea towel and set aside in a warm area to prove for 2 hours or until the dough has doubled in size.

When the dough has doubled in size, knead the dough for a few minutes and divide into eight portions.
Take a piece of chocolate and wrap each one in the middle of a portion of dough.
Place the portions into greased tins or paper moulds and cover and allow to prove for another hour.

Preheat oven to 190°C.
Whisk the egg and milk together to make the glaze.
Brush the tops of the brioche with some glaze and then bake for 10-15 minutes or until the tops are browned.
Remove from oven and allow to cool for 10 minutes then unmould.

Saturday, July 21, 2007

Bagel House, Rozelle (or How To Have a Carb Overload)

Bagel House, Rozelle

I have often lauded over my love for carbs on this blog. And on many occasions I would state how great carbs were, in a spirited attempt to curb those who are anti-carb back into the habit. What can I say, I love carbs and would fight for them to the end. But can this carb lover ever get too much carb? Well let me say after a trip to the Bagel House in Rozelle, I can aptly say that I went into a carb overload.


If it weren't for the immense pile of things I needed to do, I think my body would have gone into shut down mode just so my digestive system could process that inundation of simple sugars into my body. It all started when G decided that we needed to go to a tennis supply store in Gladesville as he needed some more things for work (he's a tennis instructor). Well whenever we are in the remote vicinity of Balmain, we always make the excuse to go into Darling St and make a pit stop into some of our favourite food haunts. One is Bertoni Casalinga, home of the Ciambelle alla Nutella, aka the Nutella Donut, and there is of course Victoire where we always find an endless assortment of pastries to sample. So off we go into Victoire, and buy some levains, a couple of croissants and a beautiful apple tart. We give the ciambelles a miss, as we didn't want to go over board. Little did we know what was in store.

Sesame Seed Bagel
Sesame Seed bagel

We were already leaving Balmain, driving along Darling St and heading towards Victoria Rd when we pass a new addition to the street. The former Cheesecake Shop had disappeared and had now been replaced with a place called the Bagel House. Our curiousity had been piqued and we couldn't help but slow down. So we made a hasty turn right, ignoring the pedestrian waiting to cross the road and quickly reversed the car into the first available car spot. Then off we went down the street into the Bagel House. The place is quite small; there's a glass counter that houses all the flavours available on the day, there a espresso machine for the obligatory coffee that accompanies your bagel and there's a shelf in the corner full of bagel chips and shmears (spreads).

We decided that we, in the interest of food blogging should sample a small selection of bagels to introduce ourselves to the Bagel House range. So what did we try? First off we had the plain bagel (pictured above, centre), which I guess is a must since this is the simplest bagel on offer. As a whole these bagels were a lot better than the ones you would normally find at the grocery store. You know the ones; the rock-like discs that are so dense you could probably break into a car just by throwing one into the window. Well these bagels had a rather chewy crust and a soft fluffy interior, a far cry from the bagels I'm used to, which are incredibly difficult to cut in half.

Soft purple interior

The Sesame Bagel and the Poppy Seed bagel were basically variations of the plain bagel, the thing differentiating them was the generous sprinkling of seeds on top. Nonetheless, these were quite satisfying, I would recommend it with some cream cheese or better yet some butter and vegemite (if you are Australian).

Poppy Seed Bagel
Poppy Seed Bagel

As you can see by now we are in the middle of our carb glut, and don't forget we had nibbled on a croissant and an apple tart and a little bit of sourdough levain earlier, this was all before the bagels were sampled. We did wait till we got home to taste test the bagels, but nonetheless those previous carb-loaded products were still sitting in our bellies. But can you ever get too much carbs? Well anyway, our carb odyssey continues!

Sugar Crusted Blueberry Bagel
Sugar Blueberry Bagel

Out of all the bagels we tried, my favourite was the blueberry, probably because it was the sweetest. We couldn't decide between the sugar-crusted and the plain blueberry so we decided to get both. I decided on the plain one, but it was a mistake, not that the plain one was horrible, but it was just that the extra sprinkling of sugar over the top made that little bit of difference. I liked the contrast of textures too with the soft doughy bagel and the sugar crusting on top. But there was definitely a resounding two thumbs up for the blueberry bagels.

Blueberry Bagel (plain)
Plain Blueberry

The most disappointing of the bunch was probably the apple and cinnamon. Out of all the flavours we had, this was the most dry and the most bland, considering we were expecting to be getting flavours bursts of apple and touches of cinnamon, we got neither. There were only slight hints of cinnamon and there was barely any apple in it to constitute it being a flavour.

Apple and Cinnamon Bagel
Apple and Cinnamon

You can see why we went into a carb overload; bagels aren't the lightest bread product around. And even though we shared the lot, it was still a lot of carbs to ingest in one sitting. I wouldn't recommend doing this again. For some reason were weren't in the mood for anything herby or savoury that day. But next time around I am planning on trying their dill bagel, the onion and the sun-dried tomato, although perhaps not all at the same time.

Also if you happen to be in the neighbourhood, do try their bagelwiches- which I am guessing is a bagel sandwich. The breakfast selection sounds particularly appetizing. If you want something as close as you can get to NYC flavour without having to span the Pacific then this bagel house is worth the traverse, it's only in Rozelle.


Storefront, Bagel House, Rozelle

The Bagel House

621 Darling St, Rozelle
Phone: (02) 9810 42905
Open: Weekdays 7am-6pm; Weekends 7am-4pm

Thursday, July 19, 2007

Brownie Love

Fromage Blanc Brownies

I usually hate getting all those batch emails that get forwarded and passed around by most people. You know which ones I’m talking about; it’s not only the spam that bothers me, but it’s the junk mail that gets circulated by all your friends that are supposed to be hard at work in the office. Hey, aren’t you supposed to be working?

Sorry to say, but I’m not really interested in the next thing that I should stop using because it might cause cancer, nor do I want to know that I will have bad luck or never find true love if I don’t pass on this email to ten people in the next five minutes. I think the only exception to this peeve is a forwarded email I received about chocolate and women. I can’t even remember the details of the email, not even vaguely, but I do remember laughing in concurrence about how right the email was about women and their affection for chocolate.

I can’t speak for every woman, but I can speak for the ones I do know and it’s true, we cannot say no to chocolate. And I sincerely believe that there is nothing that chocolate cannot solve. You have a bad day at the office, you have a bad hair day, you snap a heel, you have a fight with your partner, you have a headache, and for all those dilemmas, there’s always chocolate. Am I right, or am I right?

Surprise

I am not sure whether it’s the chemicals in chocolate that tickle the endorphins in our brains that make us love it so much but it is pretty unanimous that the majority of women enjoy chocolate. Well while I was stuck at home, nursing my sore larynx and slowly sinking into a despair that can only be brought about by being given strict orders to be house-bound for 3 days straight, I decided that a batch of brownies would be the only remedy.

Okay so perhaps this method is not scientifically proven, nor do I recommend it when trying to get over an illness but all I can say that it was more to soothe my tired mind of having to stay at home for so long. I had some Fromage Blanc lying around in the fridge that was going to spoil if I didn’t use it, so I decided to exercise my brain by concocting a brownie recipe that included the fromage blanc.

Fromage Blanc is a soft white cheese that is very similar to cream cheese although has the consistency of sour cream. As the fromage blanc is quite dense, and you don’t want to end up eating something that feels like bricks, I decided to make the brownies in the same method as you would a sponge cake. You separate the eggs and beat the whites until you get stiff peaks and then add it to the batter. The end result is a cake that is still quite dense and chocolaty, although it isn’t stiff and stodgy. Just be warned a couple of squares is more than enough to satisfy, so make sure you aren’t too greedy.

Fromage Blanc Brownies

Also don’t be too meticulous in mixing in the fromage blanc, don’t worry if you get some chunks in the batter, you will find that you will get little bursts of white in the brownies in the end that are a nice treat. If you want more brownie action, make sure you wander over to Myriam’s for a round up of this month’s Brownie Babe.

For now here is the recipe.


Chocolate Fromage Blanc Brownies
makes 16 squares

60g unsalted butter, cut into chunks
170g dark chocolate
1½ tsp vanilla extract
1/2 cup sugar
4 eggs, separated
1 cup plain all-purpose flour
½ tsp baking powder
140g fromage blanc

Preheat the oven to 180°C. Prepare a square baking tin with parchment paper.
Melt chocolate and butter in a small bowl set over a saucepan with simmering water. Stir until blended.
Remove from heat and set aside to cool.
Sift flour and baking powder together, set aside.
In a another bowl, whisk egg yolks, vanilla and half of the sugar until pale and thick.
Stir in the melted chocolate and fromage blanc.
In another bowl, whisk egg whites and sugar until soft peaks form.
Fold in flour mixture until just incorporated into the batter.
Pour batter into prepared baking tin and bake for 30-35 minutes.
Let cool in the pan for at least 15 minutes and then lift out from the tin.
Cut brownie into squares.

Sunday, July 15, 2007

Easy As Muffins

Dark Chocolate Orange Muffins

I’m feeling a bit better now; the good news is I’ve now managed a little spring in my step and I no longer feel like that seething cesspool of bacteria like I did a mere week ago. I think my immune system suffered a battering while at the conference last week eating lots of nutritionally deficient foods like hot chips, pizza and meat pies. All great when on the go, but terrible when you are trying to fend off disease.

So in my effort to wage war against those recalcitrant little bugs that have invaded my body and have yet still to pack up and leave completely, I bought a whole bag of Navel Oranges. Not only are they delicious this time of year, when they reach their season but they are also full of virus-fighting vitamin C. I don’t exactly know how adept they are at fighting disease, but it was more to soothe my conscience than anything else. I have little faith in antibiotics and really hate to even more pollute my body with drugs that I am happy to be sick longer and just let my own immune system fight it to the end. I just thought the oranges could provide reinforcements.

Dark Chocolate Orange Muffins

And now that I am feeling a bit better, I still have a surfeit of oranges lying around. What to do with so many oranges? Well I had many plans, many grand intentions- orange curd tart, orange focaccia, orange crème brulee; although my body just didn’t have the gusto to go though with any of them. I just wanted something you can whip up when you aren’t feeling 100%, but still wanted something that looked like I did put some ffort into it. Enter these Dark Chocolate and Orange Muffins.

They say that if something is easy that it’s "easy as pie", but truth be known, I never thought pie making to be that easy, especially in comparison to these muffins. I think the phrase should be amended to say: “Easy as Muffins”. This recipe was adapted from one of Donna Hay’s, the only thing I changed was the amount of sugar and I decided to use yoghurt instead of sour cream. I’ve been cooking from Miss Hay’s magazines a lot lately. If you are wondering why, it’s because my mum came across a whole stack of back issues while scouring for bargains at a garage sale (or for you North Americans- a yard sale). She found about 8 back issues altogether and all for a $1 each!

Dark Chocolate, Muffin Batter, Empty Remekins, Leftovers

Anyway, I always thought that the chocolate-orange combination was best suited for Christmas. I don’t know why but, but I think it’s because we always used to always get those candied chocolate oranges for Christmas every year from neighbours and family friends. They were always the Christmas gift you gave when you didn’t know what else to give, like the generic photo frame for birthdays. We gave them to our teachers and people who did odd jobs for us around the house, just to say a polite and unattached Thank You. So I never saw the beauty of those chocolate orange candies, until now that I am all grown up and we no longer receive or give those presents.

But nonetheless I needed to use some of those oranges before they were only good for a compost heap, and this muffin was the simplest recipe out of the bunch. It was time to revisit the orange and chocolate combination, sans the actual Christmas-time. As providence would have it, there was also a mid-winter Christmas event being held, so it was event more reason to make this recipe.

Inside the muffins

You know exactly when these muffins are done because your kitchen becomes filled with a beautiful orange perfume, as if beckoning you to finally open that oven door. The inclusion of yoghurt in the batter creates a slightly chewy and moist crumb. It’s beautiful, and the superfluity of chocolate chips is almost ridiculously childish, but I wouldn’t have it any other way. For these muffins, don’t hold back on the chocolate chips.

So have these muffins whatever season, Christmas time or not. But I assure you these will make any token Christmas present look even more sincere than you intended. If you happen to have some left over the next day, just pop them into the microwave to zap for a few seconds to nring those chocolate chips back to life. It's great for breakfast the next day, if you are inclined to have muffins so early in the day.

Dark Chocolate Orange Muffins

If you want more ideas on how to spend your mid-Winter Christmas, or if you are in the Northern Hemisphere- a mid-summer Christmas, which I think is how Christmas is meant to be spent, then make your way to Nihowera, where the round up for the Mid-Winter Christmas should be posted shortly.

Merry Mid-Winter Christmas!

Dark Chocolate and Orange Muffins
adapted from Donna Hay Magazine (Issue 8)
serves 8

Dark Chocolate Orange Muffins

1¾ cups plain all-purpose flour
1½ tsp baking powder
¾ cup caster sugar
1 tbsp orange zest
1 cup dark chocolate, roughly chopped
1 cup plain yoghurt (no gelatine)
60g unsalted butter, softened
2 eggs
2 tbsp orange juice

Preheat oven to 180°C.
Cut 8 strips of non stick baking paper into 6.5 x 60cm lengths.*
Grease the paper and roll into cylinders, overlapping a couple of times. The cylinders should fit snugly into 8 x ½ cup capacity ramekins or muffin pans. Place the cylinders in the greased ramekins.
Place the flour, baking powder, sugar, orange zest, and chocolate in a large bowl and mix to combine.
In another smaller bowl, combine the yoghurt, butter, eggs and orange juice until well blended.
Add the wet mixture to the dry mixture and mix until just combined.
Spoon the batter carefully into the prepared ramekins.
Bake for 35-40 minutes or until the tops are golden and cooked when tested with a skewer.
Remove from oven and cool for 5 minutes. They are ready to serve straight away.

*If you don’t want to make your own cases feel free to use conventional muffin cases. In this case you will make 12 muffins instead.

Friday, July 13, 2007

Baba Who?

Wattleseed and Clementine Babas with Vanilla Bean Syrup

We are now smack bang in the middle of winter and I can feel it. As I sit on the couch, in my warmest winter woollies, thick socks, scarf and if I didn’t have to type I would probably have a pair of gloves on too. Sydney homes weren’t really made for frosty conditions; they were built more to withstand those harsh Australian summers most people know about. But it appears that the construction industry seems to forget that we have winters down here too, and it gets pretty darn cold.

You will hear me every winter, every year, complain about the cold, and I realise that what I mean by “cold” is quite feeble compared to what other people go through in say, Canada and Upper Siberia. It’s not even cold enough to garner any snow here, but no matter how you look at it, to me cold is cold. It’s cold when you can feel it in your bones, and feel it in my bones I do.

Wattleseed and Clementine Babas with Vanilla Bean Syrup

So when on the hunt for recipes, all I was looking for was something to warm me up. Now after having a pumpkin stew for dinner, I needed something to finish off on the same note-something hearty without being heavy, and something warm and soothing without being to cloying- perhaps something equivalent to a big warm hug from your grandmother.

I decided that the only thing for dessert were these warm babas that I spotted in a Donna Hay Magazine. The recipe was initially for orange flavoured babas, but I had no oranges at home, only a bag of clementines in the fridge. Clementines are more like mandarins, than oranges, but nonetheless these were a great substitute. I also found some spare wattleseed lying around in the pantry and since I learned that wattleseeds go extremely well with citrus flavours, there was no going back, the babas’ fate was sealed.

Clementines

These babas are somewhat akin to a Baba Au Rhum or a savarin but minus the rum. It might not sound as fun without the rum, but let me assure you, it tasted a treat. Whoever it was that told me that wattleseeds go well with citrus wasn’t wrong. The wattleseeds’ nuttiness was highlighted even more by the clementines sweetness and the vanilla bean speckled syrup adds another dimension of flavour.

Wattleseed and Clementine Babas with Vanilla Bean Syrup

The syrup is what brings these babas to life, without it, I guess they wouldn’t even be babas to begin with. They would simply be lifeless mounds of dough, almost flavourless, but with the drenching in syrup, these little cakes are just the thing to bring a spring in your step on a cold winter’s night.

Wattleseed and Clementine Babas with Vanilla Bean Syrup

Inside the babas, you will find a soft billowing dough that, if you are lucky enough to have them straight from the oven will be steaming wafts of citrus scented perfume.


Warm Wattleseed and Clementine Babas with Vanilla Bean Syrup

from Donna Hay Magazine (issue 8)
Serves 6

Wattleseed and Clementine Babas with Vanilla Bean Syrup

FOR THE BABAS
1 package active dry yeast
1 teaspoon sugar
¼ cup lukewarm milk
1 cup plain all-purpose flour
1 tsp ground wattleseed
2 tbsp clementine zest
1 tbsp sugar, extra
1 egg
90g unsalted butter, softened, diced

FOR THE VANILLA SYRUP
1 cup sugar
¾ cup water
½ cup clementine juice
2 tbsp shredded clementine zest
2 vanilla beans, split and seeds scraped

Place the yeast, sugar and milk in a small bowl. Set aside in a warm place for 5 minutes or until bubbles start to appear on the surface.
Place the flour, wattleseed, clementine zest and extra sugar in the bowl of an electric mixer fitted with a dough hook, or a food processor.
While the motor is running, add the yeast mixture and egg then the butter, a little at a time.
Beat for 4 minutes.
Transfer to a bowl and cover with a clean, damp tea towel.
Set aside in a warm place for 1 hour or until the dough has doubled in size.

Grease 6 x ½ cup capacity ovenproof moulds or ramekins and line with parchment paper.
Punch down the dough then divide into 6 and place in the moulds, smoothing the tops.
Set aside in a warm place for 20 minutes or until the dough almost fills the tins.

Preheat oven to 180°C. Bake for 15 minutes or until golden brown.
Allow the babas to stand in the tins for 5 minutes.

While the babas are baking, make the syrup.
Place the sugar, water, clementine juice, zest and vanilla beans and seeds in a saucepan over medium heat.
Stir until the sugar is dissolved then boil for 5-6 minutes.
Remove the babas from the tins, discard the parchment paper and pour over the syrup.

Monday, July 09, 2007

Outbarking the Dog and Surfing the Net


I've confined myself indoors while recovering from what the doctor has now diagnosed as Laryngitis. So I have been giving Jack my dog a good run for his money as I've been pretty stiff competition in terms of barking it up. He's given up trying to out-bark me, i've won the past few rounds. The cough still persists and I've pretty much lost my voice, so on a social level, there is really no point in me going out or hanging out with anyone.

So as I veg out at home alone, with the dog, lemon and honey tea in hand, the heater on, blankets strewn all over the couch and laptop firmly secured on where else but my lap, I browse the wide world of the web. I'm filling up my del.icio.us album with lots of tags of recipes I want to make and alas here are a few other things i've found that have caught my eye.

Believe it or not, this is a toaster that I found on designboom.com. The toaster is called "Glide" because the toast simply glides through that little opening where the bread is heated by two aluminum hot plates and takes less time than a conventional toaster. It looks very space age and it's definitely innovative, it's probably the most exciting toaster I have ever seen and takes away the banality of waiting for your bread to toast early in the morning.


The photograph at the top of the page also comes from design boom and was one of the designs shortlisted for their ceramics for breakfast category and is, I think, the neatest and prettiest way to squeeze your oranges in the morning. The set includes the teapot, the squeezer and two cups. And if you want to see how this Cuban designer's vision for the citrus teapot came to life then go here.

Simple but ingenious, are these little salt and pepper shaker ghosts. I found them on the same website where I found the Glide toaster and the teapot. They are so adorable I cannot help but love them. A whole family of ghosts ready to dispense salt and pepper, what could be better?

Aside from gawking at cutesy home appliances, i've also been passing the time by wading through the Hubble Telescope website and marvelling at the beautiful photographs of this wondrous universe that we happen to be part of. It's a sobering thought to think Earth is a just a remote speck is this cosmic giant that is the universe, I can't help but feel small.

Several hours have passed and now and I have moved onto the Apple Trailers website. I've seen it being touted all over the place by many other food blogs (so why not this one too) as the next big thing in cinema for all foodies alike. Perhaps daresay the next big thing since Chocolat? The only time a rat will be welcomed into a kitchen, Ratatouille is the new movie from Pixar. Not out in cinemas in Australia until August 30 there is still a while to go before we can see this little gastrnome in action. But already, I can't help but love Remy, just look at him!

Anyway, I think this is it for me and my internet browsing. Signing off until next time which will hopefully be about something I made in the kitchen.

Sunday, July 08, 2007

Under The Weather

Layered Espresso Walnut Loaf

I held up pretty well all week throughout the conference where I was
serving on the televesion crew, but now I'm feeling a whole lot worse. To give you an apt description, my throat feels like razorblades, my nose is blocked, my eyes are bloodshot and all I want to do is sleep. In order not to spread my "cooties" to everyone else, I am opting to strike out of cooking and baking until I get a lot better. But so as not to neglect this poor old blog, here is a recipe from the vault that I haven't posted about.

I made this layer cake about 4 weeks ago and took photos but then completely forgot all about it. I think it may have been overshadowed by other pressing posts- like all those cookies I made during the bad weather week in the series A Cache of Cookies. Not that those cookies tasted so much better, but this cake disappeared with such speed and stealth that I almost forgot that I made it.

Icing Oozes

The original recipe asked for groundnut oil, although as I was making this cake on the fly, I substituted for macadamia oil and the result, I imagine is just as good if it had been groundnut. The use of oil in the batter prioduces an extremely moist springy crumb and adds a depth of flavour that is subtle, yet still palpable. The walnuts also adds to the cakes nuttiness. If you don't like walnuts (like me)
, then you probably won't be too crazy about this cake. What I did to get around this is to just pick out the walnuts and just eat the cake. They are big enough to be able to pick out once baked. But nonetheless everyone else who ate it loved walnuts.

Layered Espresso Walnut Slice and a cup of walnuts

So here is the recipe, I'm sorry I cannot be more descriptive, right now I feel like a festering pool of bacteria. So perhaps when I get better I will be able to bake and post to you something new.

Layered Espresso Walnut Loaf

adapted from this book

Layered Espresso Walnut Loaf

FOR THE CAKE
225g self-raising flour
225g light muscovado sugar
½ tsp fine sea salt
225ml macadamia oil
4 eggs, separated
50ml espresso, cooled
50ml full cream milk
75g nibbed or chopped walnuts

FOR THE FILLING
300ml pure cream (35-45% milk fat)
1 tsp ground espresso
1 tbsp caster sugar

FOR THE ICING
100g icing (confectioner’s) sugar, plus extra for dusting
1 tbsp espresso
a handful of walnut halves, to decorate

MAKING THE CAKE
Preheat oven to 190°C. Grease and line a 22cm loaf tin with parchment paper.
Sift flour, sugar and salt into a large bowl.
Add the oil, egg yolks, espresso and milk and beat until smooth.
In another bowl, whisk the egg whites until stiff. Fold the beaten egg whites into the mixture in two additions.
Stir in the walnuts and pour batter into prepared loaf tin, smoothing the surface using a spatula.
Give the tin several sharp taps on the worktop to allow any bubbles to rise.
Bake for 50-55 minutes or until a skewer inserted into the centre comes out clean.
Leave the cake to cool in the tin for 5 minutes, then run a knife around the edge and turn out onto a wire rack.
Place the right way up and leave to cool completely.

MAKING THE ESPRESSO CREAM
In a large bowl, combine cream, sugar and ground espresso and whip until just stiff.
Slit the cake into three layers, cutting the first just below the top line of the tin to take into account the risen surface.
Spread the espresso cream over the lower two layers and sandwich together.

MAKING THE ICING
Blend the icing sugar and coffee together and drizzle down the centre of the cake, smoothing it towards the sides using a palette knife.
Decorate the top with walnut halves and dust with some icing sugar.
Serve when the icing has set.

Monday, July 02, 2007

Gone Shopping...

Shopping LIst

You might be asking, why the influx of posts in the last few hours? Well the answer is that I won't be posting on the blog for a whole week. And this time, it's not just neglect but I am actually going to be away, so I thought that I would leave you with a few extra things to look at and muse over. I feel like this blog is my kid, so I feel the inclination that I should leave it an appropriate amount of rations while I'm gone. It must be that maternal instinct kicking in.

I will be at a conference for a whole week and thus will be away from my laptop, my kitchen and that seemingly endless supply of sugar and butter. I might be able to sneak a peek or two at the blog, probably only short enough to read your comments and put them up. But during the week i'll try to secure myself a short pocket of time where I can make a quick detour to the supermarket and replenish my dwindling pantry. And soon enough there should be a new array of goodies for you to chew on.

For now, let me take you down memory lane and see what sweet (and some savoury) provisions i have made for
Milk and Cookies so far. Hope you enjoy! And if it's any consolation I will be missing all of you terribly while i'm away.

Best of the Blog

From left to right, top to bottom:
1. Vanilla Cupcakes
2. Pumpkin and Sage Ravioli
3. Chocolate Espresso and Mascarpone Tart
4. Carrot Cake Cookies
5. Asparagus and Parmesan Cigars
6. Chocolate and Clementine Cake
7. Chocolate Delights
8. Marsala Souffle
9. Cinnamon Snails

Coming soon on Milk and Cookies... something with Wattleseed!

Sunday, July 01, 2007

Let Them Eat Ice Cream Cake?

Banana and Date Ice Cream Cake

My first experience with ice cream cake was when I was at a birthday party; I must have been around 5 or 6 years old. And since then I never really gave ice creams cakes anymore thought. To me they are just part of those juvenile whims that you try to shed once you reach a certain age along with say, wetting your bed and running barefoot around the neighbourhood in your PJs. Okay, so it might be a bit of a stretch to mention ice cream cake in the same sentence as wetting your bed, but you get what I mean.

So you might be glad to know that I’m way past those childhood dilemmas but I think that it’s time to resurrect the ice cream cake. I’ve only ever seen the ice cream cake come out for two types of birthday parties- they are usually reserved for children’s birthdays and for those over the age of 60. Is it because we revert back to that child-like state when we get older and thus requires the presence of an ice cream cake? Well, I say enough of having it merely at the polar end of our life. Why not have it in the birthdays in between childhood and, well the other end.

Banana and Date Ice Cream Cake

And since I needed a birthday excuse to make an ice cream cake, it was perfect timing that this weekend is G’s birthday. I won’t tell you how old he is, but let me say, we won’t be putting any candles on the cake. And so, with the making of this cake returned my affections for the long forgotten ice cream cake. I don’t know why I never caught hold of its appeal past childhood; I mean ice cream that you can slice into? It’s novelty at it’s best. And I’m all for that.

The cake is the perfect merging of two extremely enjoyable things- cake and ice cream. What’s even better is that you can be as creative as you can with the flavours, the layering and the ingredients. This particular one is a Banana and Date Ice Cream Cake. The dates are first soaked in Marsala and when you come across them in the cake they become gooey bursts of sweetness. The marsala adds a nice depth to the dates which I really love, but if you are serving this to children then you can certainly leave it out.

melting away

It not only happened that it was G’s birthday weekend, but this month’s Monthly Mingle is all about ice cream. While people in the northern half of the globe are sweating away in their own seasonal sauna, we down here are freezing. Two of our heaters broke so our house has become a refrigerator and I have been baking to compensate for the seemingly lack of heat in our house. Also, it appears that the only functioning heater in the house only heats up to a radius of two feet around and it seems like the dog has already laid claim to that one.

So you can see why I wasn’t really the disposition to make my own ice cream, so I opted to cheat and buy some from the shop. I know what you’re probably thinking, shock, horror, she bought the ice cream? Didn’t the theme require “your best ice cream creation”? Well the ice cream may not be homemade but the cake definitely is. And if it’s any consolation I did make the sponge cake from scratch myself in the hope that the entire cake didn’t seem like one half-assed effort at making ice cream cake. Hopefully this submission still qualifies for this month’s mingle. My laziness aside, this recipe is a winner.

melting...

I remember having dates with vanilla ice cream when I dined at Tetsuya’s last year and that combination was superb, so adding banana into the mix made it triple threat. And the dusting of cocoa powder at end makes every layer of the cake one to remember. No matter what, in each spoonful there are at least two or three different flavours, but the great thing is that it doesn’t attack your palate. The tastes integrate seemingly well together and I guess that is what ice cream flavours do. Just think rum and raisin, choc hazelnut, rocky road, individual ingredients that create a flavour of their very own.

So I hope you give this recipe a try, and make sure you mosey on down to Meeta’s blog to see the final round up of icy treats for July’s Monthly Mingle.

Banana and Date Ice Cream Cake
adapted from the Australian Good Taste Magazine (Oct 2004)
serves 8

Banana and Date Ice Cream Cake Slice

2 large ripe bananas, sliced into discs 1.5 cm thick
vanilla sponge cake (recipe below)
10 fresh dates, pitted and coarsely chopped
2 tbsp Marsala
1 litre vanilla ice cream, softened slightly
3 tbsp cocoa powder

Combine chopped dates and Marsala in a bowl and allow to macerate for 20 minutes, until the dates have soaked up all of the Marsala.
In a large bowl, combine the ice cream and dates and stir.
Spoon a thin layer of ice cream mixture onto the cooled sponge, evening out with the back of a spoon.
Line with the bananas, cut side up until the whole tin is covered.
Spoon the remaining ice cream, mixture over the bananas and smooth the surface.
Tap the tin onto the work bench a couple of times for trapped air bubbles to escape.
Fold over the excess parchment paper on each side to over the ice cream.
Place in the freezer for 8 hours or overnight to firm up.
When firm, peel off the parchment paper and use it to lift the cake out of the tin.
Transfer to a serving platter.
Dust with cocoa powder to cover the top.
Cut into slices and serve.

Vanilla Sponge Cake (Base)
*this batter makes a little bit more than required for the ice cream cake. You can choose to store the left-over batter overnight or alternatively bake the remainder in a smaller mould and make a smaller cake our of that.

Banana and Date Ice Cream Slice

¼ cup plain all-purpose flour, sifted
¼ cup cornflour (cornstarch), sifted
2 large eggs, separated
1 tsp vanilla extract
a pinch of cream of tartar
¼ cup, plus 2 tbsp caster sugar

Preheat oven to 180°C.
Line a 22cm loaf tin with parchment paper and have a 5cm overhang on each side
In a small bowl, sift together the flour and corn flour, set aside.
In a large bowl, beat egg yolks, half of the sugar and vanilla until the mixture becomes thick and pale.
In another bowl, whisk egg whites and cream of tartar together until soft peaks form. Gradually add the remaining sugar and whisk until whites are stiff and glossy.
Using a wide metal spoon, fold the egg white mixture into the egg yolk mixture.
Then, in three additions fold in the flour just until the flour is incorporated into the wet mixture.
Transfer the batter into the prepared tin to just fill 1.5cm of the way up. Smooth the top with a spatula.
Bake for about 20 minutes or until a skewer comes out clean when inserted.
Let stand in the tin until it is time to make ice cream cake.

Vanilla Ice Cream up close