Wednesday, November 29, 2006

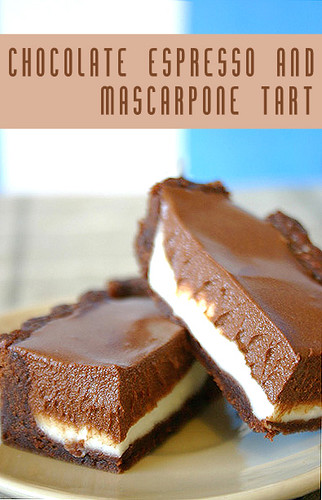
Martha...not what she's cracked up to be (Chocolate Espresso and Mascarpone Tart)

Chocolate Espresso Mascarpone Tarts

If I could have a dessert everyday for the rest of my life, I think it would have to be this tart. Okay, perhaps I cannot promise any sort of long-term commitment to this tart or any dessert for that matter; it’s a fickle world out there for desserts. But for the meantime, this one is my favourite. I found the recipe for this Chocolate Espresso and Mascarpone Tart on Martha’s
website and I would like to claim that the recipe is a winning “Martha” recipe, however this one actually was a complete blunder.

The tart turned out beautifully, as I eventually learned how to read between the lines; the lines of non-existent instructions that would have been advantageous in aiding to complete the task. The recipe, that I obtained from the internet was so flawed and fraught with inconsistencies (a reoccurring theme I find with most of her internet recipes), I can’t say that Martha was much help.

At the risk of sounding like a little miss know-it-all, it was only until I started making my own deductions that the recipe made sense. The ever so perfect and seemingly immaculate Martha, with her pristine kitchen benches and her faultless ironed shirts on this occasion was more of a hindrance than a help. Her ingredients list was missing certain essential items and also included some that are actually not necessary at all. Let’s just say that I had to make an extra trip to the grocery store, midway through the recipe to purchase another tub of mascarpone cheese because “something” went awry with the original tub. I was only following instructions but this relatively simple recipe became a bewildering and time-consuming exercise that if ultimately did not pay off in the end, I would have probably discarded it altogether- recipe, tart and Martha.

Chocolate Espresso Mascarpone Tarts

But it’s safe to say that all is not lost, the recipe’s only redeeming quality was its final result and if you think about it, this is what matters most. After a tub of mascarpone cheese and some eggs going to waste, all I can say is the tart is sensational but don’t even bother with the recipe online. That’ll teach me to read a recipe all the way through before commencing, something I have been known not to do often.

Suffice to say, the tart was a booming triumph, despite the misadventures in the kitchen. I don’t think I would be giving this tart such glowing reviews if the end result even slightly mirrored the disaster that ensued from merely following the recipe.

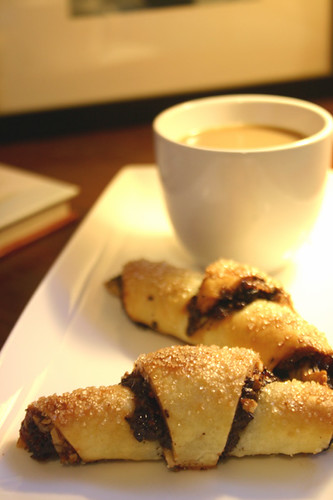
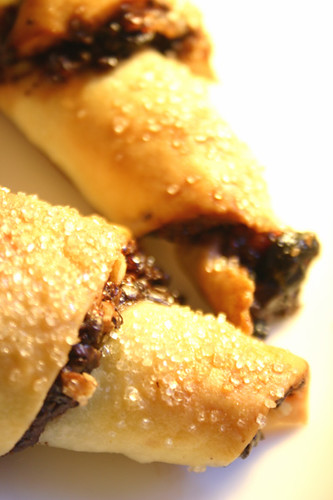
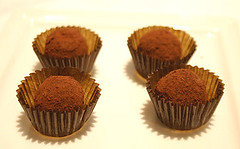
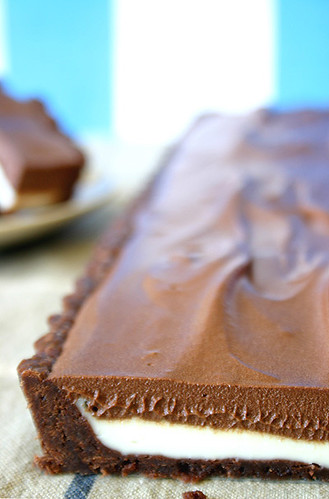
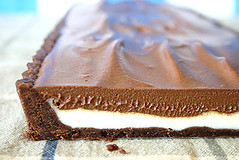
The ganache topping immediately melts in your mouth and the crisp delicate chocolaty crust is absolutely delicious, I could easily eat the crust all by itself. I love the marriage of textures in this tart, and what does it for me is the combination of the crumbly pastry and smooth and creamy mascarpone filling and ganache. Make sure you use the highest quality chocolate as you will definitely taste this in your ganache and only the best will do. On a warm summer’s day, this tart is sure to melt fast, so my only advice is to make sure you eat it faster than the rate that it is melting! Here is the complete recipe.

Chocolate Espresso and Mascarpone Tart
serves 8

Chocolate Espresso Mascarpone Tarts

THE GANACHE
220g bittersweet chocolate (60-70% cacao), roughly chopped
300ml heavy cream (45% milk fat)
2 tbsp ground espresso beans

THE PASTRY CASE
1 cup plain all purpose flour
¾ tsp fine sea salt
1/3 cup unsweetened Dutch-process cocoa powder
110g unsalted butter, softened
¼ cup granulated sugar
1 egg yolk
¾ tsp pure vanilla extract
3 tbsp heavy cream

THE FILLING
350g mascarpone cheese
3 tbsp icing (confectioner’s) sugar
zest of one lemon

MAKING THE GANACHE
Place the chopped chocolate into a medium heatproof bowl, set aside.
In small heavy-based saucepan, bring the cream and espresso to a boil, carefully stirring until the cream has just boiled.
Pour though a fine sieve over the bowl of chocolate and let stand for two minutes.
Using a rubber spatula, gently mix the cream and chocolate continuously until the mixture becomes smooth and silky.
Allow to cool to room temperature, about 1 to 2 hours.

MAKING THE PASTRY CASE
Sift flour, salt and cocoa powder into a medium bowl, set aside.
In a separate bowl, beat the butter and sugar until pale and fluffy.
Add the egg yolk and vanilla and mix until combined.
Gradually sift flour mixture in three additions, alternating with the cream and mixing after every addition. The mixture will be quite sticky.
Gather the dough into a ball and shape into a thick rectangle, wrap in clear plastic and refrigerate for 1 hour (or can be kept overnight).

Roll out dough between two pieces of lightly floured parchment paper to about ½cm thick, enough to cover a tart pan 36x13cm.
Gently lift the dough, with the help of a rolling pin and transfer to the tart pan.
Press the dough into the pan and trim the edges using the rolling pin; use the left over dough to cover any holes or thin surfaces on the pan.
Place in the freezer for 30 minutes to chill.
Preheat oven to 180˚C.
Before baking, prick the base of the pastry shell all over using a fork.
Line with some parchment paper and fill with pastry weights or uncooked rice or beans.
Place in the oven for 18 minutes, then remove pastry weights and replace in the oven for another 2-3 minutes at 220˚C or until the shell has crisped up.
Remove from oven and allow to cool completely before unmolding.

NOTE: The dough can be kept in the freezer, tightly wrapped for up to one week.

MAKING THE FILLING
Place mascarpone cheese and lemon zest in a medium bowl.
Sift over icing sugar, making sure that all clumps are removed.
Mix the sugar and cheese until smooth.

ASSEMBLING THE TART
Whisk ganache on medium speed until soft peaks form. Ensure that the mixture is at room temperature, not warmer or colder, or else your ganache will seize or become grainy.
Using a flexible spatula, smooth mascarpone filling evenly over the bottom of the tart shell.
Then spoon your ganache over the top of the mascarpone, or if you wish, you may pipe the ganache over the filling.
Chill for 30 minutes before serving.

Monday, November 27, 2006

Madeleine Memories

a bite into an orange madeleine

"In an old house in Paris that was covered in vines,
lived twelve little girls in two straight lines
They left the house, at half past nine...
The smallest one Madeline."

If you are familiar with this verse, then you will probably also be familiar with this one:
"We love our bread, we love our butter, but most of all we love each other."
Then if you are not, these lines are from the children’s book and cartoon
Madeline, created by Ludwig Bemelmans. She was the spirited and feisty Parisian schoolgirl that never played by the rules. And although Madeline the girl has nothing to do with these Orange Madeleines, eating them somehow always reminds me of waking up during the school holidays and watching episode upon episode of Madeline. For some people, memories of madeleines may come from Proust’s evocative recollection of his experience with the little tea cakes in his novel, however for me, it is the cartoon.

Green Tea Orange Madeleines

Perhaps not quite as profound as Proust, but my memories of watching Madeline evokes just as fond a memory. Many school holiday mornings were spent propped up on our couch, feet just barely hanging over the edge, singing along to the song “I’m Madeline, I’m Madeline…” So every time I take a bite into a Madeleine, I am taken back to those days.

So here is the recipe for Orange Madeleines I adapted from Shannon Bennett's book My Vue. The recipe called for lemon zest and juice, although all I had in my fruit bowl were some oranges, so that is where the adaptation takes place. Other than that, the recipe is fairly true to Bennett's recipe.

Orange Madeleines
(adapted from
this book)
makes 30 small teacakes, 18 large

232_3230

100g cultured butter
125g caster sugar
3 eggs
1 cup plain all-purpose flour
1 teaspoon baking powder
Zest and juice of a half an orange
1 vanilla bean split lengthwise, seeds scraped
pinch of salt

Preheat the oven to 180°C. Brush Madeleine moulds with butter and lightly dust with flour.
Cream the butter and sugar in a mixing bowl until pale.
Add the eggs and beat until combined. If mixture curdles, don’t worry.
Sift in flour and baking powder and mix until the flour is incorporated.
Mix in the orange zest and juice, vanilla seeds and salt.
Place a teaspoonful of mixture in each mould for small cakes, and a tablespoon for large.
Place in the oven and bake for 5-6 minutes (for small) and 10-12 (for large).
Remove from moulds by carefully tapping the underside.
Cool to room temperature on a wire rack and serve immediately, with tea or coffee.

Orange Madeleines

Thursday, November 23, 2006

Dinner For Friends

Food Bloggers Menu

Now that I’m back, there were some long-overdue things that needed my attention. One being my laundry, it has piled up ye high (hand gestures to the height of her hip) and I am gradually running out of clean clothing. This probably wouldn’t be such a problem if I were male, but seeing as that I am not, my laundry desperately needs doing. Boring household chores aside another thing that I needed to tick off my to-do list is this shamefully tardy meme that I was tagged with by not one, but three other bloggers almost a month ago.

Jeff, Ellie and Brilynn all tagged me for the Food Blogger’s Dinner Menu and after several weeks of no response, here I finally bring to you my menu. You probably thought I had brushed it off and forgotten all about it, however with last month being Good Food Month and having the most hectic work schedule, I just couldn’t give it the earnest attention that it deserved. Appalling really, but that's my excuse and I am sticking to it.

The menu is nothing spectacular, but it is something I would gladly serve my nearest and dearest, to wrap them in the comfort and goodness of a home-cooked meal. I love Moroccan cuisine and North African flavours, and whenever I get the opportunity to share in my fondness for such fare it is always met with giddy anticipation, mostly on my part.

Carrot and Chermoula Fritters with Garlic Mayonaise

So to start off our feast is a small serving of Carrot, Chermoula and Ricotta Fritters with garlic aioli. Chermoula, is a North African spice mix most commonly used in Moroccan, Tunisian and Algerian cuisine. Spicy and earthy its main components are cumin, paprika and coriander, it adds a spicy dimension to these typically sweet and mild fritters.

Carrot, Chermoula and Ricotta Fritters

Carrot and Chermoula Fritters with Garlic Mayonaise

1 cup self-raising flour
1 tsp chermoula spice mix
*
sea salt and cracked pepper
2 eggs
20g unsalted butter, melted
1/3 cup milk
½ cup fresh ricotta cheese

1 tbsp chopped coriander
1 medium carrot, sliced into thin strips
vegetable oil for shallow frying
baby spinach leaves, washed and drained
Garlic Aioli

Place flour, chermoula, salt and pepper, eggs, butter and milk in a large bowl and whisk to combine.
Fold in ricotta, coriander and carrot strips.
Place a tablespoon of oil in a small frying pan and heat over medium heat.
Add two tablespoons worth of the batter to the pan and spread into a small, neat circle.
Cook for 2-3 minutes each side or until the fritters are golden brown and bubbles have appeared in the surface.
Set aside and cook the remaining batter.
Serve with some baby spinach and a dollop of garlic aioli.

Lamb Tagine

To make sure your bellies are filled to the brim, next up is a Lamb Tagine with couscous. I love tagines, if there ever were to be a meal I am forced to live with for the rest of my life, then it would have to be the tagine. The myriad of flavours, from spicy to sweet, to herby and tangy all encapsulated in the one mouthful is pure ecstasy. I also love how the process of stewing in the tagine renders the meat meltingly tender. It's hard to go wrong with a tagine, it's a crowd pleaser if there ever was one.

Moroccan Lamb Tagine

Lamb Tagine

½ tsp cayenne pepper
2 tsp ground black pepper
1½ tsp paprika
1½ tbsp ground ginger
1 tbsp turmeric
1 tsp ground cinnamon
2 cinnamon sticks
1kg shoulder of lamb, trimmed and cut into 5cm cubes
1 large onion, diced
4 tbsp olive oil
3 cloves of garlic, crushed
2 x 400g tinned chopped tomatoes
120g dried apricots, chopped in half
60g dates, chopped in half
60g currants
90g flaked almonds
1 tsp saffron stamens, soaked in 1 tablespoon cold water
500ml lamb stock
1 tbsp honey
2 tbsp coriander, chopped
2 tbsp flat leaf parsley, chopped

Place cayenne pepper, black pepper, paprika, ginger, turmeric and cinnamon into a small bowl and mix to combine.
Place the lamb in a large bowl and sprinkle over half of the spice mix. Toss the pieces of lamb together to ensure that all pieces are coated with the spice mix.
Cover bowl with plastic wrap and leave refrigerate for 2-3 hours, or overnight.

Preheat oven to 150˚C.
Heat 2 tbsp olive oil in a large oven proof casserole dish and add the onions and remaining spice mix.
Cook over medium heat until the onions are soft and translucent.
Add the crushed garlic and continue to cook for 2 minutes.
In a separate frying pan, heat the remaining oil and brown the cubes of lambs on all sides, ensuring not to cook the meat completely.
Add the seared meat to the casserole dish.
When all the meat has been seared, de-glaze the frying pan with some of the stock and add these juices to the stock.
Then add the chopped tomatoes, apricots, dates, currants, almonds, saffron and remaining lamb stock to the casserole dish.
Bring to the boil, cover and place in the oven and cook for 1-2 hours or until the meat is tender. Check the meat halfway through.
When cooked, sprinkle over fresh herbs and serve with couscous.

Fig Pudding with Caramel Sauce

Lastly, who could forget dessert, it's the last stop on any menu and rightly so. If this meal were to be your last at least you die having had your dessert. It completes any meal and really a meal without dessert is an incomplete one. I am one of those people that plan their whole dining experience around dessert and always have room in their belly for something sweet. It's as if I have an entire other stomach just for it, some may call it a defect, but I call it a blessing.

And in case you were wondering, yes, I knew I was making these Warm Fig and Caramel Puddings even before I knew what the entree was. This cake is quite dense, although the texture is delicately soft. In every mouthful you will hear the crunchy resonance of fig seeds still intact after baking. Served with some vanilla ice cream and a drizzling, or a drenching of caramel sauce, which ever you prefer, this dessert is heaven in a cup.

Warm Fig and Caramel Pudding

250g dried figs
375ml water
¾ tsp baking soda
100g unsalted butter, softened
130g brown sugar
130g caster sugar
3 eggs
270g self-raising flour

Caramel Sauce
100g caster sugar
30ml water
150ml cream
1 tbsp Cointreau

Preheat oven to 180˚C. Prepare a baking tin with parchment paper.
Place figs, water and baking soda in a saucepan and bring to the boil, then simmer uncovered for 20 minutes.
Cool to room temperature then blend until smooth.
In another bowl, beat butter and sugars together until light and fluffy.
Add the eggs, one at a time, beating well after each addition.
Fir in fig mixture and sift in flour. Combine until the flour is just incorporated.
Pour into baking tin and bake uncovered for 1 hour.
Stand cake for 5 minutes.
Tip out cake onto a wire rack and cool further.

FOR THE CARAMEL SAUCE
Place sugar and water in a saucepan over medium heat and stir until sugar has dissolved.
Bring to the boil then simmer for 5 minutes or until the sugar changes colour.
Remove from heat and stir in cream and Cointreau.

TO SERVE
Serve pudding with vanilla ice cream and top with caramel sauce.

So I hope you enjoyed this virtual feast, and come over anytime soon!!

Wednesday, November 22, 2006

I'm Baaaack....

at Bronte Beach
at Bronte Beach

Ahhhhh...

That's the sigh of a relaxed, rested and rejuvenated Jen.

After seven days of night shifts, two of which were 12-hours straight, a wedding one weekend and the U2 concert the next; I needed a week off to just do nothing. And that's just what I did. Although I was "away", I didn't go anywhere, or do anything, which was exactly the whole point of this exercise.

It was nice to just wake up and take it easy. I got re-acquainted with my couch and remote control and indulged myself in the sick voyeuristic pleasures of daytime television. It’s a necessary evil of which I am content to succumb to. But not only did I drown myself in daytime TV, but I did also go out and enjoy myself in this beautiful city of Sydney; I may be partial to her as she is my home city, but there really is no place like home.

Harbour Bridge from Blues Point
the Sydney Harbour Bridge by night, from McMahons Point

Wednesday, November 15, 2006

While I'm Away...

Maple Tuile with Vanilla Ice Cream

I'm away from the blogosphere right now, but don't fret, I'll be back very soon. While you wait, here's a photo of some meltingly good, vanilla ice cream and maple tuile that I enjoyed earlier.

Friday, November 10, 2006

Snap To It

Brandy Snaps

Here’s something from the vault.

Baked about two weeks ago, I discovered what cruel fate awaited my fingers after baking these Brandy Snaps. A favourite as a child, mum would always buy us Brandy Snaps from
The Cookie Man after school. Once in the seclusion of the backseat of the car, I would open the tightly sealed foil bag and proceed to munch through a whole packet while on the traverse home. It sounds somewhat dubious and I wouldn’t go as far as to include it in a bio, but perhaps this is where my fondness for cookies began, in the backseat of the car?

Back then I never gave a second thought as to how these beautifully brittle cookies were made and it is probably an advantageous thing not to embark in baking these cookies at all. That is, unless you are prepared to suffer the consequences. So if you wish to shape them into cigars, just know that you have been warned as burnt fingers are your portion when baking Brandy Snaps.

Brandy Snaps

The store-bought snaps were left flat and now I know why. Cigar shaped snaps are finicky, painful and time consuming, although, they are not impossible. Finicky, because you need a certain amount of nimbleness in rolling the cookies swiftly before they turn hard. Painful, because in order to roll them you will need to do so while they are still piping hot, your fingers may need a cold bath afterwards. And time consuming because you can only bake two or three at a time. Like making fortune cookies, brandy snaps are somewhat akin to kitchen callisthenics as you’re constantly pacing back and forth from the oven to the bench, moving as deftly as you can. So forget about putting your feet up while baking; this is no one hour cheesecake.

That said, once the baking and the rolling has been endured, these cookies is pure pleasure. Whether or not it is the reminiscence for long-gone school days that helped me persevere through burnt fingers and all, I can safely say it is worth the trouble and sincerely retract my statement about not making these cookies at all.

Brandy snaps are sweet, very sweet, and very hard. S
o don’t be surprised if you need some cavities filled or some teeth replacing after eating them. And trust me, you won't be stopping at just the one, so chipping teeth is a prospect you might want to preapre for. I also decided to use maple syrup as opposed to golden syrup which is typical of the recipe. To be honest I don’t really like golden syrup as much as other sweeteners like honey and maple syrup. But if you happen to like it then by all means substitute the maple for some golden syrup. The results should be very similar.

Maple Brandy Snaps
(makes lots of snaps)

Brandy Snaps

50g unsalted butter, cubed
¼ cup raw caster sugar
½ cup maple syrup
½ cup plain all-purpose flour
2 tbsp brandy (optional)
¼ tsp ground ginger

Preheat oven to 180˚C. Prepare two non-stick baking sheets, or alternatively use silicone sheets.
Place butter, sugar and maple syrup into a medium saucepan and dissolve over medium heat.
Add brandy, if you are using it.
Sift in flour and ground ginger and stir. Cook for a further 2 minutes.
Drop half a tablespoon worth of batter onto the baking sheet and spread into a thin circle.
Only bake two or three cookies at a time and make sure you spread them out at least 10cm apart as they will spread significantly.
Bake cookies for about 6-8 minutes or until they have turned a golden brown colour.

TO SHAPE THE COOKIES
Allow cookies to rest no more than 30 seconds after removing them from the oven, as these cookies harden in a split second.
Using a wide metal spatula lift the cookie from the baking sheet and quickly transfer to a flat surface.
Take the edge of the cookie and proceed to roll into a cigar shape.
Place on a wire rack to cook.
If the snaps harden before you get a chance to roll them, just pop them back into the oven for a minute and begin to re-roll.

NOTES: The Brandy Snaps can be stored in an airtight container for up to a week.

Thursday, November 09, 2006

Part II: Spotlight On- World Peace Coookies

World Peace Cookies

Feuding families beware, warring countries take note; if a cookie were to ever initiate world peace it would have to be these. The name was coined by Dorie’s neighbour who thought that a daily dose of these cookies would be enough to instigate world peace. These are high aspirations for a mere cookie but if they really had it in them, perhaps we should start sending boxes of these overseas instead of our troops?

Just imagine, in place of battalions of armoury and tanks we send over boxes of these delicious chocolate cookies. I think they would go down really well. Really, who can resist the power of the cookie? I know I can’t. Especially one that was originated by the man dubbed the “Picasso of Pastries”, the master himself, Pierre Hermé. Dorie learned how to make these cookies while working with Mr. Hermé and in the spirit of sharing in all good things here I present to you World Peace Cookies!

World Peace Cookies

The cookies are fabulously moist, sinfully moreish and terribly addictive. After making one batch you realise that you will need to employ a method of creating these on some form of production line. Be it a cookie-making robot or a posse of hard-working elves that never sleep, something certainly needs to be done; as after one taste, your appetite for these cookies will be unrelenting. Days after baking them, I am still yearning for more.

This is the kind of cookie you eat with your gut, not with your head. It’s not only the cookie’s moist chocolate flavour, or its loose melt-in-your-mouth crumb, but the cookie’s charm comes mostly from the bursts of saltiness you get in every bite. The addition of fleur de sel (or fine sea salt) is the cookie’s secret power. Chocolate and salt are probably one of the oddest and unlikely couplings in the epicurean arena, however they work quite well. It's like Tim Burton and Helena Bonham-Carter’s oddball union, it looks weird, it sounds weird but strangely enough it works.

Their capacity for causing a sensation is undoubted, as for their peace-inducing faculties, this I am yet to vouch for; although, I don’t think it would hurt to find out. Come to think, more research is probably required and I guess I will just have to keep eating them until I come across a sound conclusion. Trust me, I am more than happy to sacrifice myself in the interests of world harmony.
World Peace Cookies
(makes about 36 cookies)
from this book featured on Spotlight On

World Peace Cookies

1¼ cups all-purpose flour
1/3 cup unsweetened cocoa powder
½ tsp baking soda
155g unsalted butter, at room temperature
2/3 cup (packed) light brown sugar
¼ cup sugar
½ tsp fleur de sel or ¼ tsp fine sea salt
1 tsp pure vanilla extract
140g bittersweet chocolate, chopped into chips, or a generous ¾ cup mini chocolate chips

Sift the flour, cocoa and baking powder together.
Beat the butter until soft and creamy.
Add both sugars, the salt and vanilla extract and beat for 2 minutes more.
Pour in the dry ingredients and mix just until the flour disappears into the dough- for the best texture, work the dough as little as possible once the flour is added, and don’t be concerned if the dough looks a little crumbly.
Toss in the chocolate pieces and mix only to incorporate.
Turn the dough out onto t a work surface, gather it together and divide it in half.
Working with one half at a time, shape the dough into logs that are 4cm in diameter.
Wrap the logs in plastic wrap and refrigerate them for at least 3 hours. (The dough can be refrigerated for up to 3 days or frozen for up to 2 months. If you’ve frozen the dough, you needn’t defrost it before making- bake for 1 minute longer.)
Preheat oven to 160˚C.
Line two baking sheets with parchment paper or silicone mats.
Using a sharp knife, slice the logs into rounds that are 1 cm thick. (The rounds are likely to crack as you’re cutting them- don’t be concerned, just squeeze the bits back onto each cookie.)
Arrange the rounds on the baking sheets, leaving about 3cm between them.
Bake the cookies on sheet at a time for 12 minutes- they won’t look done, nor will they be firm, but that’s just the way they should be.
Transfer the baking sheet to a cooling rack and the cookies rest until they are only just warm, at which point you can serve them or let them reach room temperature.

STORING: Packed airtight, the cookies will keep at room temperature for up to 3 days; they can be frozen for up to 2 months.
THE VERDICT

Dorrie Greenspan's new book

THINGS I LIKED:
+ Dorie’s intimate writing style- it’s far from aloof or snobbish and she appeals to the baker in everyone. She has a flair for winning even the most reluctant baker.
+ Most recipes are prefaced by an anecdote or at least Dorie’s notes on how they taste and look. It makes for an insightful and informative read.
+ The recipes are great. Not only are they delicious and actually inspire you to bake but her instructions are detailed and thorough. There won’t be any blank stares and vague expressons as her instructions are meticulous and although her recipes are quite verbose, she leaves no stone unturned.
+ She includes a section called “Indispensables” that contains a heap of base recipes- a must in any dessert cookbook, as sweets are quite open to personal adaptation.
+ Every recipe has instructions for storage and some recipes also include variations.
+ Dorie includes a comprehensive glossary in the back that explains most of the terminology, techniques and the ingredients contained in the recipes.
THINGS I DIDN'T LIKE (there aren't that many):
+ No metric conversions! Most countries use the metric system so I cannot understand why most cookbooks from the US do not bother including them. I know that this can get quite tedious, and writing a cookbook is hard work enough, although if the baker at home is expected to make the conversions, I think the writer should take this into account.
+ This brings me to my next point, if you do not include metric conversions in your recipes, then at least have a conversions table somewhere in the book. I hate maths as it is, and it would be nice to include a table of conversions for those who are mathematically challenged.

Wednesday, November 08, 2006

Part I: Spotlight On

I am not usually too wary when people offer me things for free. Often times, I accept without giving it a second thought. The words “free” or “sale” usually get my attention without too much coercion. However, I have to admit I was little cautious when Sara made me the offer to participate in a cookbook spotlight, where I would receive a copy of a new cookbook and then were to blog about it. Did they want something in return? Was there more to it than just a mere exercise in blogging? What if I don’t like the book?

I wasn’t sure at first, but my qualms were quickly allayed when I read that I would be receiving a copy of Dorie Greenspan’s new book,
Baking: From My Home to Yours. I had been coveting this book for sometime and knew that it would not be available here for some time if at all. In fact Sara’s email just came in time as I was just about to buy myself a copy of the book on Amazon; fortunately I decided to read my emails before purchasing the book!

The book is quite thick; it landed with a thud on my doorstep and woke my dog Jack up from his daily afternoon nap. It’s a big solid piece of culinary literature, and would take up a sizeable amount of the meagre shelf space I already have. So for now it sits with a stack of other cookbooks on the floor that I have yet to find a home for. Despite it occupying a rather lowly piece of real estate in my room, the book has been read, pored over and admired many times since its arrival. The book is one that you can sit with on a lazy afternoon and lose yourself in. And at times it seems as if Dorie is right there reading it to you, the book is personal and reads more like a diary than a cookbook.

I love Dorie’s intimate writing style. Most of her recipes are accompanied by insightful anecdotes or a short history as to how they came about. There’s one thing to make a chocolate Armagnac cake but it’s another to make the chocolate and Armagnac cake that got her fired. There is a certain level of familiarity that she assumes with her readers that is sometimes absent in other cookbooks.

Rugelach
Being the cookie fiend that I am, I decided to make two cookie recipes. The great thing about these two recipes in particular is that both can be done whether you are pressed for time or on the contrary, if you are looking at exhausting time by means of baking. Both recipes are divided into two parts so if your time is limited you can either carry out the two parts separately, or spend a good few hours completing one.
Dorie’s Rugelach recipe comes from her mother-in-law; passed down and adapted through several generations, this recipe has bit on ancestry to it. The dough can be made in advance and then rolled and baked later. Being somewhat time-poor this week, I made the dough one night then baked the cookies the next day.

Rugelach

These cookies remind me Christmas, perhaps it’s the chocolate and fruit filling and the fresh burst of spicy sweetness that is somewhat reminiscent of fruit cake, a yuletide staple when I was younger. And come to think, these cookies would probably make for great presents over Christmas. But whatever season, I will certainly be making these cookies, as that the extra rolling out and filling of the dough is worth the result in the end. The cream cheese pastry is wonderfully flaky and biting into one results in an eruption of flavours in your mouth that cannot be accurately described but can only be understood through experince. Here is the recipe:
Rugelach
(makes 32 cookies)

Rugelach

FOR THE DOUGH
110g cold cream cheese, cut into 4 pieces
110g cold unsalted butter, cut into 4 pieces
1 cup all-purpose flour
¼ tsp salt

FOR THE FILLING
2/3 cup raspberry jam, apricot jam or marmalade
2 tbsp sugar
½ tsp ground cinnamon
¼ cup chopped nuts (pecans, walnuts or almonds)
¼ cup plump, moist dried currants
110g bittersweet chocolate, finely chopped, or 2/3 cup mini chocolate chips

FOR THE GLAZE
1 egg
1 tsp cold water
2 tbsp sugar, preferably decorating (coarse) sugar

TO MAKE THE DOUGH
Let the cream cheese and butter rest on the counter for 10 minutes- you want them to be slightly softened but still cool.
Put the flour and salt into a food processor, scatter over the chunks of cream cheese and butter and pulse the machine 6 to 10 times. Then process, scraping down the sides of the bowl often, just until the dough forms large curds- don’t work so long that it forms a ball on the blade.
Turn the dough out, gather it into a ball and divide it in half.
Shape each half into a disc, wrap the disc in plastic wrap and refrigerate for at least 2 hours, or up to 1 day. (Wrapped airtight, the dough can be frozen for up to 2 months.)

TO MAKE THE FILLING
Heat the jam in a saucepan over low heat, or do this in a microwave, until ti liquefies.
Mix the sugar and cinnamon together.
Line two baking sheets with parchment or silicone mats.

TO SHAPE THE COOKIES
On a lightly floured surface, roll the dough into a 30cm circle.
Spoon a thin gloss of jam over the dough, and sprinkle over half of the cinnamon sugar.
Scatter over half of the nuts, half of the currants and half of the chopped chocolate.
Cover the filling with a piece of wax paper and gently press the filling into the dough.
Using a pizza wheel or sharp knife, cut the dough into 16 wedges. (The easiest way to do this is to cut the dough into quarters, then to cut each quarter into 4 triangles.)
Starting at the base of each triangle, roll the dough up so that each cookie becomes a little crescent.
Arrange the roll-ups on one baking sheet, making sure the points are tucked under the cookies.
Refrigerate the cookies for at least 30 minutes before baking.
Repeat with second packet of dough, and refrigerate the cookies for 30 minutes. (The cookies can be covered and refrigerated overnight or frozen for up to 2 months; don’t defrost before baking, just add a couple of minutes to the baking time.)

To GLAZE
Stir the egg and water together, and brush a bit of the glaze over each rugelach.
Sprinkle the cookies with sugar.

Preheat oven to 180˚C.
Bake the cookies for 20 to 25 minutes, rotating the sheets from top to bottom and front to back at the midway point, until they are puffed and golden.
Transfer the cookies to racks to cool to just warm or room temperature.

Rugelach

STORING: The cookies can be kept covered at room temperature for up to 3 days or wrapped airtight and frozen for up to 2 months.

Tuesday, November 07, 2006

Beyond That Gate

Green Tea

We had probably driven past that inconspicuous metal gate a thousand times. Back and forth, in perpetual ignorance of what exactly lied beyond that gate. Then, I became a “foodie” and those gates somehow began to mean something else. It was as if the moment I began to love food a homing beacon was turned on; and one day while naively driving down Kent St, I saw the indistinct sign and exclaimed to G, “That’s Tetsuya’s!” And from that moment on, I began to dream of what gastronomic pleasures lied beyond those hallowed gates.

The dreaming continued for some time, then not too long ago, when G and I were planning what we were going to do to celebrate 4 years together, he proceeded to utter five most magical words, “I’m taking you to Tetsuya’s”. A rush of blood to the head and a brief rendition of the victory dance ensued and I’m sure if there were a couch nearby I would have jumped up and down on it, fists punching the air and all.

So began four weeks of counting down to the day of our degustation lunch and it seemed that those days could not have passed by more slowly. Oh how waiting can feel so long. We had tried to book dinner, but seeing as that it was only four weeks prior to the date we wanted to go, and dinner usually needs to be booked at least three to four months ahead we could only secure a table for lunch. Not that lunch would be any less magnificent. At this stage there was no going back, I was determined and if that meant sneaking in my own table and chairs, so let it be.

Like one of our waiters who graciously took our photos in the Japanese garden said, "It's not everyday you come to Tetsuya's". So I’ll try my best to recount what we actually ate, but at that time my head was clouded with the giddy delirium of a lovesick school girl. I was just ecstatic to be actually there and that was probably enough for me. However for the noble purposes of food blogging I did whip my camera out at every course to faithfully document our meal. And surprisingly many other people were doing the same and I did get one business man and his wife requesting me to email them our photos. It was a nice piece of flattery that soothed every shred of embarrassment I felt in taking photos at such a fine establishment. It's not everyday you go to Tetsuya's so why not have a photographic account of your experience.

* * * * *

And so it began, the day I was finally going to find out what lied beyond the gate. I imagined that some sort of alarm bell or siren must sound the second that automatic metal gate opens because valets, hosts, greeters, an entire entourage somehow materialises in the previously unmanned entrance as if they knew we were coming. This is what I call service and I thought to myself, “That was quick!” It was a great start to our lunch and not a morsel of food had been served yet.

Black Tuffle Salsa Butter

Just minutes after being seated you are presented with a choice between freshly baked white bread or sourdough rolls and is accompanied by a small supply of black truffle salsa butter! The only way to eat the bread is to smear the butter on thick like there’s no tomorrow. As you can see we savagely mauled this little pot just minutes after receiving our bread.

Lost Valley Sauvignon Blanc 2005, Victoria

Then came the wine list, it was a thick black book that almost rivalled the size of War and Peace. Okay, perhaps I exaggerate although it did take G a good fifteen minutes to pore over the list and eventually settle on a bottle. He opted for a 2005 bottle of Lost Valley Sauvignon Blanc ($55), which was a little dry for my tastes but was beautifully earthy and aromatic.

Cold Corn Soup with Basil Ice Cream

The degustation started of with a cold corn soup with basil ice cream which I have to say was a great start. It was a beautiful mingling of flavours; the sweet corn soup and the crisp sharpness of the basil ice cream. It was certainly an imaginative introduction to the menu.

Pacific Oysters with rice vinegar and ginger

Next in line was an optional course of Pacific oysters with rice vinegar and ginger. We shared one serving seeing that I do eat oysters, but don’t exactly love them. It’s an acquired taste that I never really acquired even after numerous attempts to do so. These oysters were fresh, I would not have been surprised it the kitchen staff had fished them out of the restaurant pond themselves as they were so plump and succulent, and I had almost acquired the taste for them. But I do emphasise, almost.

Tartare of Tuna on Sushi Rice with Avocado

Then we were treated with what I would say was one of my favourite courses, a tartare of tuna on sushi rice with avocado. The tuna was gorgeous, it melted in your mouth and the avocado cream was just the right amount of spiciness. The servers always explain what is on your plate and he suggested we eat this by mixing a little bit of everything in one spoonful. Too bad, the servings are quite small, I could have eaten about three of these!

Tuna Marinated in Soy & Mirin, Soft Smoked Ocean Trout with Asparagus, Marinated NZ Scampi with Chicken Parfait and Walnut

You might need your magnifying glass to see the Tuna Marinated in Soy & Mirin, Soft Smoked Ocean Trout with Asparagus and Marinated NZ Scampi with Chicken Parfait and Walnut. Again, the servings are quite small, and I do realise it is a degustation but it really wouldn't hurt to have just a fraction more on your plate. Small as it may have been in size, the flvours were huge enough. My favourite of the three would probably be the tuna as I love mirin although all three were so fresh and felt so luscious on your tongue.

Confit of Petuna Tasmanian Ocean Trout with Konbu, Daikon & Fennel

This really doesn’t need an introduction, but it was presented to us as Tetsuya’s signature dish, his confit of Petuna Tasmanian Ocean Trout with konbu, daikon and fennel served with seasonal green salad. We were guessing that the trout is slow-cooked as that it tasted quite raw and we really couldn’t be bothered asking our server the finer points of the dish as we were too busy eating it. The small crumbs of konbu that crusted the top of the trout are quite salty and I thought that the fish would taste like a glass of sea water, but in one mouthful is an absolute burst of flavours; salty, sweet and a touch of bitterness all in one. On the outside I was cool calm and collected, nodding in quiet recognition of it goodness, however inside I was doing my little victory dance.

Ravioli of Lobster & Crab with Shellfish Essence

The next two dishes were great but in my opinion were not "out-of-the-ballpark" amazing. But I must give some credit to these two brave dishes; it’s not easy following the signature dish. Here you see a ravioli of lobster and crab with shellfish essence. Beneath, the ravioli sits on what appears to be a sort of terrine. I think this is what killed it for me; I just didn’t like the terrine. The shellfish essence was beautiful though, and I was scooping up every spoonful on my plate until it was clean.

Duck with fennel

I think the only reason I was disappointed about this braised duck with fennel (I couldn’t even remember exactly what it was called) was that I was expecting the de-boned spatchcock. The duck was flawlessy tender and juicy, and the sauce was beautifully sweet, although my pining for the spatchcock clouded my judgement and I probably wrongfully overlooked it in my disappointment.

Veal with wasabi butter and wilted spinach

This next dish normally would have been the Wagyu beef, but was replaced with a tender veal with wasabi butter and spinach. I was so excited at the sound of wasabi butter that I hastily hacked into my plate before taking a photograph. Luckily G reminded me, and I tried to salvage the already ravaged plate and attempted to make it look like how it was before. This was a real treat, the wasabi butter was exquisite and as one who loves her butter this dish made me forget about the Wagyu. Wagyu-shmagyu.

Beetroot and Blood Orange Sorbet, Strawberry Shortcake
from the side

Beetroot and Blood Orange Sorbet, Strawberry Shortcake
from above

A palate-cleanser and a magnificent introduction to dessert was this vibrant beetroot and blood orange sorbet accompanied by Tetsuya’s rendition of the strawberry shortcake. The sorbet was refreshing and the beetroot’s sweetness was a perfect marriage to the blood orange’s tartness. I am still dreaming of this sorbet and am thinking of replicating it one day.

The strawberry shortcake was the sweetness that I was waiting for. It was not cloyingly sweet, but just enough to satiate my sweet tooth. What it looked like was a sweet yellow pulp at the base, some strawberry pieces in the middle and a thick layer of strawberry coulis topped with the cutest, perfectly plopped dollop of thick cream. It was hard not to end up scraping down the sides, as that the serving comes in such a tiny shot glass.

Vanilla Bean Ice cream with Coffee, White Beans and Dates
up close...

Vanilla Bean Ice cream with Coffee, White Beans and Dates

Almost to the end of the meal, next up is the vanilla bean ice cream with coffee syrup, dates and beans served in stylish martini glass. At first I was a little apprehensive about the beans with the ice cream. I really dislike all those Asian desserts that involve beans and thought this one would be the same. However I was proved wrong, the beans, which were apparently Great Northern Beans went surprisingly well the vanilla bean ice cream. Although I still could have done without them. The dates and the coffee syrup was intoxicatingly good and again it was a pity that there was only one scoop.

Floating Island with Praline & Vanilla Bean Anglaise

The last of the desert course is the serenely plated floating island with praline and vanilla bean anglaise. I have this slight veneration for floating islands as most of my attempts have resulted in a fine mess. The islands were airy and delicate, each spoonful disappears on your palate. I loved the praline and vanilla bean anglaise although I could have done with a little more praline and a little less vanilla, seeing as that vanilla featured in the previous dessert. As you get further in, a chocolate and raspberry sauce oozes out of the islands, which is a pleasant and welcomed surprise.

Chocolate Truffles

We had thought that our lunch had come to an end although we still had some petit fours left. We received a small plateful of chocolate truffles which we divided evenly between the two of us and five pieces of these coconut encrusted date biscuits which we rightly fought over. Being the gentleman that G was, he conceded and allowed me the last one. Being the glutton that I was, I gladly accepted the offer.

Petit Fours

Maybe I’m just a small girl with the stomach of dozen cows, but I really did wish there was just that little bit more on our plates, not too much, just a fraction more. I do realise that a degustation involves a tasting of flavours, but for the amount of money you part with I did expect servings that were larger than a few mouthfuls.

Even though I do pass judgement on the meagre servings, the flavours and the ingenuity applied in concocting such cuisine needs to be applauded. And not to mention the faultless service you receive from the smartly suited attendants. They knew their stuff and they made you feel at home, their attention to detail was bar none. I loved the way they tuck you into your chair after everytime you have gotten up (and I mean every time) and how they fold your napkin neatly back while you have left the table to go to the bathroom. Your glass of wine and water is watched like a hawk and is always topped up when necessary. Our main server even let us traipse through the pristine Japanese garden out front so he could take our photos. What more could you ask for?

Overall, Tetsuya's degustation lunch proved to be a dining experience we will never forget, and this is testament not only to the excellent cuisine but also to the meticulous attention to detail from the staff and the seamless service we received.

Tetsuya’s
529 Kent St,
Sydney NSW 2000
Phone: (02) 9267 2900

Sunday, November 05, 2006

Good Living Pyrmont Grower's Market

Peaches

Somehow the sight of grey clouds blanketing our usually blue sky gives me the permission to stay in bed and well under cover. A grey day just brings out the lazy in me and I have never been one to be sprightly first thing in the morning. It’s bad enough trying to get me out of bed on a fine day let alone a dreary one. So when the drab morning of the Pyrmont Grower’s Market rolled by yesterday, I reluctantly peered out from the covers, wisely deduced that it would be more favourable to stay indoors and resumed my snooze position. Outside it was wet, cold and miserable. Where did spring go? She came in with such a bang. And to add to my misery, I didn’t have the benefit of an “assistant” like I did last month.

So after a brief pep talk from G about how these markets only come around every month and that I would regret not going later, yada yada yada; I reluctantly got out of bed put on my comfy Chucks and made the trek to Pyrmont. The markets were no where near as crammed as
last month, but there certainly was an ample turnout considering the weather. Aside from the usual stallholders, Justin North and Joanna Savill were also there doing cooking demonstrations, although I didn't stop long to watch. Aside from the bad weather, all the great things about the markets were still there; the atmosphere, although a little wetter was still thriving.

Shepherd's Bakehouse Sourdoughs
Shepherd's Bakehouse sourdoughs proudly on display

Simon Johnson cheeses
Simon Johnson fine cheeses

First season cherries!
The season's first cherries!

Edmundi Smokehouse samples
Yes please!Free samples from Edmundi Smokehouse.

La Tartine stall
Certified organic sourdoughs from La Tartine. The ones on the right are their fruit loaves, they have huge chunks of whole dates and nuts!

A stack of Barrington beef
Someone is buying this whole stack of Barrington Beef.

Pineapples
Pineapples

Consummate stall
One of my favourite stalls, Consummate. Of course they sell breads, cakes and pastries, just my kind of thing. I cannot go to the markets without leaving with some of their gorgeous Olive Flatbead.

Wagyu Beef pies
Delicious Wagyu beef pies

Heaven's Leaven
Heaven's Leaven assorted baked goods

Pet food stall
A staple at these markets for our furry friends. A guide dog gets treated to whatever his puppy dog nose finds by his master at the Pet Food stall. Life doesn't get better for this helpful pooch.

Christmas ham
Slicing up some Christmas ham. Is it that time of year already?

Gympie Farm Dairy stall
I love taking photos of the Gympie Farm stall. There is always a buzz about it with the never ending oohs and aahs from admiring taste testers. Their
butter is to die for.

Gympie Farm creme fraiche
Aside from their cultured butter and assorted cheeses, Gympie Farm sell some exceptional creme fraiche. This I could eat by the spoonful.

Chorizos
Chorizos. I overheard an elderly man telling his other elderly friend that these were the sausages you were only to eat at breakfast. The other friend nodded, although was a little confused. It was very cute.

The last Pyrmont Grower's Market for the year will be on December 2 (my birthday)!! I probably won't be able to make it, but I sure hope you can.