Showing posts with label Just Dessert. Show all posts

Sunday, June 01, 2008

O Blogger Where Art Thou?

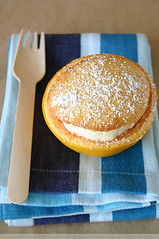
White chocolate-espresso parfait sandwiches

Call it a hiatus or call it indolence, call it whatever you want but all I know is that it has been far too long. 5 weeks in fact. It escapes me how I managed to fall off the blogosphere for so long, but I did. And although I'd love to say that I have been trekking on camel-back through the sub-Saharan desert, or navigating icy waters with Greenpeace thwarting harpoon attacks on orcas, there's no such story to tell.

I have been able to do a few photo shoots for publications that will be out later this year (more on that closer to the release date), and taking on a few other things bigger than my plate will allow, but other than that I haven't been doing much at all, well nothing noteworthy or blog-worthy that is. There are a few developments that I will be announcing in a couple of weeks but aside from the ordinary shenanigans that occur in daily life, it's been business as usual, minus the fact that I have managed to circumvent any chronicling of my eating and baking activities on the blog.

I have to say that I haven't been in the groove lately, my mojo for baking hasn't dried up but it seems to have gone astray, or at least into a narcoleptic state. I guess the past few weeks the blog has been going through it's own existential crisis, asking the why am I here, and what am I doing with myself questions. Especially, in light of the world's current state, it's becoming harder and harder to find the real relevance of food blogging. With over half of the world unable to meet peoples' basic nutritional needs, is it really pertinent to be writing about food in such banal and trifling tones?

And this by no means is intended to condemn anyone who loves to eat and eat well, hey, I'm in that group of people too. And although I haven't had the urge to bake and write about food for a few weeks, it's safe to say that my appetite for eating remains insatiable. I guess speaking sincerely, this is what has been going on the blog for a few weeks now, just a quiet reflection on the reason why I blog. And it's naive to think that any one thing is going to solve world hunger, and this post is nothing about that.

Like many of you reading, I love eating, I love food, I love taking photos of my food and I love blogging about it, and I don't think we should stop this discourse on account of those who cannot engage in it. No one should feel remorse for the pursuit of their passions, but I guess my point is that after a little self-reflection, I don't consider this passion mere trite, but I have come to realise that this space we have to write and share about food is a privilege.

So I'm sorry to get all metaphysical on you.

It happens sometimes, when I have too much time on my hands. But if you came here for a recipe, then a recipe you shall get. This is definitely one for those who have some time on their hands as it takes a whopping 3 days to complete.
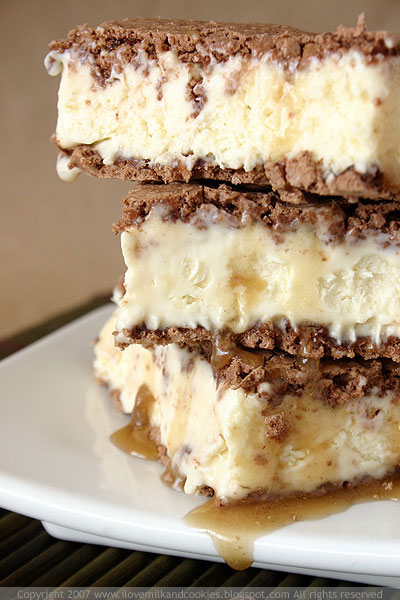
White chocolate-espresso parfait sandwiches

I've been cooking a heap of recipes from the Australian Gourmet Traveller website lately. I'm obsessed with poring through their archives, gazing with green-eyed envy at the spectacular food photography and styling, wishing I could only emulate their splendidness. I came across this recipe for parfait, and was enamoured by the photograph. I didn't even know what exactly a parfait was, except for what I had learned about it from Donkey on Shrek- which was that parfaits had layers and you'd be a fool not to love one.

So armed with that knowledge I decided it was high time I find out why this dessert was so perfect.
If the French couldn't find a better way to describe the dish than to just call it perfect, then I don't know what else could be better. Now 3 days is a long time to find out why a dessert is exceptionally good. I was tempted to just go find a patisserie and get one just so I didn't have to wait so long. And I guess if you are really the impatient kind and cannot bear 3 days of torture, then you can probably just wait overnight. Nonetheless, this isn't your quickie dessert.

White chocolate-espresso parfait sandwiches

"You know what else everybody likes? Parfaits. Have you ever met a person, you say, "Let's get some parfait," they say, "Hell no, I don't like no parfait"? Parfaits are delicious."
-Donkey

But, if your patience can endure the stretch long enough to wait for this dessert to come into perfection then you won't be sorry. The reward is a the velvety rich texture of white chocolate espresso cream sandwiched between a crunchy hazelnut meringue, dripping in a topping of espresso caramel sauce. If that's not how you describe perfection then I stand corrected, but I'm pretty sure this is as close to perfection as you can get.

The recipe can be a little fiddly, and with all the steps of having to leave mixtures in the refrigerator and freezer overnight, it can test your patience. But the pay-off far exceeds the trouble you have to go. My parfait isn't as pretty as the one on the Gourmet Traveller website, but I bet it tastes just as good. And I must warn, this dessert only lasts as long as your appetite will allow, and in our case, we polished off the whole thing in less time it took to write this post.

White chocolate-espresso parfait sandwiches

Serves 8-12
Adapted from Australian Gourmet Traveller

NOTE: You will need to begin this recipe 2 days ahead.
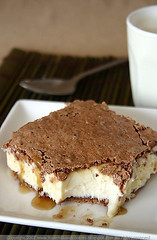
White chocolate-espresso parfait sandwiches

600ml pouring cream
25ml espresso coffee
3 pieces of lemon peel
330g white chocolate, coarsely chopped

FOR THE HAZELNUT MERINGUE
4 egg whites
110g (½ cup) caster sugar
110g (2/3 cup) icing sugar, sieved
50g ground hazelnuts
20g Dutch-process cocoa, sieved

FOR THE ESPRESSO CARAMEL
150g caster sugar
75g maple syrup
1 tbsp espresso coffee
40g butter, coarsely chopped

Combine cream, coffee and peel in a saucepan, bring just to the boil over medium-high heat, strain over chocolate in a bowl and whisk until smooth.
Cool, whisking occasionally so chocolate doesn’t separate from cream, to room temperature, then refrigerate overnight.
The next day, whisk chocolate mixture until soft peaks form.

MAKING THE MERINGUES
Preheat oven to 100ºC.
Using an electric mixer, whisk eggwhites and a pinch of salt until soft peaks form.
With motor running, gradually add caster sugar; whisk until glossy.
Using a metal spoon, fold in icing sugar, hazelnut and cocoa.
Trace 2 rectangles using a 20cm x 30cm cake pan as a template onto baking paper-lined oven trays. Spread meringue evenly onto rectangles; bake for 40 minutes or until crisp. Cool on trays.

MAKING THE CARAMEL
For caramel, combine sugar, maple syrup and ¼ cup water in a small saucepan and stir over medium heat until sugar dissolves.
Increase heat to medium-high and cook for 3-5minutes or until syrup thickens.
Remove from heat, add espresso, swirl to combine.
Add butter, swirl to incorporate, then cool.

Place a meringue rectangle, trimming edges to fit, into a 20cm x 30cm baking paper-lined cake pan.
Drizzle with half the espresso caramel, top with white chocolate mixture and drizzle with remaining espresso caramel.
Top with remaining meringue and freeze overnight.
Remove, cut into squares using a wet sharp knife and serve immediately.

Tuesday, April 08, 2008

Getting Seriously Stoned

Almond Cakes with Roasted Peaches

There's been a chill in the air of late. Autumn is well and truly here and although summer may well be done and dusted, some of it's late harvest has decided to stick around for a farewell party. Yes, stone fruits are something to look forward to come summer, but there's always enough left behind to tide you over till the beginning of autumn. In a last ditch effort to relive summer days, I suggest getting stoned.

Of course I'm not talking about sparking up a doobie and getting fried, but rather enjoying the last that summer has to offer in its stone fruits. I'm having summer weather withdrawals right now, seeing that we never really got to have a proper one on the east coast. So this was my way of sparking up some lost memories of summer.

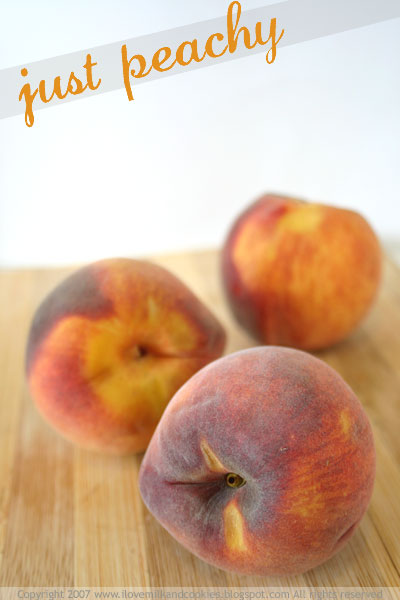
Peachy keen

And really, what's a summer without a peach? The quintessential image of biting into a ripe one, its juice dripping from the corners of your mouth, can make up for all the lucklustre weather we have had for months. They said it was going to last till March and it certainly did, and it looks like we just sailed right into autumn without even the slightest bump. Maybe there was the odd lightning crash and tree falling on one's roof, but other than that, as far as I'm concerned we've been in autumn since December.

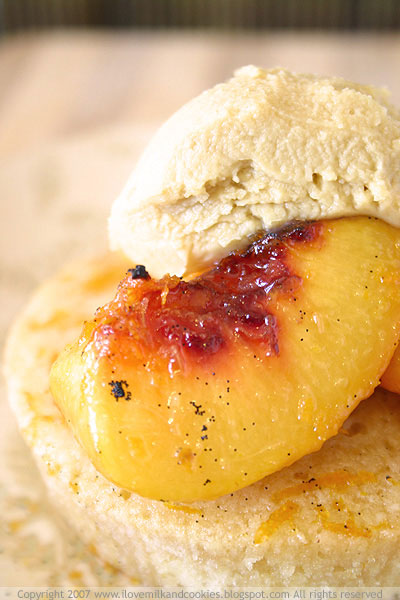
So this is my long overdue swan song for the summer we never had- almond cakes topped with roasted peaches. There's only one way to bid her farewell and it's with the best she had to offer. So rosy blushed peaches was an appropriate choice for a goodbye offering.

Almond Cakes with Roasted Peaches

I actually made this a few weeks back, although never had time to blog about them for a while. I found the peaches at the Entertainment Quarter Farmer's markets going for a song and couldn't pass them up. Then I happened upon a recipe for Almond cakes with roasted apricots on the Australian Gourmet Traveller website, and you know when you see a recipe that you simply must have right now, well that sheer impulse overcame me and I was bent on making this that very same day. I'm sure the droolworthy photograph on the AGT website helped in stoking the urge for them right away.

Seeing as I didn't have apricots but had a heap of cheap peaches lying around, well, you know what I did. When life gives you peaches, you can decide to make a cake.

Almond Cakes with Roasted Peaches

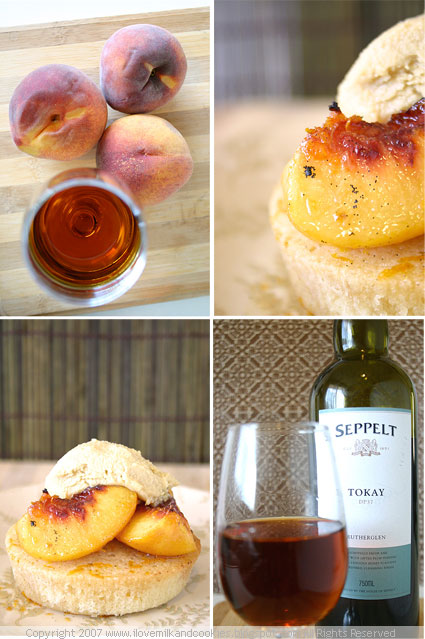
Peaches, like many other stone fruits, roast very well and there's very little you can do to improve on its flavour. So you might as well stick to the basics, a little sugar and little bit of booze and you have yourself a top notch dessert. It's amazing what wine does to a syrup. The booze of choice for this fare was a Seppelt Rutherglen Tokay that we bought on our last trip to the Hunter Valley- a sweet, honey flavoured dessert wine that was ideal for a fruit based dessert.

I have to say that the almond cakes didn't turn out as dark as they were pictured on the website, so I was a little worried I had made a mistake. But after tasting the cakes, there wasn't anything to worry about. Not sure why there was a lack of colour, but at least it wasn't lacking on taste. Two thumbs up for this recipe and perhaps
a better and less illegal way of getting stoned.

Almond cakes with roast Peaches and orange blossom fool

Serves 6
Adapted from Australian Gourmet Traveller

Almond Cakes with Roasted Peaches

SPECIAL EQUIPMENT: blowtorch (optional)

110g (½ cup) raw caster sugar
1 vanilla bean, seeds scraped
8 peaches, halved, stones removed
4 pieces of orange rind, removed with a peeler
80ml (1/3 cup) dessert wine
1 tbsp orange juice
3 tsp orange blossom water
300g crème fraîche
30g brown sugar, sieved

FOR THE ALMOND CAKES
120g (¾ cup) pure icing sugar, sieved
50g almond meal
35g plain all-purpose flour
¼ tsp baking powder
2 tbsp finely grated orange rind
2 eggwhites, lightly whisked
90g butter, melted and cooled

Preheat oven to 200ºC.
Using a blowtorch, scorch the peach skins until they blister. They should peel off easily.
Combine sugar and vanilla seeds in a bowl and scatter over the base of a roasting pan large enough to hold peaches snugly.
Place peaches, cut-side down, in a single layer in pan, pressing into sugar.
Turn peaches and scatter over orange rind.
Combine wine, orange juice and 2 tsp orange blossom water in a jug and pour around apricots.
Roast for 10 minutes or until just tender and golden.
Set aside to cool, then, using a slotted spoon, remove 4 peach halves from syrup and process using a food processor until smooth. Set aside.

MAKING ALMOND CAKES
For almond cakes, reduce oven to 170ºC.
Combine dry ingredients and rind in a bowl, add eggwhite and fold through until just combined.
Add butter, stir to combine, then divide among six shallow pie moulds, smooth tops and bake for 15 minutes or until golden and centre springs back when lightly pressed with a fingertip.
Cool in pans for 5 minutes, then turn out onto a wire rack placed over a tray.
Spoon a little apricot syrup over cakes and cool completely.

Combine crème fraîche, brown sugar and remaining orange blossom water in a bowl and whisk until thick and smooth. Fold through apricot purée to form a ripple effect. Top each cake with 2 apricot halves and a generous dollop of fool. Serve with syrup to the side.

Saturday, February 02, 2008

Soft-centred

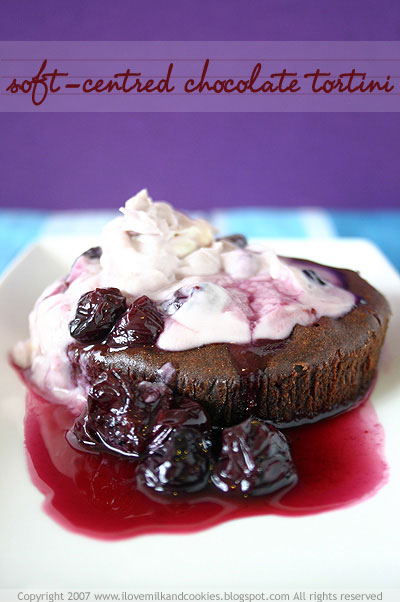
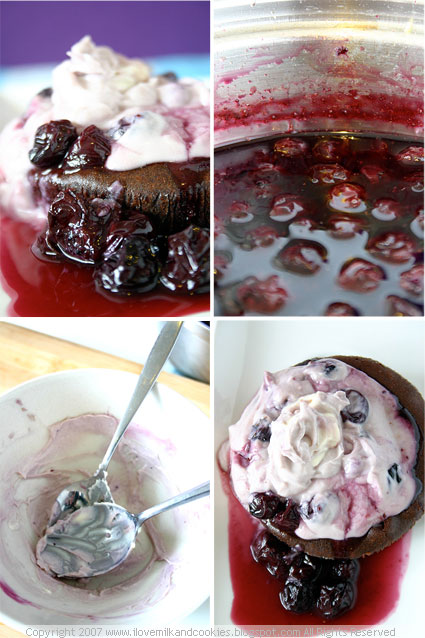
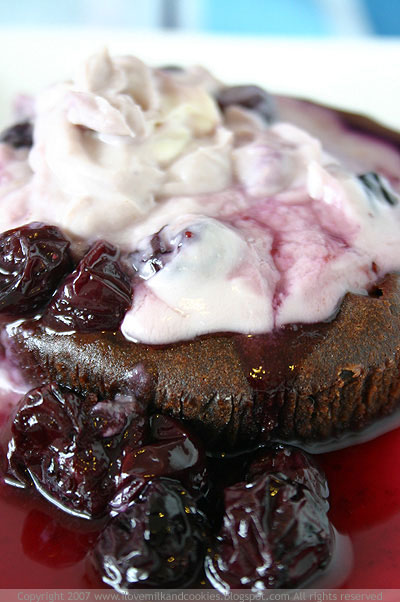
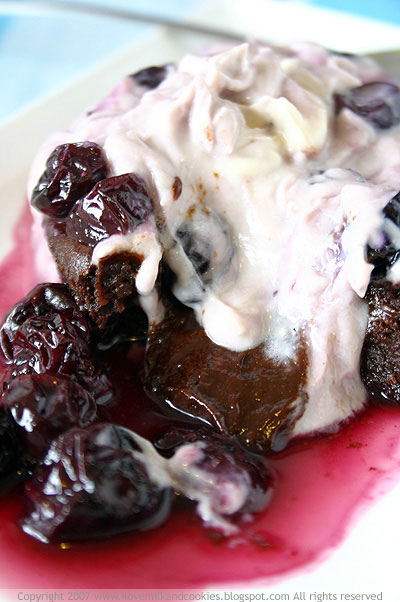
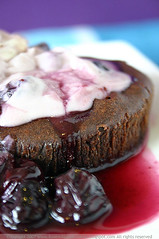
Soft Centred Chocolate Tortini with Port and Blueberry Sauce

With the weather dithering between sunshine and rain, it's hard to know what kind of meal to go with. Shall I go for something heavy to blubber-up for the cold or do I go for something light and refreshing? It's the same kind of dilemma when you go out- should I bring a cardigan or will I regret having to carry it in my already stuffed bag, ten blocks away from the car? Sometimes you just have to put your money on the fact that although it's mid-summer, it's probably going to rain.

According to the bureau of meteorology, the east cost is currently experiencing the La niña weather phenomenon, which basically means that it's going to rain- a lot. And it has. On the bright side, at least I don't have to worry about the lawn going brown or having to wash my car so often. So this La niña thing isn't all doom and gloom- it has its ups.

Soft Centred Chocolate Tortini with Port and Blueberry Sauce

So when the outside is just too disagreeable to contend with- like earth shattering claps of thunder, stray bolts of lightning that could possibly strike you at any time and a wall of rain that's falling sideways, it's best to stay indoors and let nature's fury pass. And while passing the time indoors, I decided to make use of all those spare hours by making a chocolate tortini- a soft-centred chocolate tortini to be exact.

The recipe is from chef Luke Latimer of Onesta Cucina in Bowral, which is in country NSW. I found the recipe in the Australian Gourmet Traveller accompanied by one of those really enticing photographs, worthy of a magazine cover that lure you into buying the thing and then makes you crave the dish so much that you would give up your first-born for a taste. Luckily I have no offspring of my own. But what I could possibly give up is a perfectly sunny day in exchange for one chocolate tortini, topped with all sorts of sweet and creamy condiments that will make your dietician shudder.

Soft Centred Chocolate Tortini with Port and Blueberry Sauce

The dish is almost in danger of bordering on being too good. And what is great is that the recipe is designed for when you have time to wile away. This is exactly what rainy days are made for, sitting around and wasting away the hours, probably in front of the television or with a good book. And if you are too self-righteous to admit to loving those lazy days then that's just too bad. Doing nothing is tons fun.

The original recipe calls for a raspberry sauce although I was all out of raspberries and in this rain, I wasn't going to venture out berry-picking; I was all stocked up on blueberries though, so I decided to create a port-based blueberry sauce to go with the tortinis instead. The result is a gorgeous deep mulberry-coloured syrup that is the perfect accompaniment to the richness of the tortini.

Soft Centred Chocolate Tortini with Port and Blueberry Sauce

The tortinis are under-baked intentionally so that the centres remain soft and when you cut into one of them, the lovely dark-brown centre oozes out from the middle. It's artwork in motion. You can also top the tortinis with a dollop of cream, however I decided to use mascarpone because that's what I had lying around.

I know it sounds extremely pretentious in that snobishly foodie sort of way, but I would recommend only using high quality chocolate for this dessert, as you probably would for most desserts because you will definitely taste the difference in the end. In this case, compound chocolate just won't do. Actually I wouldn't even recommend using compound chocolate in anything as it lacks the complex flavours that true chocolate has. So is that uppity enough for you?

If and when there's another rainy day to give you all the time in the world, head over to the Monthyly Mingle at What's For Lunch Honey. There will be a great selection of comfort foods that will see you through a rainy day and then some.

Soft-Centred Chocolate Tortini with Blueberry Port
Adapted from Australian Gourmet Traveller
Serves 6

Soft Centred Chocolate Tortini with Port and Blueberry Sauce

FOR THE TORTINI
160g dark chocolate(70% cocoa solids), coarsely chopped
160g unsalted butter, coarsley chopped
3 eggs
3 egg yolks
75g (1/3 cup) caster sugar
50g (1/3 cup) plain all-purpose flour
Mascarpone cheese, to serve

FOR THE SAUCE
150ml Tawny Port
100ml water
1/3 cup caster sugar
1 tsp vanilla extract
zest of 1 lemon
2 punnets blueberries

MAKING THE TORTINI
Melt chocolate and butter in a heatproof bowl over a saucepan of gently simmering water, stir to combine and cool.
Using an electric mixer, beat eggs, yolks and sugar for 8 minutes or until thick and creamy.
Gradually add flour and whisk to combine, then add chocolate mixture and whisk for another 5 minutes.
Divide mixture between 6 lightly greased and floured 10cm-diameter round pie tins, place on an oven tray and refrigerate for 1 hour.

Preheat oven to 170ºC.
Bake tortini for 10-12 minutes or until they are firm but their centres are soft.
To serve, remove tortini carefully from pie tins and place on plates, top with a scoop of mascarpone, drizzle with blueberry sauce and serve immediately.
MAKING THE PORT AND BLUEBERRY SAUCE
Combine port, water, sugar, vanilla and lemon zest in a medium saucepan and bring to the boil.
Add the blueberries and reduce heat and leave to simmer for 15-20 minutes until the liquid becomes syrupy.
Set aside to cool.

Thursday, January 24, 2008

A Cake Without the Bake

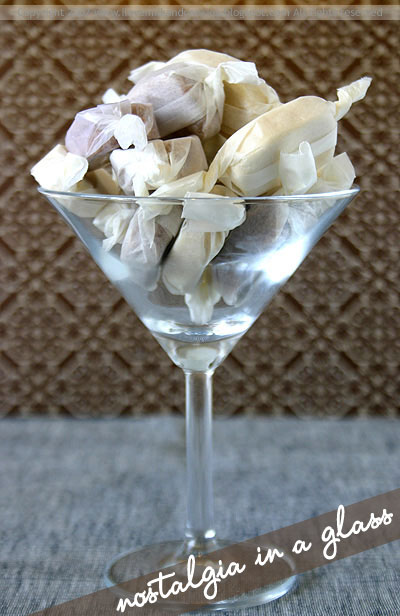
Nostalgia In a Glass

NOTE: I have received several comments about the Spanish origin of polvoron or namely polvorones. I do realise that this Filipino sweet was most definitely inherited from the Spaniards during their colonisation of the Philippines during the late 1500's, and I do apologise for not pointing this out earlier. However, this version of polvoron, I believe, is the Filipino permutation of the dessert after thousands of years of acquiring the recipe. Traditionally, Spanish polvorones is made with almonds and cinnamon, and does not contain any powdered milk like the Filipino version does. So although polvoron did originate from Spain, the Filipino version does differ markedly from it's Spanish original.

**********

Everyone loves a shortcut, taking the longer course or going through arduous and difficult procedures is usually left to sadists. Why do you think those "lose-10-pounds-in-two-weeks" exercise machines are so popular, and not to mention liposuction. Hey, when all this food-blogging weight finally catches up with me, I wouldn't say that lipo was out of the question. Inherently we all like the shorter path, easier to tread and faster to get through. Who wants to row a boat across a river when there is a perfectly reliable bridge?

Sometimes a shortcut takes you to a place you never wanted to be at in the first place, sometimes it gets you in an argument you never wanted to have as you are tossing the street directory out the window, but enough about my life. Sometimes a shortcut can take you to a delicious destination in half the time, like a cake without the bake. Say what?

All wrapped up

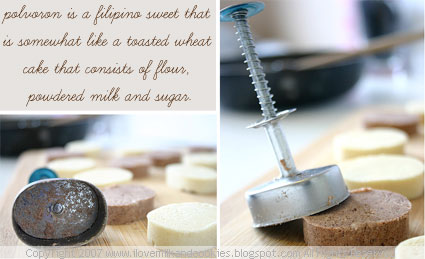
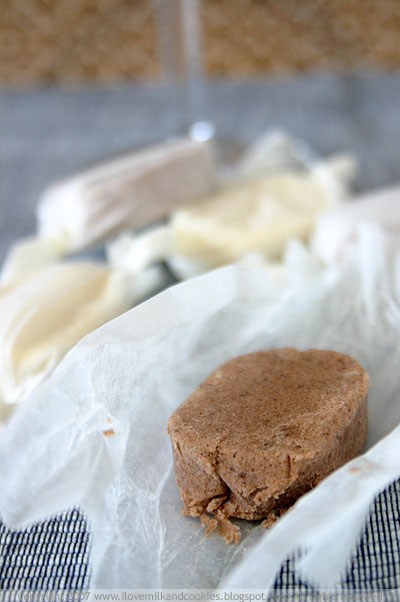
Yes, a cake without the bake. It's polvoron- a Filipino sweet that is somewhat like a toasted wheat cake that consists of flour, powdered milk, sugar and melted butter, and is compressed into a cake using a polvoron press. I used to eat these by the dozen as a child and I never imagined that I could make it myself. It always stood in my memories of childhood on some imaginary pedestal of foods that I could never possibly recreate. It seemed almost irreverent to reach into that corner of my childhood remembrance and rehash something that I have such a wistful affection for.

Since I had never made this childhood dessert before, and always ever purchased it from the Filipino store, I doubted whether my creation could attain the same pleasure and gratification I got whenever I popped one of the store-bought ones in my mouth. Sweet and milky, the powdery cake slowly melts into a thick pool of sweet creamy goodness in your mouth. But I never realised how simple it was to make. And did I mention there is no baking involved?

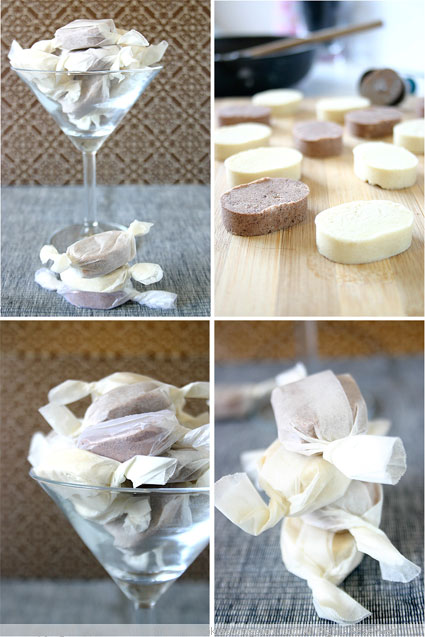
Polvoron- Chocolate and Plain

Traditionally polvoron is milk flavoured but sometimes nuts like cashews or peanuts are added. Also a popular addition is pinipig, which is immature glutinous rice that is pounded and added to the flour mixture and sometimes pandan (screwpine) or ube (purple yam) is also used to flavour polvoron. But as a child with such a juvenile palate, I could only savour the plain version of polvoron, I was much too fussy to eat anything green, or even more so purple.

But this time I decided to make the original milk flavoured polvoron and a chocolate version as well. I know as a child I would have relished a chocolate flavoured polvoron, as most children probably would. I assume that this flavour would have caught on by now as I know that some places in the Philippines do sell a very post-modern cookies and cream version of polvoron. And if your imagination stretches far enough you could pretty much cnceive any flavour of polvoron- say green tea, lavender, coffee, hazelnut, which ever way you are inclined the polvoron can go that way.

Chocolate Polvoron

But today we are talking about sentimental food, so there can't be any meanderings into the bizarre and fanciful. It's all about the simple things that hark back to your youth. There's always something distinctly romantic about the food we've have in our youth and years later they somehow manage to mount the massive plinth for things we idealise and hold dear with starry-eyed affection. And this sweet, along with fairy bread and nutella sandwiches is definitely high on the list.

As for the cake without the bake, well it might seem off-putting and unsavoury to be eating flour unbaked, but what is done first is that the flour is toasted in a skillet until it is slightly browned. Turn your eyes away for a moment and you might have yourself suffering from smoke inhalation, burnt flour does not smell good, so make sure you keep your eyes on the colour of the flour at all times. Just like caramelising sugar, it can go brown in the blink of an eye.
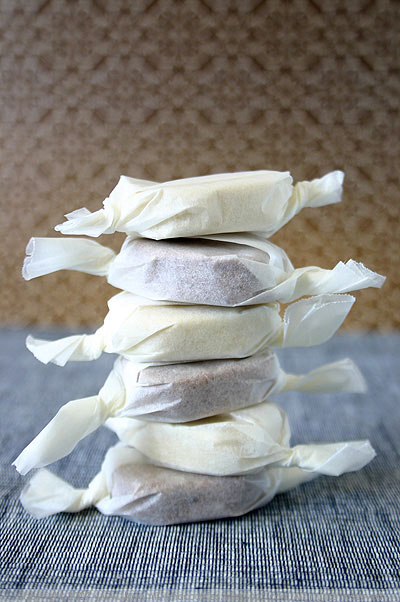
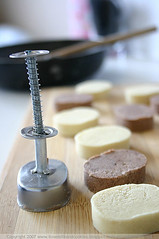
It all comes together with a little melted butter and the powdery mixture is compressed in a polvoron mould that contains a small press that pushes out the shaped polvoron. And to finish it off the polvoron is individually wrapped in paper like little powdered lollies.

Polvoron- Chocolate and Plain

The verdict, well I couldn't help but be hard on myself. Could my own rendition of this hallowed childhood sweet be as good as it is in my memory? I don't know. To be honest when I tasted it I was pleasantly surprised at how similar it tasted to the store-bought variety, although for me it just wasn't the same. It was probably because my palate had been clouded by years and years of eating this stuff as a child, and frankly I don't think any version of mine could ever taste as good as it does in my imagination. But do try it for yourself and come to your own conclusion.

But if you would like to see what other meals and recipes people are reminiscing about, head on over to the Skinny Gourmet. She is holding a food event focussing on food nostalgia. The round-up will be posted at the end of January.

Polvolron
makes about 24 polvoron

Polvoron Mould

1 cup plain all-purpose flour
1/3 cup granulated sugar
½ cup powdered milk
1/3 cup unsalted butter, melted

FOR CHOCOLATE POLVORON
2 tbsp hot chocolate milk powder

In a large skillet over low to medium heat, toast the flour until light brown.
Remove from heat and add the sugar and powdered milk, (add the hot chocolate milk powder if making chocolate polvoron)
Add the melted butter and mix thoroughly in skillet.
Transfer flour mixture to a plate and compact mixture in a polvoron press.
Place moulded polvoron onto a flat baking tray/cookie sheet and refrigerate for 1 hour.
To wrap, cut tissue or soft wax paper into 12cm x 12cm squares.
Place polvoron piece onto the middle of the paper and fold over top and bottom sides, tuck in edges into the middle and twist

Friday, January 11, 2008

Blowing Hot and Cold

Honey Lavender Ice Cream

Hot, cold, Sunny, cloudy. You never know what it's going to be. The weather in Sydney has been as indecisive as a temperamental bride-to-be umm-ing and ahh-ing her way through everything. I don't think I have seen the weather this ambivalent until of late; moody, yes; merciless, yes, but this ambiguous, no. You never know what's coming your way, and I've given up trusting the weather people, they seem to get it wrong most of time.

With the weather being so volatile, I thought I would beat mother nature to the punch and just put away something sweet and icy for when a hot summer's day would come. If we were going to get one, that is. I found that making a batch of ice cream on a cloudy day, is the perfect nest egg for future hot days.

And well what do you know, summer does eventually decide to show up and in true Sydney fashion, it showed up in such a way that you will want to jump out of your skin, or at least straight into a cold pool of water. Woe to all those who don't have air-conditioning, or aren't in near proximity to a body of water.

Honey Lavender Ice Cream

Being the environmentally-conscious greenies that we are, were a little stingy with the air-conditioning and try not use it unnecessarily and like to leave it up to mother nature to provide the cool breeze. Although when Sydney summer is at its peak, you can forget the breeze; you can also forget the words balmy and tropical, it's more like stifling and blistering and not to mention the muggy nights. There's just no relief. By this time there is absolutely no hesitation in grabbing the remote and turning on the cool air. I'm trying to remember why I love summer again.

Ahh yes, there is this one thing, besides the beach of course- it's Ice Cream! I hate to say it but let's just do a united shout out and hi-five for ice cream. Whoever decided to put some cream and eggs
together and said let's churn this baby till it gets thick and freeze it is a godsend. In my opinion, nothing makes children and adults alike as happy as ice cream does.

This ice cream not only took the edge off during the hot days but it also comes as an extremely tardy recipe for the guys at Harden Honey. I had promised them some recipes on the supply that they had generously given me months ago but never got around to making something decent and worthy of their honey. So here it is, finally, a gorgeously smooth Honey Lavender Ice Cream.

Using honey instead of sugar is great of you are thinking about minimising refined sugars in your diet, honey is not only a natural sweetener and is full of antioxidants. It also adds a nice floral accents to the ice cream, more so than ordinary sugar would. I would recommend using a mild honey for this ice cream as a stronger, richer honey would drown out the subtlety of the lavender.

And to add to the fanfare, I made these cute ice cream cups made of wonton wrappers. It's a great alternative to waffle cones, especially when you don't have one of those nifty waffle cone presses.

Honey Lavender Ice Cream

Recipe from epicurious.com
Makes about 1-litre

Lavender bunch

2 cups heavy cream
1 cup full cream milk
2/3 cup mild honey
2 tbsp dried edible lavender flowers
2 large eggs
1/8 tsp salt

Bring cream, milk, honey, and lavender just to a boil in a 2-quart heavy saucepan over moderate heat, stirring occasionally, then remove pan from heat.
Let steep, covered, 30 minutes.
Pour cream mixture through a fine-mesh sieve into a bowl and discard lavender.
Return mixture to cleaned saucepan and heat over moderate heat until hot.

Whisk together eggs and salt in a large bowl, then add 1 cup hot cream mixture in a slow stream, whisking.
Pour into remaining hot cream mixture in saucepan and cook over moderately low heat, stirring constantly with a wooden spoon, until thick enough to coat back of spoon and registers 75 to 80°C on a thermometer, about 5 minutes (do not let boil).

Pour custard through sieve into cleaned bowl and cool completely, stirring occasionally. Chill, covered, until cold, at least 3 hours.
Churn custard in ice cream maker according to manufacturer’s instructions.
Transfer ice cream to an airtight container and put in freezer to harden.

Crispy Ice-Cream Cups
recipe from Donna Hay Magazine Issue 36

1-pack wonton wrappers*
40g unsalted butter, melted
icing (confectioner's) sugar, for dusting

Preheat oven to 200
°C.
Brush wonton wrappers with melted butter.
Press wrappers into a 12-hole muffin tray. (Depending on the size of the wonton wrappers you have bought you may have to use more than one wrapper. If you are using more than one, brush between each layer.)
Bake for 5-6 minutes or until golden and crispy.
Turn out into a wire rack and cool.
Dust with icing sugar.
Scoop ice cream into the cups and serve immediately.
Thursday, January 03, 2008

Eat, Drink and be Berry

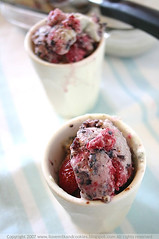
Berry Semifreddo

January is here again, and the season of expanding waistlines is slowly winding up; it looks like gym memberships and low-fat yoghurt are back on the list of things hip and happening and pork and anything that ends with the word pudding are back the list of all things dreaded and uncool. Only during the festive season is it okay to reach for your third or possibly even fourth helping of Christmas ham (with extra glaze), and everyone knows when you have multiple festivities to attend the food tally always reverts back to zero at the start of every function.

Is it just me or does the capacity of one's belly tend to expand with each Christmas? I know now that I have had 26 years practice in eating to surfeit, and my belly can hold surprisingly more than I can fathom to eat. You should have seen the meagre amount of gingerbread men I could eat in the past, now I can practically down a whole tribe of them and their m&m covered house without even batting an eyelid. Luckily, the genetic lottery has supplied me with a quick metabolism that hopefully won't go south with age.

Berry Semifreddo

But just before you go back into that regime of pristine of fitness and health and while were still hanging on to our seemingly rapid metabolic rate, here is one more fat-laden dessert for the road- a Berry Semifreddo that is a nice balance between the good and the bad. Good = berries. Bad = Cream.

If you are teetering on the fine edge between saying no to desserts and all things sweet as your resolution this year, then perhaps consider this semifreddo as the last thing to tide you over until the next sugar binge. The dessert isn't overly cloying and the great thing is that all the ingredients are natural. If you are at all worried about all that cream then this dessert is probably not for you. Just think, all that cream aside, there are eggs and berries, both I imagine would have that giant red tick from the Heart Foundation. So what's to worry about?

Besides, with all the whisking involved in this dessert, half of what your eating is probably just air. And if you are still really worried abut all that cream, then the best thing to do is to invite ten of your closest friends and get them to help you eat all that extra dessert. What are your friends there for but to share the calories with?

Berry Semifreddo

What's great about most iced confections that contain cream, like ice cream, is that you really don't need to eat that much to feel full. Two modest scoops and you have had your fill. Not that this dessert isn't good enough for seconds but when you are curbing the expansion of that waistline, two scoops are perfect for drawing the line.

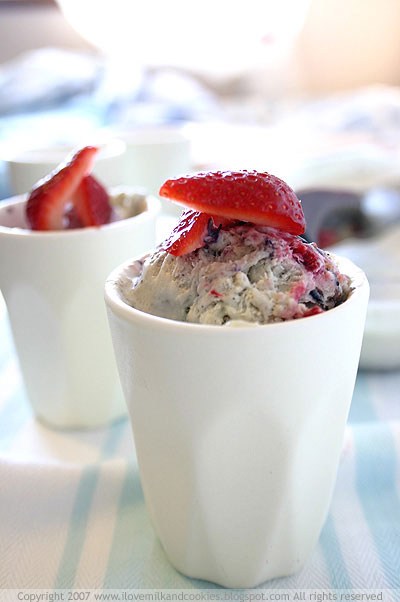
As you can see, I am still enjoying the bumper crop of berries available in the markets. Some berries have a markedly short season here so I like to get them as soon as they appear in stores before they disappear again. For this recipe I used blueberries and raspberries, although you could probably substitute any other type of berry that is is in season- strawberries which can be easily found are a good alternative, as would be mulberries and blackberries and redcurrants if you can get them.

Berry Semifreddo

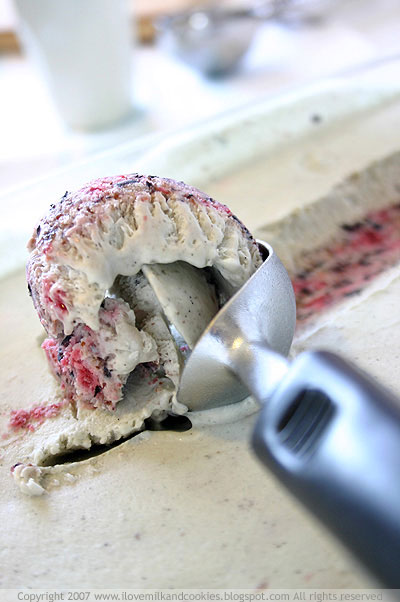
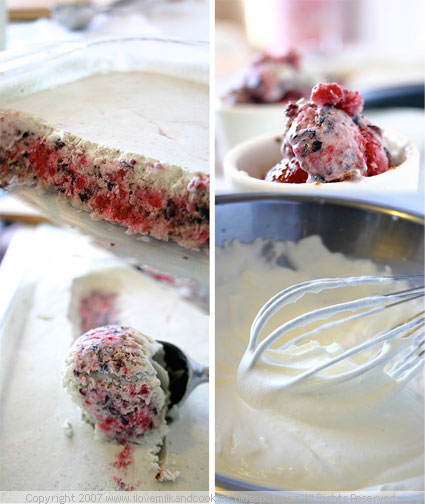
The great thing about this dessert is that it not only tastes delicious but it looks a treat once you start to scoop into it. The berries tend to sink to the bottom as you freeze them, so when they emerge from the freezer it really doesn't look like much much, but when you dig in you will be pleasantly surprised by a deluge or colour.

Right now the weather has been surprisingly genial, considering the weather people had tipped an overcast and wet summer. So what better way to take advantage of the sunny days than with a dessert to beat the heat.

Berry Semifreddo
Adapted From Donna Hay Magazine, Issue 36
Serves 10

Berry Semifreddo

2 x 120g punnets blueberries
1 x 120g punnet raspberries
3 eggs
2 egg yolks, extra
1 vanilla bean, split and seeds scraped
1 cup caster sugar
1¾ pure single (pouring) cream

Place blueberries in the bowl of a food processor and process until smooth.
Pour into a small bowl and set aside.
Clean out food processor bowl and process the raspberries and place in another bowl and set aside.
Place eggs, egg yolks, vanilla seeds and sugar in a large heatproof bowl.
Place over a saucepan of simmering water and whisk the mixture with a hand-held beater for 4-5 minutes or until thick and pale.
Remove from heat and continue to whisk until the mixture is room temperature.
In a separate bowl, whisk cream until soft peaks form and gently fold into the egg mixture.
Fold in the berries until evenly incorporated throughout the mixture.
Pour the mixture into a 12-cup capacity dish and cover with aluminium foil.
Place in the freezer for 4-6 hours until set.
Serve with strawberries on top.

Thursday, December 27, 2007

Berries Berries Everywhere

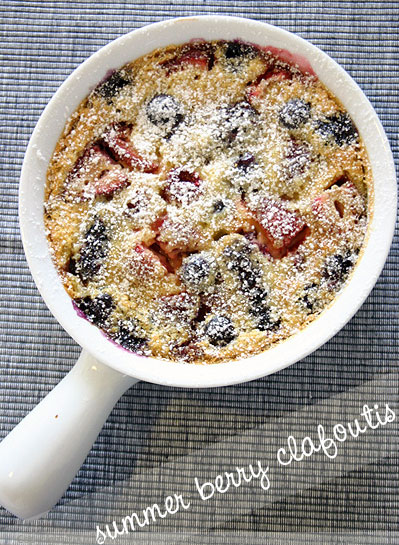
Summer Berry Clafoutis

Ahh Christmas. I can't believe that it has just come and gone. And although many a swine and perhaps turkey are breathing a collective sigh of relief now that their juicy tender flesh are no longer being eyed off as delectable cuts of Christmas meat to be proudly set down on one's dinner table, I can't help but think how much quicker and quicker the Christmas season rolls by every year.

I know I've had my fair share of ham and turkey and of course the obligatory seafood bounty that is the cornerstone of every Aussie Christmas, but I cannot overlook one of the very reasons why I love Christmas down under, it's that Christmas is smack-bang in the midst of our summer. And although we are experiencing what I have affectionately coined as the summer that never was, the sun turned out for a gloriously sunny Christmas day.
Seeing the sun was quite heartening, seeing as that we are looking at the prospect of only 4 sunny days in December, according to the weather people and it appears that we have already had them all.

Berries Berries everywhere

With a typical all-Australian summer comes the sun and the flies, which can be cause for contempt for many Australians and a lot more non-Australians who just cannot handle the sticky weather and the flies that tend to stick. The flies are indeed everywhere, and annoyingly so, although the good weather has been somewhat remiss.

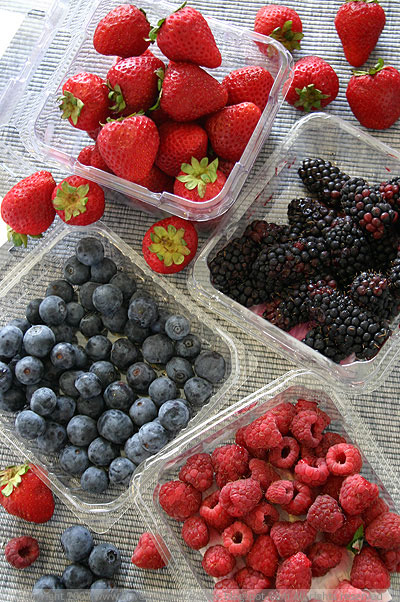
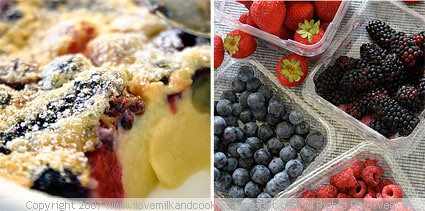
However, thunderstorms and absent sunshine aside, one thing that makes my heart beat that little bit faster is the prospect of summer berries. Of all the genus of fruit around, I think the berry is my most favourite. They come in so many varieties, so many colours and so many flavours, what's not to fall in love with? Berries in the summer, mean berries for Christmas and what doesn't scream festive more than the look of summer berries. Hues of deep blue, magenta and violet and bright tones of crimson, ruby red and green the palette is endless.

Berries galore

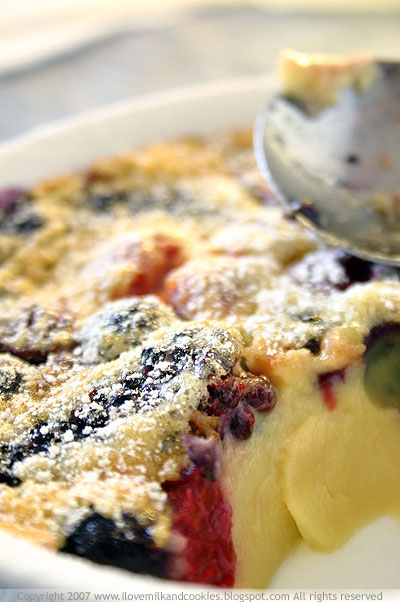
As much as I cannot go past the humble strawberry, probably the most popular of all berries there are so many others that are ripe for dessert, and a great way to showcase one of summer's bounties is in a berry clafoutis. A dessert that originated from France and was traditionally made with cherries, the modern clafoutis, I think can be made with just about any fruit you can bake. Although clafoutis purists adhere strictly to cherries, I think this dessert is versatile enough for a change.

You can pretty much include whatever berries you wish in this dessert's and if berries aren't your thing then stone fruits like peaches and apricots are a great substitute. Even though, strictly speaking, raspberries and blackberries aren't considered to be true berries in the botanical sense, there's no need for being exclusively botanic in your interpretation of a berry clafoutis. Feel free to throw in anything that ends with a the word berry. I'm sure the result will be just as fantastic.

Berry Clafoutis

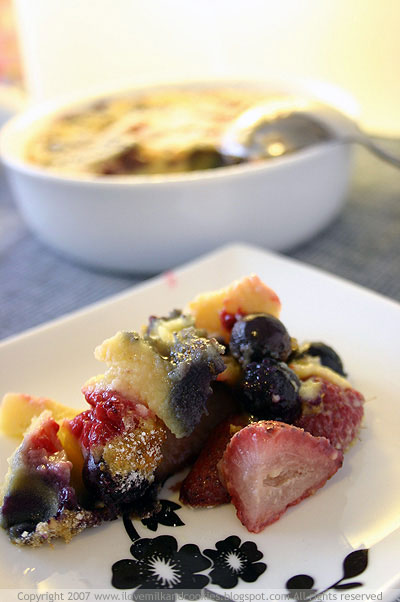
The verdict? This recipe yields a smooth and light dessert that is perfect after Christmas when we have all had a little bit too much to eat and drink. Althought it's made up mostly of cream and eggs, the dessert is not at all rich and filling like a crème brûlée would be. And the tartness of the berries create a nice contrast to the sweetness of the custard.

Perfect with a glass of champagne if your feeling celebratory or just a simple glass of moscato (Tempus Two is my favourite) this dessert is an easy crowd pleaser and one you can pull out for any dinner party. So take advantage of the surplus of berries right now and perhaps make up for the lack of sunshine this summer.

Summer Berry Clafoutis
Adapted from Donna Hay Magazine Issue 36
Serves 6

Berry Clafoutis

4 eggs
1/3 cup caster sugar
300ml pure single or pouring cream
1 tsp vanilla extract
¼ cup plain all-purpose flour
1 punnet blueberries
½ punnet blackberries or mulberries
1 punnet raspberries
½ punnet strawberries, halved and hulled
icing (confectioner's) sugar, for dusting

Preheat over to 160ºC.
Brush oven proof dish with butter.
In a medium bowl combine eggs, sugar, cream and vanilla extract and whisk until frothy.
Sift flour over egg mixture and whisk until smooth.
Pour batter into prepare oven proof dish and scatter berries evenly throughout the dish.
Bake for 55 minutes to 1 hour or until the centre has just set and golden.
Remove from oven and dust with icing sugarto serve.

Wednesday, December 12, 2007

The Summer That Never Was

IMG_7088.jpg

Summer where are you? I checked under my bed and you weren't there, I checked under the rug and in between the couch but you weren't there. I looked through the drawers and even through my dirty laundry but alas you were nowhere to be found. Who has stolen our summer away?

After weeks of continual rain and this freak of nature that has turned some parts of our city into a state of emergency, many are starting to wonder what ever happened to summer. The official start of the summer season was supposed to be the beginning of this month, but since then I can only recall one perfectly sunny day and that was my birthday. If only there was a way of willing summer back by clicking my heels three times like Dorothy but it looks like the wet and at times kooky weather is going to continue on for a few more weeks.

Untitled-1.jpg

Oh how I miss summer. The summer berries and stone fruits are back but the weather to accompany them somehow absent. It just doesn't seem right to go through a pile of berries, looking out your window at a grey sky. It just isn't Sydney without the incapacitating heat and the sun beating down at you with the force of a thousand flames. As much as I love to complain about the heat, I really would like the humidity and the sun-stroke inducing weather back.

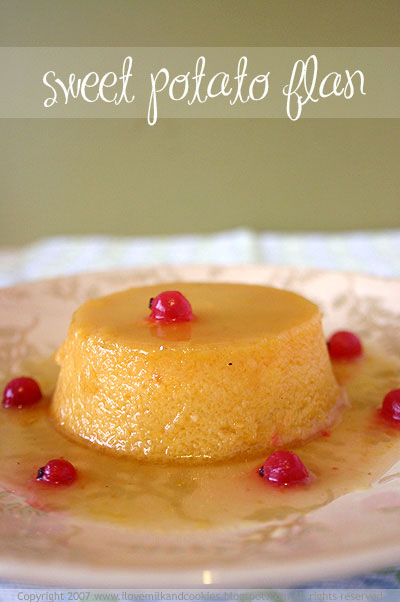
But either way grey skies or blue, I think I will probably grumble either way. So in an effort not to be such a whiner, I decided to get into the bleak and cold weather with a dessert that's more a wintry treat than a summer delight. Sweet Potato Flan. How thanksgiving is that?

IMG_7098.jpg

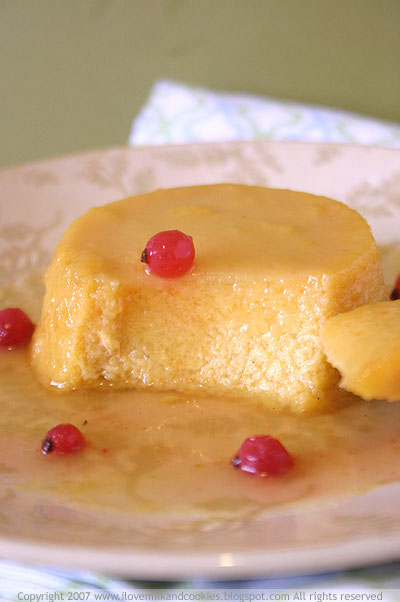
There's nothing that says hibernating in the dead of a cold winter than a sweet potato, there's something about its sweet starchiness that screams out comfort food. So what better way than to revel in all this cold weather and the advent of Christmas than with this flan. Similar to a Filipino dessert called leche flan this sweet potato flan is made in the same way.

I've been cooking from a lot of blogs lately, and it's no surprise that this recipe came from Meeta's blog, I've been gleaning ideas from this girl for some time now as her site is a trove for all things delicious. I've always wanted to make a dessert using sweet potato although I never wanted to turn it into a pie, so the flan was the perfect idea.

IMG_7094.jpg

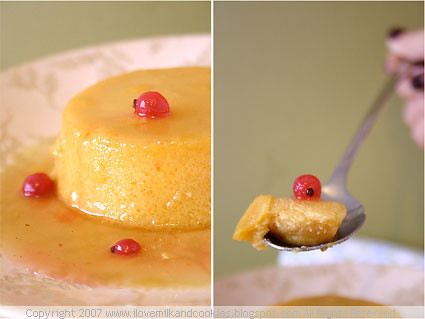
At first I was quite apprehensive in incorporating sweet potato into a perfectly good creme caramel recipe. Why ruin a good thing? But there's no taking away from the dessert, it can truly stand on its own. The taste is quite subtle and there's no glaring sweet potato flavour staring in you in the face. It's not to sweet and it's not too rich. It's actually incredibly smooth and refreshing.

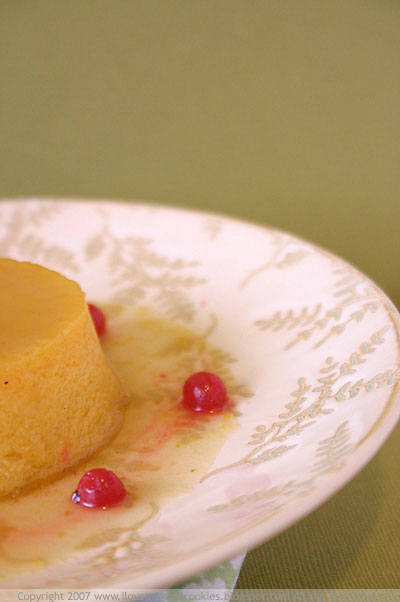
And if you're looking to add just a little summery touch to these flans, then go ahead and add some berries to the flan. I decided to go with some redcurrants I had lying around the tangy bite of the redcurrants pairs beautifully with the sweetness of the flan.

Sweet Potato Flan

Recipe from this blog
Serves 6

IMG_7090.jpg

400 g sweet potatoes (yams), peeled and cut into thick slices
juice of one lime
190g sugar - divided in half
2 tbsp water
240 ml milk
4 large eggs
125ml whipping cream
¼ tsp salt
2 tbsp tawny Port
fresh redcurrants, to serve (optional)

Preheat oven to 200°C.
Place the thick potato slices on a baking tray lined with baking paper.
Roast in the oven for about 30 minutes until the flesh becomes soft enough for mashing, making sure they do not become too dark.
Put the slices in a food processor and add the lime juice; puree until smooth.
Reduce oven temperature to 180°C.
Strain pureed sweet potato through a fine meshed sieve to get it really smooth.
Stir half of the sugar and 2 tbsp water in a medium saucepan over medium-low heat until sugar dissolves.
Increase heat to high and boil without stirring, until the syrup turns a deep amber color, occasionally swirling the pan. This should take about 5 minutes.
Immediately pour caramel into small ramekin bowls or one larger oven-proof dish.
Save about 2 tablespoons caramel in saucepan.
Swirl each ramekin form around, allowing caramel to coat bottom and about 1cm up the sides.
Add the milk to the remaining caramel in saucepan. This will cause the caramel to solidify but don't worry keep stirring over medium-low heat until the caramel dissolves.
Whisk eggs in another bowl until frothy.
Whisk in cream, salt, sweet potato puree, and remaining sugar.
Gradually whisk in hot milk-caramel mixture then strain back into same saucepan.
Stir over medium heat for about 1 minute.
Remove from heat; whisk in Port.
Pour custard into prepared ramekins.
Place the ramekins in a large roasting pan. Add enough hot water to the roasting pan to come halfway up sides of ramekin forms.
Bake until just set in centre, about 30-45 minutes. (If you find the top getting too dark place a sheet of baking paper over the tops.)
Remove flans from water.
Chill until cold for about 5 hours or overnight.

Just before serving dip each ramekin bowl into a pan of hot water for about 15 seconds. Wipe dry.
Invert onto serving plates; serve with redcurrants if desired.

Thursday, December 06, 2007

Breathless

Grapefruit Souffles

I love the drama that is the soufflé; one minute they're up there and the next minute you're back where you began.
But what is it about the melodrama that is the soufflé that keeps us going back for more? Like the momentary bliss you get from witnessing a shooting star, so is the transient beauty of the soufflé. Fleeting and short-lived just like the morning dew or a gust of wind, blink and you will almost miss it. And what is soufflé without its puff?

Nonetheless, I love the
soufflé for what it is; it's classic gastronomic theatre. And just like a great play will reel you in, I'm happy to buy into the drama that is soufflé-making. I don't know but perhaps it's their delicate texture and the ethereal way that they seem disappear on your tongue but I'm happy to go through it's ephemeral rise and fall just to enjoy the eating of it.

Grapefruit Souffles

There's one thing to enjoy the eating of a
soufflé and there's another thing to endure the making of one. Most times people pass up the making of a soufflé just to avoid all the frustrations that come with making them succeed. But let me assure you that the rules aren't that difficult and success is more likely than failure. And when they don't rise it really really doesn't matter, after all they become breathless in no time at all. They'll lose their puff and no on will ever know they never rose.

The making of a
soufflé might be seen a difficult, but the added pressure of photographing one is twice and burdensome. But always worth it in the end even when they has sunken by the time you have your best shots.

Sugar Shower

These
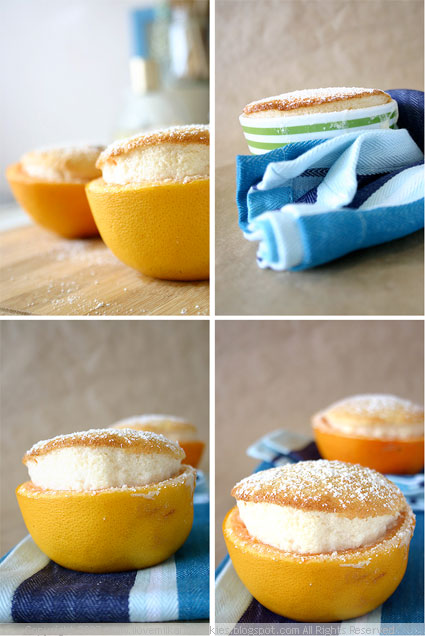
soufflés were from a recipe by Shannon Bennet, head chef at the illustrious Vue De Monde in Melbourne. I'd always had great success with his recipes however had always stuck to Matt Moran's basic soufflé recipe and was quite excited to try Bennet's version for a change. It was also quite novel that he chose to use the grapefruit skins as a mould rather than conventional ramekins. However being the skeptic that I was, I decided to go with some ramekins just in case the grapefruit skins didn't work out.

But surprisingly the grapefruit skins faired well in the oven and provided a beautiful rise for the
soufflés. Although as they do not conduct or preserve heat as well as ramekins do, you will find that they loose their puff a lot more easily. So if you are entertaining, you will have to time these desserts quit well and literally serve them as they emerge form the oven.
Grapefruit Souffles

Grapefruit Soufflé
Adapted from a recipe by Shannon Bennet
from the Australian Gourmet Traveller March 2006
Serves 6

Grapefruit Souffles

500ml (about 3 fruit) grapefruit juice
finely grated rind of 1 grapefruit
150g caster sugar
30g cornflour
30g plain all-purpose flour
2 tbsp cold water
4 egg whites
icing (confectioner’s) sugar, for dusting

Combine juice, rind, half of the sugar in a medium saucepan over moderate heat and bring to the boil. (Remember not to discard the grapefruit skins of you want to use them as moulds.)
Then simmer for 10 minutes or until the liquid has reduced by half.
Remove from heat.
Combine cornflour and plain flour with cold water and whisk until smooth.
Whisk flour mixture into grapefruit juice and whisk using an electric mixer on high speed.
Refrigerate until cool.

Meanwhile, clean grapefruit skins by spooning out the flesh.
Grease each half with butter and dust with caster sugar.

Reheat oven to 180°C.
Beat egg whites until they form soft peaks and then add the remaining half of sugar.
Continue to whisk until the meringue starts to become glossy.
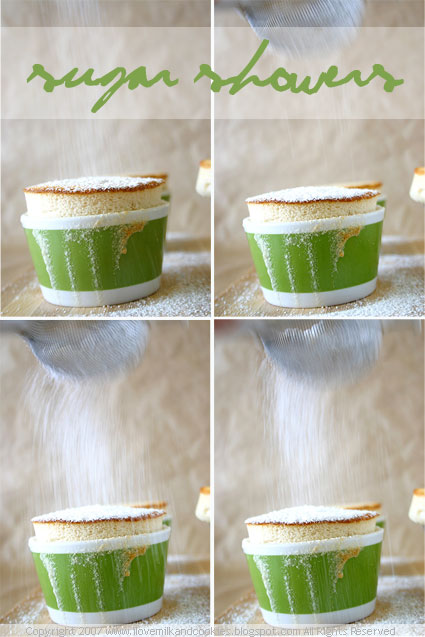
Using a large wide metal spoon fold in two scoops of meringue into the grapefruit mixture, then fold in the remaining meringue until incorporated.
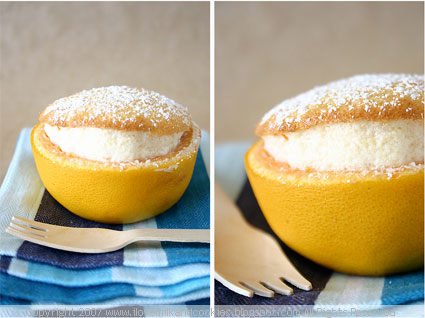
Fill each grapefruit skin to the brim and scrape off excess with a spatula to flatten the tops.
Bake for 10-15 minutes until edges are golden brown and tops have risen.
Dust with icing sugar and serve.

Wednesday, October 17, 2007

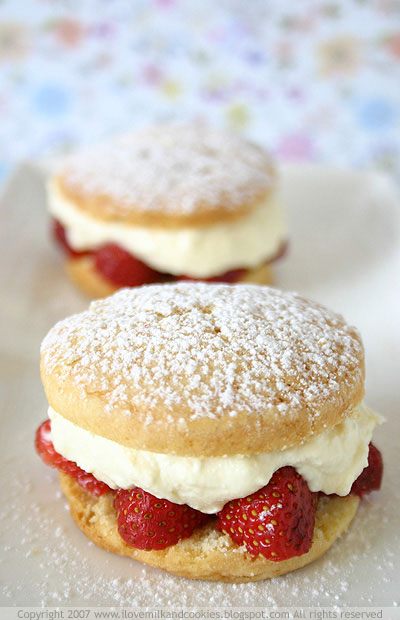
Strawberry Shortcakes

Strawberry and Ricotta Shortcakes

As much as strawberry shortcakes are a childhood favourite for many people, it was something I never grew up with. The only strawberry shortcake I was familiar with was the cartoon character. Some of you might remember her and some of you might not want to admit you remember her.

While perusing the pages of Good Living online, I came across a Steve Manfredi recipe for Strawberry and Ricotta Shortcakes. I knew I had to satiate my curiosity for these shortcakes, and especially when strawberries are so cheap right now.

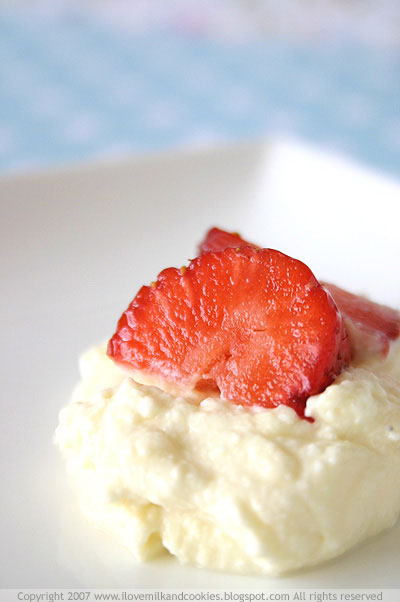
Strawberry and Ricotta Cream

I told you about how I almost ran off the side of the road when I saw that they were selling asparagus for 69 cents a bunch, well strawberries aren’t that cheap but they are in season so what that means is that they are at their most bountiful and most fragrant.

I’m not one that fully ascribes to eating everything organic; frankly I think there needs to also be an emphasis on eating and buying local as organic isn’t necessarily always the best choice. But I have to admit that when it comes to strawberries, I think that organic is far superior.

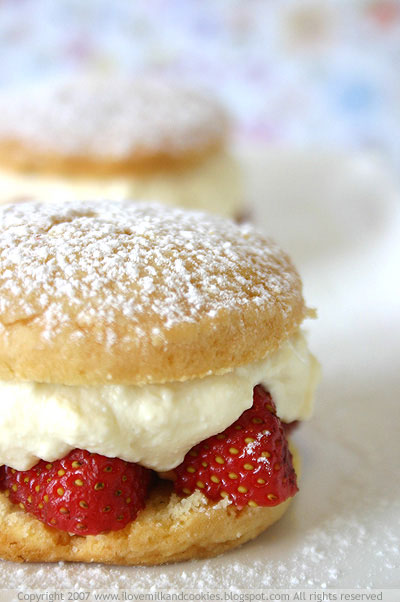
Strawberry and Ricotta Shortcakes

The great thing about these strawberries is that they are organic and locally produced, jackpot! They might not be as super-sized as the non-organic versions however I have found that they are softer, juicier and more aromatic. I can’t remember who gave me this advice, but when shopping for strawberries if you can’t smell them then they probably aren’t worth buying. This is mantra I have shopped for strawberries with.

Strawberry and Ricotta Shortcakes

serves 9
from SMH Good Living

Strawberry and Ricotta Shortcakes

FOR THE SHORTCAKES
230g plain flour
60g caster sugar
1 tbsp baking powder
Pinch salt
80g unsalted butter, cold, cut into 2cm cubes
160ml thickened cream

FOR THE RICOTTA CREAM
250ml thick cream
2 tbsp caster sugar
125g ricotta
1 tsp vanilla essence

FOR THE FILLING
300g medium-sized strawberries, hulled and halved lengthways
Icing sugar for dusting

First, make the shortcakes. With an electric mixer, fitted with the paddle attachment, mix the flour, sugar, baking powder and salt.
Add the butter and beat until the mixture looks like coarse meal.
Add the cream and beat until the mixture comes together.
Turn out the dough onto a lightly floured surface and form into a 15cm square about 3cm thick. Refrigerate for an hour.

Preheat the oven to 180C.
Using a 5cm biscuit ring, cut out 9 cakes.
Place on a baking tray and bake for 20-25 minutes until brown.
Cool on a cake rack.

Make the ricotta cream by whipping the thickened cream with the sugar.
Fold in the ricotta and vanilla.
Slice each shortcake in half and fill with the strawberries and ricotta cream.
Dust with icing sugar.

Monday, August 27, 2007

Quintessential Winter

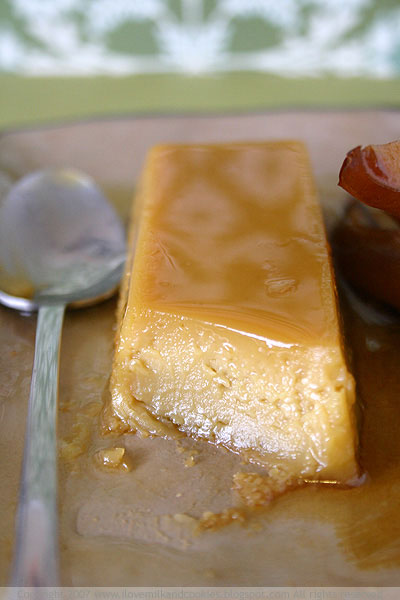
Maple Flan with Pears

No matter what the weather is, most of us somehow find a way to find fault, grumble and whine about it. It’s always either too hot, too cold, too sunny, too windy, too wet, too sticky. And I admit, I am usually a prime suspect for such behaviour; in the winter I moan about how I can never get warm enough and then come December and the Sydney summer descends on us and I complain about how insufferably hot it is.

The weather has always been a talking point, a conversation starter I guess, and why should it be different on this blog. You have probably heard me complain several times about how cold and wet it has been the past few months and I bet you’re sick of it. Well before you leave, I should mention that this time I have nothing to complain about. Nothing. Absolutely nothing. Sydney’s weather today was as perfect as the proverbial postcard.

reflections

But before winter is all done and dusted, I thought I would make her one last meal to send her off in style before she makes her way up into the northern hemisphere. For me, there are certain words that epitomises winter, and no they aren't “cold” or “snow”. One word is curry, then there is pudding, and the other is custard. Quintessential Sydney winter, I think, starts and ends with one or perhaps even all of these words and I know that my winter is never complete without them.

I think it’s quite obvious why these are considered, well by me anyway, winter fodder. They pretty much are equivalent to having a furnace in your belly; they are classic winter warmers, full of fatty goodness. And if you are somewhat inclined to having yourself a little bit of fatty goodness (in wintertime), well let me introduce you to this maple crème flan.

Maple Flan

Now, if you aren’t inclined to having yourself a little bit of fatty goodness then don’t be disheartened, it’s rich but it’s not heart attack inducing. It’s more likely to give you a toothache or a sugar rush than anything else.

I love the smoothness of custard, especially baked custards like flans and crème brulee. They are like the suave, debonair cousins of the crème anglaise. This flan, I warn can get a bit too sweet, and I wouldn’t even be opposed to reducing the amount of maple syrup in the future. But saccharine overindulgence aside, the flan does have a depth of flavour that you can't get with simple sugar. It's the the lushness of the maple syrup that gives this flan that depth.

Pears and Custard

When you overturn the wobbly custard onto a plate you will smell with giddy excitement the scent of pure maple syrup, cream and eggs coming together to produce something so ethereally good, it’s almost criminal. But to stray from harping on with one superlative after another, all I can say is that this flan is good, it’s great in fact. But moderation is the key.

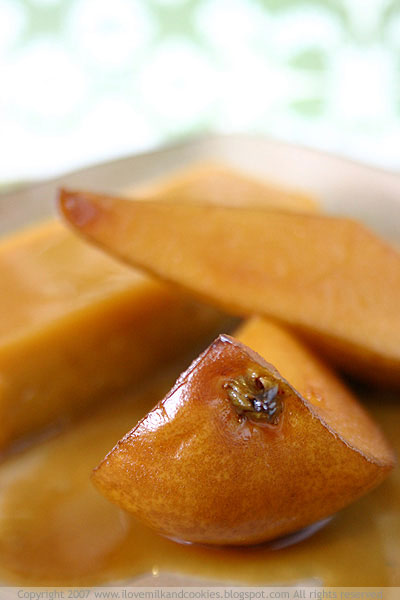
I used buerre bosc pears, which you might be familiar with from a few posts ago. They are the best looking pears out right now with their beautiful brown russeted peel and their spongy but firm flesh. They are perfect for poaching and if you accidentally leave them too long to overripe, then it’s all the more reason to poach them.

These pears might seem like the supporting act for this maple custard but it's to the contrary. The pears serve a purpose, in that it cuts out a lot of the flans cloying sweetness. Whoever made this recipe must have known how potent the sweetness of maple can be, and if you have second thoughts about including the pear then think again. The pear becomes a welcome companion after a few spoonfuls of the custard.

Pears soaked in maple syrup

Well, you might remember I attended their soiree last year but they having another one this year! Ivonne and Lis are hosting another round of La Festa Al Fresco. This custard with the glazed buerre bosc pears are what I am contributing to the shindig and what I am offering up as a last hoorah for the end of the winter season here in the southern hemisphere. Soon enough we will be saying hello to spring!

This is a feast of everything fresh and in season whatever hemisphere you are from, so go and check out what everyone else has cooked up after the 3rd of September and meanwhile, here is the recipe for the maple creme flans.


Maple Crème Flan with Maple-Glazed Pears

From Epicurious.com
Serves 10

Maple Flan with Pears

NOTE: It is recommended that you start making the custard one day before serving.

FOR THE FLAN
¾ cup pure maple syrup
3½ cups whipping cream
7 large egg yolks
a pinch of salt

½ cup sugar
¼ cup water
½ teaspoon maple syrup

FOR THE PEARS
1 tablespoon unsalted butter
3 ripe Bartlett pears, unpeeled, quartered, cored
1/4 cup pure maple syrup

MAKING THE FLAN
Simmer maple syrup in heavy medium saucepan over medium-low heat until reduced to ½-cup, about 7 minutes.
Stir in cream; return to simmer.
Whisk egg yolks in large bowl to blend.
Gradually whisk in hot cream mixture.
Whisk in salt.
Strain custard into another large bowl.
Cover and chill until cold, at least 2 hours and up to 1 day.

Preheat oven to 150°C.
Stir sugar, water, and maple syrup in heavy medium saucepan over low heat until sugar dissolves.
Increase heat and boil without stirring until syrup is deep amber colour, occasionally brushing down sides of pan with wet pastry brush and swirling pan, about 6 minutes.
Pour syrup into 10 rectangular, 10 x 5cm ceramic dishes, tilting pan carefully to coat sides. Let stand 10 minutes.

Pour custard into pan with syrup.
Place all the dishes in large roasting pan.
Add enough hot water to roasting pan to come halfway up sides of loaf pan.
Cover roasting pan with foil and pierce foil all over with fork.
Bake flan 1 hour 45 minutes. Increase oven temperature to 170°C in the last 45 minutes of baking. Uncover and bake until flan is set around edges but center moves slightly when pan is gently shaken.
Remove flan from water. Transfer to rack; cool to room temperature.
Cover and refrigerate overnight.

MAKING THE PEARS
Preheat oven to 180°C.
Melt butter in heavy large ovenproof skillet over medium-high heat.
Arrange pears, 1 cut side down, in skillet. Cook until brown, about 4 minutes.
Turn onto second cut side and cook until brown, about 4 minutes longer.
Stir in maple syrup; bring to boil.
Place in oven and bake until pears are tender, about 25 minutes.
Using slotted spoon, transfer pears to plate.

Run sharp knife around edge of flan to loosen.
Invert flan onto platter. Surround with pears and sauce.

NOTE: You can have the flan warm of slightly chilled. If you are serving them chilled, then simply heat the bottom of the dishes with some boiling hot water to looses then syru at the bottom to make for easier unmoulding.