Showing posts with label Cooking School. Show all posts

Tuesday, October 31, 2006

Serendipity Ice Cream Class: Part II

Wattleseed and Orange Rind infused creme aglaise
All hands on deck

Eighteen strangers arrived at Serendipity's Marickville factory on a crisp Wednesday evening with eager anticipation and probably a certain amount of trepidation as to what delights or possibly horrors were in store for them that night. Thankfully, within the first 5 minutes of the class, owner Sarah Mandelson had already managed to capture the attention of her class regaling us with amusing anecdotes and enthusing about her love for ice cream. You could tell that ice cream is her passion and she and husband Richard have really staked their reputation on making some of the finest and most luxurious ice cream in Sydney.

The first portion of the class was a basic introduction to her and a short history on how Serendipity Ice Cream came about; which was actually borne more out of necessity than pure chance. Her mother Alix Mandelson, who was an American married to an Australian, missed all the “wacky” American ice cream flavours like Run and Raisin and Rocky Road that were not available here in Sydney during the 60’s. So she found Serendipity Ice cream; and back then Alix would make all the ice cream for the shop using her manual self-churn ice cream maker, an austere contraption that looked a lot like a bucket with a wheel attached to churn the cream while it was submerged in some ice. Now that’s a lot of elbow grease! Ice cream is most certainly in Sarah’s blood, as her mother was not only heavily pregnant while (self)-churning her first batch of Serendipity ice cream but she was actually in labour with Sarah.

Stirring the creme anglaise

The ice cream being made for the class was a Wattleseed and Grand Marnier Ice Cream. You start off with a crème anglaise consisting of cream (35%-40% fat content), milk (full cream or 4% fat) and egg yolks (free-range). This mixture needs to be stirred over a double broiler continuously. Once you have started this process you shouldn't leave the stove, as Sarah emphasises the minute you leave the stove is the instant the crème anglaise will decide to turn into scrambled eggs.

Creme Anglaise

While stirring the crème anglaise, you can now add your sugar; you can also use honey, golden syrup, maple syrup or glucose, whatever you like. Also other flavours you would like to infuse your ice cream with can also be added now, especially things such as herbs, spices and coffee which need to be steeped to release their flavour. Just remember solids such as cinammon sticks and cloves will need to be strained before churning. Once the crème anglaise has thickened, which is after about 20 minutes of continuous stirring you now have your base for your ice cream.

Wattleseed and Orange Rind infused creme aglaise

Now it's time to add your flavourings- today we are using wattleseeds, orange zest, orange essential oil and Grand Marnier. Sarah mentions it is advisable to add several types of flavourings if your base flavour is not potent enough. For example, the orange zest would not have been sufficient to render our ice cream the orange flavour we desired, so to solve this, we added some orange oil and Grand Marnier to boost its overall orange flavour. For the purposes of the class and time restrictions we made a concentrated crème anglaise base and just added this to a large batch of plain crème anglaise that Sarah had made and chilled earlier. That is why the crème anglaise looks extremely dark here.

Pouring the ice cream

The next step, which is vital, is to chill your crème anglaise; as it is not advisable to pour your mixture into any type of ice cream machine while still warm. As Sarah recalls, this is how you would effectively destroy your ice cream machine and your crème anglaise. If this ever happens, you will need to start over. Seeing that for our class Sarah had already prepared a chilled batch of crème anglaise, all we had to do was pour in our concentrated wattleseed mixture into the prepared batch and take a short walk to Gina, their affectionately named ice cream machine.

Gina spits out the churned ice cream

Then you play the waiting game. Luckily for us, Gina is a commercial ice cream machine and can churn nearly 20 litres in less than a mere 10 minutes. After Gina spits out the churned ice cream into buckets we were then allowed to go for our life and fill our 1-litre containers. Sarah asserts that we all fill our containers to the brim as that pockets of air in the container will cause undesired ice crystals to form when frozen. We gladly took her advice and with even more enthusiam accepted the offer to make sure we licked our giant ice cream spatulas clean. They didn't call it hands on for nothing.

Wattleseed and Orange Ice Cream

After you have placed your ice cream in its container you will have to chill it for some time until it is completely frozen. Depending on how efficient your freezer is, this could take an hour or so. We were lucky that Sarah packed our ice cream with some dry ice to continue the freezing process on the way home. Once the ice cream is frozen, the only step left is to devour it with as much gusto and appreciation that was excercised while making the ice cream.

These are some things I learned...
+ Sugar not only makes you ice cream taste better, but it also acts to depress the freezing point of your ice cream thus making for a softer product that is easier to eat. It is actually better to use natural sugars as opposed to artificial sweeteners when making ice cream as that the sugar helps to bind and create a smooth luscious texture to your ice cream.
+ When substituting sugars, replace it weight for weight as sugar volumes vary between different sweeteners. So substituting by weight is a safer bet.
+ Unless you are making gelato or sorbet (not ice cream), do not skimp on the cream or the amount of butterfat content, using more milk or water will cause your ice cream to be harder and not as velvety. They don’t call it ice cream for nothing.
+ Do not use too much alcohol in your ice cream, as that alcohol will cause the ice cream not to freeze at all, resulting in a gooey mush that evidently will not look or taste like ice cream. As a guideline, your ice cream should have no more than 2%-4% alcoholic volume. You can cook the alcohol off first if you want to use more for flavour.
+ Alcohol will actually give the ice cream a very cold “mouth feel”. But adding too much will result in a disaster.
+ When making a vanilla bean ice cream, rub the vanilla beans into the sugar to disperse the seeds and not form clumps.
+ Pieces of nuts should not be added to your crème anglaise. To get maximum flavour, roast them first, chop them and then mix through after churning.
+ Never under any circumstances add citrus juice (acids) to your crème anglaise unless you want to make yoghurt. For citrus flavours, use the zest or essential oils instead.
+ Fruits that have high water content may need to be cooked to a jam consistency before adding to your crème anglaise.
+ When it comes to ice cream, you are only limited by your imagination!

See Part I, with pictures of the the final product

Gina the ice cream churner
Serendipity
333 Enmore Rd
Marickville NSW 2204
Phone: (02) 9557 8986

Check out the last of the round up for Good Food Month here.

Saturday, October 28, 2006

Serendipity Ice Cream Class: Part I

Serendipity-Title-Shot

[I apologise now for this rather verbose post, but when it comes to ice cream I just cannot be concise]

When one is presented with the opportunity to witness ice cream being made by one of the city’s leading artisans, one should not retreat into reticence but rather do everything in their power to get themselves to that class. Be it feigning illness to get out work commitments or even selling the proverbial kidney, do whatever needs to be done to get to there, especially when one claims to love ice cream almost as much as breathing itself.

Boy do I love ice cream.

Okay, perhaps my passion for ice cream really does not extend so far as to support those outlandish claims, but I cannot ignore the fact that I love ice cream. Even as a child I have vivid memories of how slowly and meticulously I would eat a scoop of ice cream, scooping, scraping and licking in a methodical and almost Zen-like fashion. So whatever it is I love about ice cream, it began at an early age and I am forever ruined for it. Nothing else can compare to a creamy scoop of velvety ice cream, or gelato, or sorbet or semi freddo. Anything frozen and scoop-able is encompassed in this affection.

So where does this lovesick introduction lead us? To the
Serendipity “hands on” class being run during Good Food Month, that’s where!

Running the hands on class was Sarah Mandelson, who along with her husband is the owner at the helm of Serendipity. I was delighted to see that she was nowhere near the size of a house and thus proved to me that ice cream does not cause you to, let’s just say, “chubbify”.

A little bit of history. The company was started by Sarah’s mother Alix, who as an American living in Australia pined for the “wacky” American ice cream flavours that seemed to be absent in Australia. Apparently the only unconventional flavour Australia boasted back then was the humble Neapolitan, and unfortunately her mother was allergic to chocolate which left for an uninspired combination of strawberry and vanilla. So what this meant was that an alternative had to be birthed, and so came Serendipity.

Serendipity's Wattleseed Grand Marnier Ice Cream

The underlying mantra for Serendipity is to use all natural ingredients and to use the best, which means no skimping on the cream and to always use the freshest eggs. This I cannot agree with more and after tasting a scoop of Sarah’s ice cream, you will notice how lacking the conventional store-bought ice creams really are. She claims that for the money you would pay for a seemingly “premium” ice cream from the supermarket, there is probably more air churned into the mixture than ice cream itself. Serendipity can pride themselves on making “super premium” ice cream which refers to the fat content (at least 14%) in their ice cream. I know what you’re thinking, whoa mama that's a lot of fat! Although this may seem like a lot, one scoop of her rich and creamy ice cream is more than enough to satisfy. Her ice cream wasn’t designed to be eaten in bulk; it’s more of a luxury item than a cheap thrill.

Sarah’s teaching style is light-hearted and humorous, and her approach to making ice cream is simple and straightforward. She is not one for convoluted techniques and asserts that those long-winded steps are just being “too precious”. What she lacks in convolutions she makes up for creativity, and urges us that the flavour of ice cream is only limited by our imagination. For instance, she tells us of a Laksa ice cream her and her husband concocted for a recent festival in Chinatown. Probably one of the few ice creams to ever contain seafood products! I don't know if I would have fancied this flavour, but this is what she coins as, “intellectual ice cream”- ice cream that will make you think, but will not make you go for another scoop; as opposed to “emotional ice cream”- the kind that you always want more of despite better judgment (and your hips) telling you no.


All gone

The class cost me $40 for 1½ hours but to be honest, I felt like I got a lot for my money. When I left the Marickville factory, I came away with a handful of great ice cream recipes, a wealth of knowledge in making homemade ice cream from scratch, a truly enjoyable time, and a 1-litre tub of freshly made Wattleseed and Grand Marnier Ice Cream packed with my very own reserve of dry ice to keep my ice cream frozen throughout the trip home. All bases were covered and really, what more could you ask for?

Part II: an ice cream class pictorial

See more hands on experiences during Good Food Month at Rebecca Cucina.

Serendipity Ice Cream Shop Front
Serendipity
333 Enmore Rd
Marickville NSW 2204
Phone: (02) 9557 8986

Wednesday, August 23, 2006

Can you can? Jam sessions for SHF

Papaya and Pineapple Preserve

I have fond memories of jam. Sweet, squishy and sticky; jam holds a certain nostalgic charm that hark back to the simplicity and innocence of childhood. Back then, I remember sitting on the front steps of our house watching the dogs play in the yard while eating a jam sandwich that I had made all by myself. You see, I was allowed to make my own jam sandwiches because they were the kind of snack you could make using a blunt knife. And seeing as that I was making this for myself, I would craftily make sure to spread extra lashings of jam on each slice so as to increase the jam to bread ratio. I would also take meticulous attention in spreading the jam all the way to the edges leaving no trace of the bread underneath. Once the other piece of bread was placed on top, I would get up on tip toes and with the palm of my hand press down on the two slices and with wide-eyed pleasure watch the excess jam drip down the sides of the sandwich. Once this happened, then I knew it was perfect.

The eating of the jam sandwich was no less tidy than the making of it; having to negotiate the jam drippings on the side, all the while attempting to take meaningful bites without getting squirts of jam all over yourself. No matter how much I tried to keep myself neat, there would always be the evidence of jam sandwich all over my mouth, hands and shirt. It was proof of a snack well made; every dribble, every spot was the mark of sweet gratification. A child’s mouth sullied with the remains of their meal, is one of the quintessential images of childhood. Fortunate are those kids allowed to eat with their hands and faces, bits of jam, honey and sticky fruit strew across their chubby faces.

For me jams, marmalades and preserves alike hold a certain sense of longing for simpler days; when a jam sandwich was equivalent to a warm hug from your grandmother. When playing on the streets were safe and you didn’t have to think twice before walking barefoot in the park; days where summers were filled with water fights and coming home everyday to a glass of Ribena. Luckily those kinds of days are not all lost.

Three Jams: Strawberry and Passionfruit, Chilli, and Papaya and Pineapple Jams

So you can imagine how delighted I was to hear that Nicky of Delicious Days chose preserving fruit as the theme for this month’s SHF. Although I have always been fond of jam, the seemingly obvious progression to making my own jam sadly never arrived. By no means did I, until recently, entertain any thoughts of jam-making or fruit preservation. As a child pigging out on jam sandwiches and as an adult who loves her scones with jam, I sadly never gave a second thought to exactly how that jam came to be. If it weren’t for this SHF, the whole process of fruit preservation would have still eluded me. It was all too easy to go to the markets and pick out what flavour of jam I fancied and go home and enjoy it, sans any appreciation of the labour involved in making it.

Luckily I have been cured of my ignorance, and along that my curiosity satiated. And although my skill and flair for jam-making are yet to be refined, I think I faired well in this maiden attempt. For my first one I chose to make a Chilli Jam. I had always been fascinated by the breadth of flavours contained in chilli jams; the spiciness, sweetness and sourness all vying for attention in your mouth.

Chilli Jam

The taste was quite subtle at first. The first flavour to arouse your palate is the sweetness, I thought, perhaps I had put too much sugar, where did all the chilli go? However as the jam begins to infuse your tongue the spiciness eventually comes through. For the amount of chillies I used, the jam produced a mild spiciness- great for stir fries and soups. I assume that if you desire a hotter chilli jam you could increase the amount of chillies used or rather utilise a stronger chilli.

I also decided to make some fruit preserves- a Strawberry and Passionfruit Jam and a Papaya and Pineapple Preserve. I will not provide you the recipe for these two preserves as that the method I used was sort of a guerrilla/improv style of jam making. Toss in a few fruits here and there add some sugar and hope for the best. Now, I would not go out and recommend this style of jam making, especially when there are so many variables involved, it is best to stick to precise measurements. But because I never anticipated how much sugar you consume while making jam, I was running out. So to counter my low supplies, I decided to ration the remaining sugar evenly between the two and just add how much fruit I thought was appropriate for the amount of sugar. Like I mentioned, this is not the recommended way of making jam. If you are asking, what would Martha do? This is not what Martha would do.

Strawberry and Passionfruit Jam

Even so, with this ad-lib style of jam making, surprisingly enough the desired outcome was achieved. The Strawberry and Passionfruit had a beautiful combination of sweetness and tartness, the vibrant red colour with little flecks of passionfruit seeds throughout the jam was absolutely stunning. It was like staring into a jar of rubies, the colour was so consuming. I would recommend spreading some of this jam generously across some toast or some scones or even into a Bakewell Tart.

The Papaya and Pineapple was a tropical taste sensation. Although the preserve was slightly cloying (must have been those improvised measurements) the papaya and pineapple flavours were not lost in the sweetness. Although I used more papaya, the overriding flavour was still the pineapple. To offset the sweetness I mixed a spoonful of it with some of my favourite
yoghurt and this does the trick. The yoghurt’s tartness and the preserve's sweetness is just the perfect balance. Which is essentially, what I think great food is- a well balanced equation of flavours.

Papaya and Pineapple Preserve

I found that that I really loved the quaint and rustic nature of the process of fruit preservation. Its creation requires your full attention, and I think when you are given a pot of homemade jam as a gift, you know that there is a lot of love involved; love in the giving and in the making. I can see why some people’s most cherished memories of jam are of their mother or grandmothers stirring a pot of jam over a hot stove.

Whatever jam, marmalade or preserve it is, make sure you spread generously. Life is too short to skimp on good jam.

Chilli Jam

Chilli Jam

200g large red chillies
200g red onions
300g granulated caster sugar
200g grated palm sugar
125ml water
2 tbsp tamarind sauce
1 tsp salt


Sterilise bottles and lids in boiling water for 10 minutes. Air-dry the bottles and lids completely. Slice the chillies into discs and dice onions. Place all ingredients into a heavy based saucepan over medium to high heat. Boil mixture until the sugar becomes of a thick consistency.

THNGS TO NOTE:
Be attentive, do not burn the sugar, doing this will cause the jam to set to a toffee-like hardness. If this does occur, there is nothing much you can do to salvage the jam. Make sure if you do overcook the jam that you do not go ahead and place them into the jars. Just give up and try again as it will be very difficult to get the hard jam/toffee out of the jar once you have put it in.

A good way to test whether the jam is at setting consistency is to take a small dollop of jam and drop it on a clean plate. Place it in the refrigerator for a minute or two and see whether the mixture has set. If it has, then the jam is ready to be taken off the heat.

If you do not want seeds in your jam, an easy way to get rid off the seeds is to simly crush the fruit and put it through a sieve.

If you do choose to use pectin, be very careful as not to burn the mixture. Use a thermometer to be exact as pectic can be sensitive when exposed to excessive heat and stir continuously.

The Labels

Labels

To keep with the rustic nature of these jams and preserves, I chose to make handmade labels. All you need is some card, some string and a nice felt pen. Just use your imagination and label away!


Strawberry and Passionfruit Jam


Chilli Jam

Monday, July 17, 2006

Egg on Their Face

Butternut Pumpkin, Sage butter and Goat's cheese Ravioli

When your mother gives you a pasta machine for your birthday what do you do? Well the obvious answer is to make pasta of course, but before this could transpire I had to silence the sniggering taunts from other family members who laughed at the prospect of me making my own pasta. For someone who previously had little interest or experience in cooking before, they were quite bemused at how I had acquired such a novel distraction in so little a time. Apparently, I somehow went from being completely detached from everything associated with food and the culinary arts to suddenly knowing the difference between Chanterelles and Portobellos.

The fact is, I have always been surrounded by food and have had the benefit of a rich culinary upbringing, but until very recently I never embraced it. Now in my twenties, you can see why it was such a surprise to many when I begin heralding the wonders of homemade shortcrust pastry and start spouting French cooking techniques previously unheard of, coming from these lips.

Seven months after my birthday, the pasta machine remains unused. Until today that is. I decided that today would be the day that I would break in my seven-month old, mint condition pasta machine by making some egg-pasta ravioli. After tasting
Pastabilities’ Butternut Pumpkin, Sage and Goat’s Cheese Ravioli, I vowed that if I were ever to make ravioli, I would endeavour to replicate this particular one.

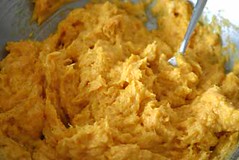
The filling seemed fairly straightforward as all the ingredients were included in the name of the ravioli. And indeed it was simply a matter or combining all these ingredients together. A few taste tests here and there, a few sprinkles of salt here and there and it was done. The filling was velvety and delicate; the hints of sage with the creamy pumpkin tasted blissful. The three ingredients all mingled together, mutually enhancing each others’ flavour. The burnt butter also added an exquisite touch of nuttiness to the filling.

And so it appears that it is they, the doubters that have egg on their faces, as that it was they that were so rapt about my egg pasta ravioli, so much so that they were eating bowlfuls of it. It is only right that it is I, that gets the last laugh. Making pasta can so so much fun.


Egg Pasta

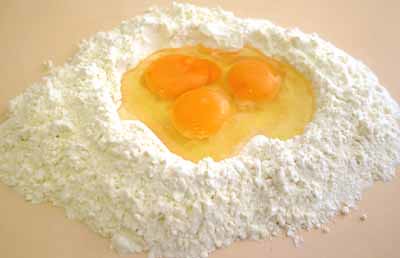
Preparing the pasta dough

250g "00" Italian Pasta flour
2 large, fresh, free-range eggs
1 egg yolk


Place flour in a mound on a dry flat surface.
Create a well in the centre of the flour, and crack the eggs and yolk into the well.
Using your fingers or a fork, gently mix the eggs slowly incorporating more and more flour until you create a smooth dough.
Keep kneading the dough with your hands until it becomes smooth and elastic.
Shape dough into a ball and wrap in clear plastic and refrigerate for 30 minutes.

NOTE: Use organic or free-range eggs when possible and it is important to use the freshest eggs that you can obtain.
Also if available, use Italian “00” flour as that they are especially milled for pastas and contain the proper amount of gluten to achieve the desired consistency for pasta dough.

Butternut Pumpkin, Sage Butter and Goat’s Cheese Filling

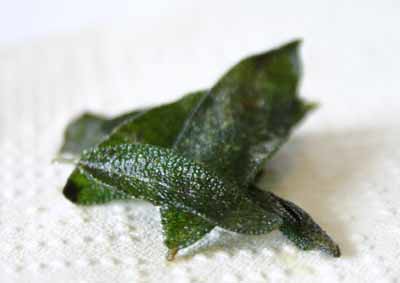
Fried sage leaves

500g Butternut Pumpkin
25g unsalted butter
8-10 sage leaves
60g goat’s cheese (chévre)
sea salt


Roast the butternut pumpkin in the oven for 40 minutes, or until soft at 190°C.
When the pumpkin is cooked, spoon out the flesh and place in a bowl.
Make a well in the centre of the bowl for the excess water to drain into.
Allow pumpkin to cool and drain for 20 minutes, and then remove the excess water.
Meanwhile, place butter and sage leaves in a small saucepan and fry until sage leaves are crisp and butter has browned.
Remove the sage leaves and pour the butter into the bowl with the pumpkin.
Add the goat’s cheese and a pinch of sea salt and combine until the mixture reaches a smooth consistency.
Set aside until ready to fill ravioli.


Rolling the Pasta Sheets

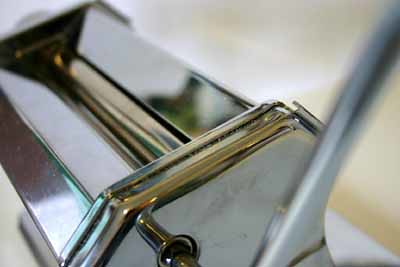
Pasta Machine

Divide the dough into four portions and work with one portion at a time, keeping the others covered.
Take one portion of dough and knead until smooth, roughly flatten the dough with a rolling pin.
Lightly dust with flour on both sides before running through the machine.
Using the pasta machine at its widest setting (highest number), roll the dough through, ensuring that it remains in one piece.
You may want to fold this sheet over and run it through the machine again, at the same setting to ensure you have a smooth texture.
Continue running the sheets of pasta through each setting (decreasing in number), until you achieve the desired thickness (with my pasta machine, I rolled the pasta through, until the number 2 setting).

NOTE: Remember to dust the pasta sheets on both sides to prevent it from sticking.
Also make sure you have adequate bench space for the pasta sheets to lie flat on the bench.


Assembling the Ravioli

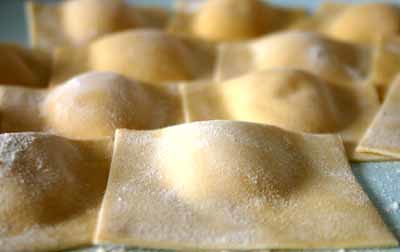
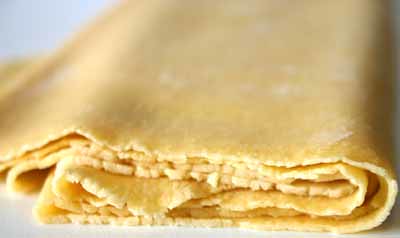
Rolled pasta

Lay your pasta sheets on a flour-dusted surface.
Heap a good amount of filling onto the centre of each sheet at one end. Repeat this all the way along the sheet at 5cm intervals.
Using a pastry brush, dipped in a little water, evenly brush the pasta around the mounds of filling.
Fold the pasta sheet over, covering the mounds until the two ends meet.
Push out any air by cupping the filling and extracting the little air bubbles that form.
Using a knife, pizza cutter or crinkly cutter, trim the sides of the ravioli.


The ravioli is now ready to be cooked or they can be stored in the freezer, in a container dusted with flour for up to 4 weeks.

Butternut Pumkin, Sage butter and Goat's cheese filling

Butternut Pumpkin, Sage Butter and Goat's Cheese Filling
sunny perfection