skip to main |
skip to sidebar
No matter what the weather is, most of us somehow find a way to find fault, grumble and whine about it. It’s always either too hot, too cold, too sunny, too windy, too wet, too sticky. And I admit, I am usually a prime suspect for such behaviour; in the winter I moan about how I can never get warm enough and then come December and the Sydney summer descends on us and I complain about how insufferably hot it is.
The weather has always been a talking point, a conversation starter I guess, and why should it be different on this blog. You have probably heard me complain several times about how cold and wet it has been the past few months and I bet you’re sick of it. Well before you leave, I should mention that this time I have nothing to complain about. Nothing. Absolutely nothing. Sydney’s weather today was as perfect as the proverbial postcard.
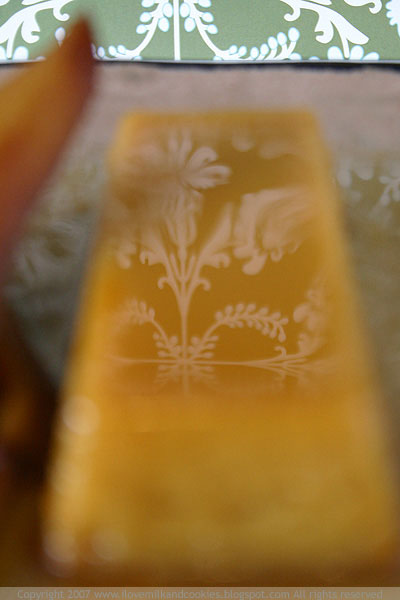
But before winter is all done and dusted, I thought I would make her one last meal to send her off in style before she makes her way up into the northern hemisphere. For me, there are certain words that epitomises winter, and no they aren't “cold” or “snow”. One word is curry, then there is pudding, and the other is custard. Quintessential Sydney winter, I think, starts and ends with one or perhaps even all of these words and I know that my winter is never complete without them.
I think it’s quite obvious why these are considered, well by me anyway, winter fodder. They pretty much are equivalent to having a furnace in your belly; they are classic winter warmers, full of fatty goodness. And if you are somewhat inclined to having yourself a little bit of fatty goodness (in wintertime), well let me introduce you to this maple crème flan.
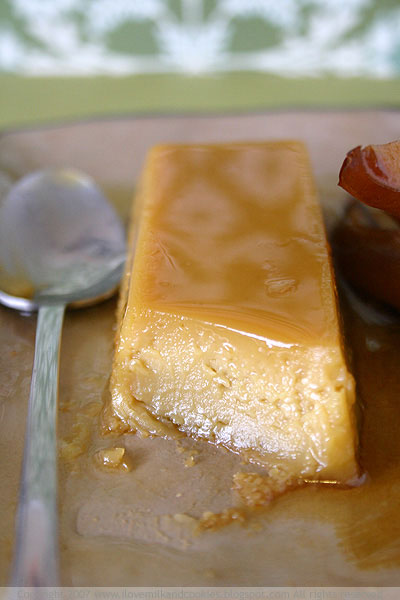
Now, if you aren’t inclined to having yourself a little bit of fatty goodness then don’t be disheartened, it’s rich but it’s not heart attack inducing. It’s more likely to give you a toothache or a sugar rush than anything else.
I love the smoothness of custard, especially baked custards like flans and crème brulee. They are like the suave, debonair cousins of the crème anglaise. This flan, I warn can get a bit too sweet, and I wouldn’t even be opposed to reducing the amount of maple syrup in the future. But saccharine overindulgence aside, the flan does have a depth of flavour that you can't get with simple sugar. It's the the lushness of the maple syrup that gives this flan that depth.

When you overturn the wobbly custard onto a plate you will smell with giddy excitement the scent of pure maple syrup, cream and eggs coming together to produce something so ethereally good, it’s almost criminal. But to stray from harping on with one superlative after another, all I can say is that this flan is good, it’s great in fact. But moderation is the key.
I used buerre bosc pears, which you might be familiar with from a few posts ago. They are the best looking pears out right now with their beautiful brown russeted peel and their spongy but firm flesh. They are perfect for poaching and if you accidentally leave them too long to overripe, then it’s all the more reason to poach them.
These pears might seem like the supporting act for this maple custard but it's to the contrary. The pears serve a purpose, in that it cuts out a lot of the flans cloying sweetness. Whoever made this recipe must have known how potent the sweetness of maple can be, and if you have second thoughts about including the pear then think again. The pear becomes a welcome companion after a few spoonfuls of the custard.
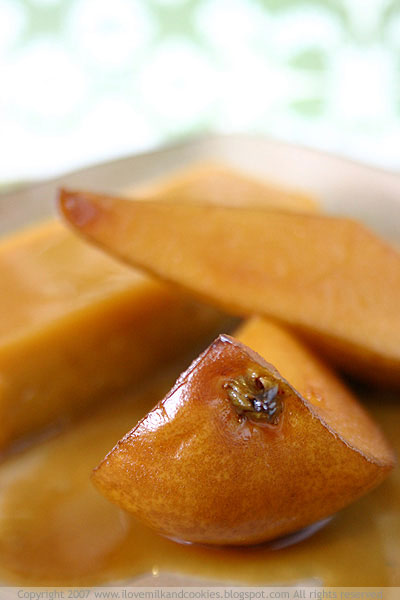
Well, you might remember I attended their soiree last year but they having another one this year! Ivonne and Lis are hosting another round of La Festa Al Fresco. This custard with the glazed buerre bosc pears are what I am contributing to the shindig and what I am offering up as a last hoorah for the end of the winter season here in the southern hemisphere. Soon enough we will be saying hello to spring!
This is a feast of everything fresh and in season whatever hemisphere you are from, so go and check out what everyone else has cooked up after the 3rd of September and meanwhile, here is the recipe for the maple creme flans.
Maple Crème Flan with Maple-Glazed Pears
From Epicurious.com
Serves 10
NOTE: It is recommended that you start making the custard one day before serving.
FOR THE FLAN
¾ cup pure maple syrup
3½ cups whipping cream
7 large egg yolks
a pinch of salt
½ cup sugar
¼ cup water
½ teaspoon maple syrup
FOR THE PEARS
1 tablespoon unsalted butter
3 ripe Bartlett pears, unpeeled, quartered, cored
1/4 cup pure maple syrup
MAKING THE FLAN
Simmer maple syrup in heavy medium saucepan over medium-low heat until reduced to ½-cup, about 7 minutes.
Stir in cream; return to simmer.
Whisk egg yolks in large bowl to blend.
Gradually whisk in hot cream mixture.
Whisk in salt.
Strain custard into another large bowl.
Cover and chill until cold, at least 2 hours and up to 1 day.
Preheat oven to 150°C.
Stir sugar, water, and maple syrup in heavy medium saucepan over low heat until sugar dissolves.
Increase heat and boil without stirring until syrup is deep amber colour, occasionally brushing down sides of pan with wet pastry brush and swirling pan, about 6 minutes.
Pour syrup into 10 rectangular, 10 x 5cm ceramic dishes, tilting pan carefully to coat sides. Let stand 10 minutes.
Pour custard into pan with syrup.
Place all the dishes in large roasting pan.
Add enough hot water to roasting pan to come halfway up sides of loaf pan.
Cover roasting pan with foil and pierce foil all over with fork.
Bake flan 1 hour 45 minutes. Increase oven temperature to 170°C in the last 45 minutes of baking. Uncover and bake until flan is set around edges but center moves slightly when pan is gently shaken.
Remove flan from water. Transfer to rack; cool to room temperature.
Cover and refrigerate overnight.
MAKING THE PEARS
Preheat oven to 180°C.
Melt butter in heavy large ovenproof skillet over medium-high heat.
Arrange pears, 1 cut side down, in skillet. Cook until brown, about 4 minutes.
Turn onto second cut side and cook until brown, about 4 minutes longer.
Stir in maple syrup; bring to boil.
Place in oven and bake until pears are tender, about 25 minutes.
Using slotted spoon, transfer pears to plate.
Run sharp knife around edge of flan to loosen.
Invert flan onto platter. Surround with pears and sauce.
NOTE: You can have the flan warm of slightly chilled. If you are serving them chilled, then simply heat the bottom of the dishes with some boiling hot water to looses then syru at the bottom to make for easier unmoulding.
As for me the notion of breakfast, as a meal, generally oscillates between the comfort of routine and the pleasure of ceremony. Somehow, you can have the same thing for breakfast everyday and it’s no drama, as if we need to start the day with one constant before we are hit by all the variables that follow throughout. Then there is the ritual of the café breakfast, now that’s another thing.
We’ve made it somewhat of a sport to go out for breakfast here in Sydney, and if you are even trendier or sporting a hangover on a Saturday morning, it’s brunch. But it seems that the café breakfast, no matter what time of day is experiencing a revival. Before, it seemed rather preposterous that you would even leave your house at such an early hour to go and have breakfast out, when you can have a perfectly good one at home, but times are a changing. Nowadays, the hottest thing in Sydney’s eateries is the breakfast menu and I’m not the only one who has noticed.
But then again who can maintain such an addiction? As much as I do love the idea of breakfast out everyday, my hip pocket simply isn’t big enough. And besides, sometimes, all I want for breakfast is a good warm bowl of porridge and nice cup of tea. I know there was once upon a time, when I was about ten, or maybe even twelve when all I wanted for breakfast was chorizo and toast. This craving lasted for weeks and I remember my mum stocking up with containers of chorizo in our freezer just to keep up with my morning appetite.
I’ve now kicked that nagging chorizo habit in the mornings, and have move on to something else. I love pancakes or are they hotcakes, well either one. I’ve done pancakes/hotcakes at many a Sydney eatery; there were the nutella pancakes at La Plage, of course Bill’s ricotta hotcakes, sourdough ones from Brasserie Bread (which I highly recommend) and there were the hotcakes at Fifi Foveaux’s, which I might add are preferable to Bill’s- sorry Bill. But now it’s time to take the hotcake back to my own kitchen.
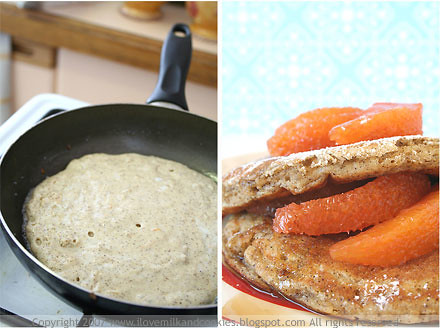
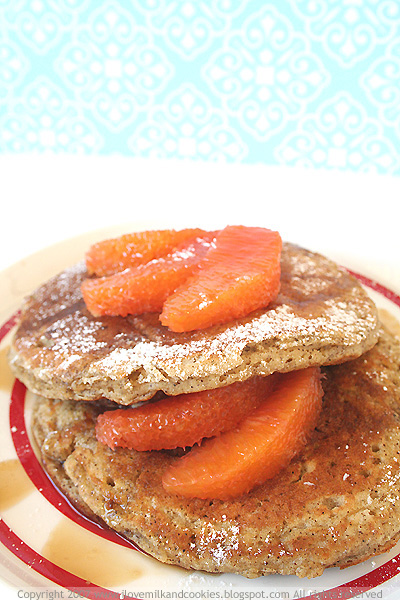
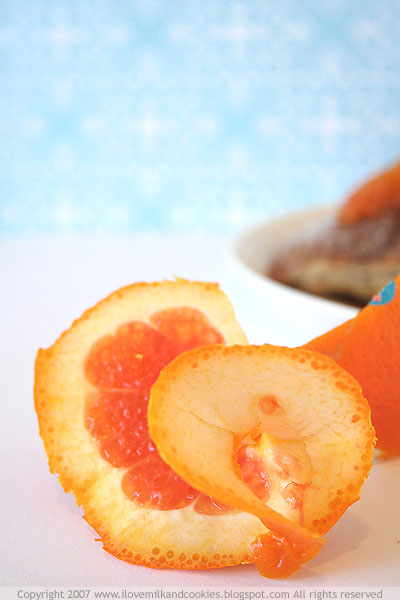
Setting down a plate of hotcakes at my own dining table didn’t have the same allure as eating them out at some café, but the taste was certainly enough to distract me from my humble surroundings. I made coffee flavoured hotcakes (or are they pancakes?) with some rosy red oranges and a drizzling of maple syrup. And to sound crudely cliché- it was simple and satisfying. Which I guess is what everyone looks for in a breakfast; I’ve never seen anyone sit down for a three course breakfast and whoever has the time to do so should really re evaluate how they spend it. Breakfast can be familiar and breakfast can be unchanging, but it should never be boring, or convoluted.
As for these hotcakes, well let their taste speak and that heady aroma of coffee in the kitchen for themselves. Then perhaps you can sit down and contemplate whether you are eating hotcakes or pancakes because I really don’t know the difference between the two and truth be known, I really don’t care, as long as they taste great.
Coffee Hotcakes with Rosy Red Oranges
adapted from Delicious Magazine, June 2005
serves 4
1 1/3 cups (200g) self-raising flour
1 tbsp instant coffee granules
½ tsp bicarbonate of soda
1 tsp baking powder
1 tbs golden caster sugar
1 egg, separated
200g Greek yoghurt
200ml milk
20g unsalted butter, melted, plus extra to brush
To serve
Rosy red oranges, peeled and segmented
Icing sugar, to dust
Maple syrup or honey
Sift the flour, soda and baking powder into a bowl and stir in the coffee and sugar.
In a separate bowl, beat together the egg yolk, yoghurt, milk and melted butter.
Beat in the dry ingredients.
Place the eggwhite in a separate bowl and whisk until soft peaks form.
Fold the eggwhites into the batter.
Brush a non-stick frypan with melted butter and place over medium-high heat.
Drop 1/4 –cup of mixture into the pan for 1-2 minutes until golden.
Flip over and cook for a further minute until golden on other side.
Transfer to a baking tray loosely covered with foil, and keep warm in a low oven while you make the remaining hotcakes.
Serve 2-3 hotcakes per person with some sliced rosy red oranges.
Drizzle with some maple syrup or honey and dust with icing sugar.
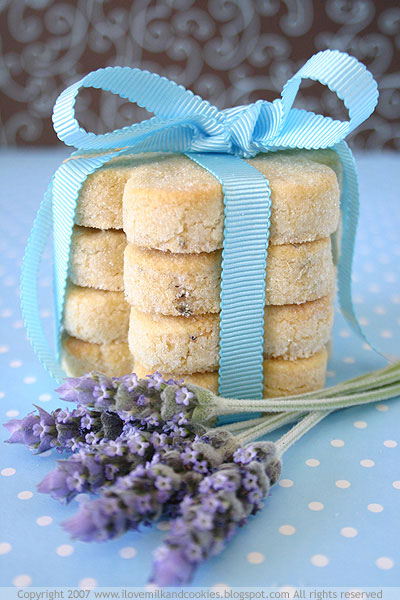
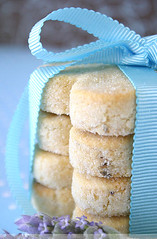
Even though this is all wrapped up in pretty blue ribbon, no, this isn’t the surprise I was talking about before. I know some of you have been anticipating with bated breath what this surprise is. And I do hope that it eventually lives up to all this hype I have inadvertently bestowed it with. But I just have to find the time to make it, just for the simple fact that I don’t want to rush it. I only a have a small portion of the stuff, so I must be cautious lest I ruin it and have nothing to show.
So it will have to wait until later in the week, as I have a packed schedule these next two days filled with birthdays, dinners and soirées. It’s just as well that I love to eat (and drink), as I would tire of all these shindigs. But, alas, that surprise must wait. Don’t worry I am itching to create something new
But here is something I made earlier.
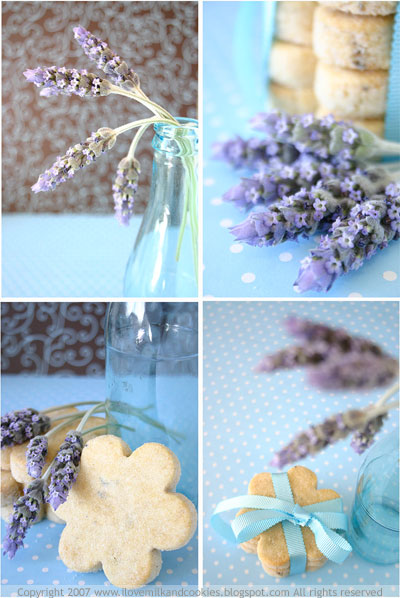
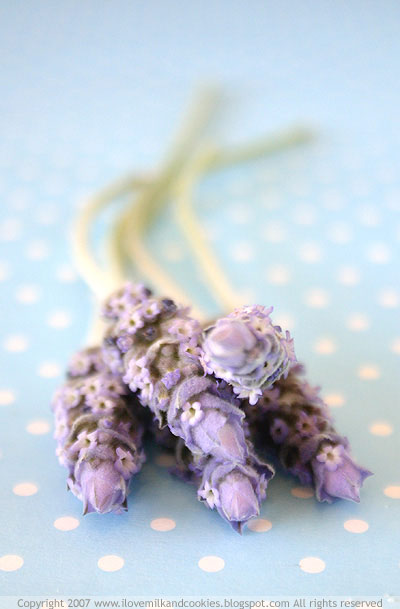
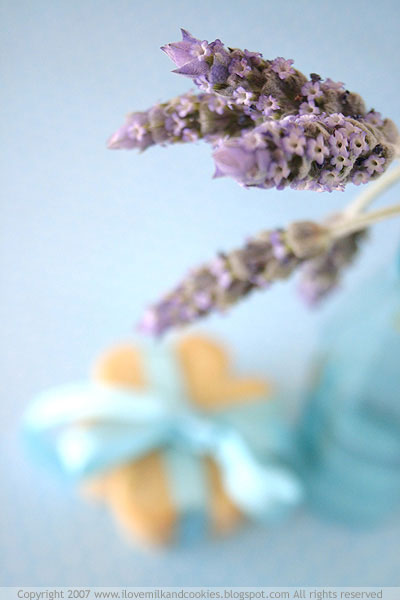
If you like all things pretty, then for me, lavender is usually what comes to mind; its delicate lilac blossoms, its fragrant aroma and it's beautiful velvety stems. It seems that when you add lavender to anything, it almost instantly becomes pretty. Lavender's allure has captured me again, and this time the creation isn't too far from what I had made before.
If you are thinking that the recipe looks familiar, then you have probably seen it before on Kelli's Lovescool. I adapted her recipe from her award winning recipe for Green Tea Sweets. All I changed was the green tea flavouring and replaced it with lavender, but other than that the recipe is based on Kelli's original creation. I am so glad that she decided to share the recipe with us, as I am making it my base shortbread recipe from which I will probably make other variations from.
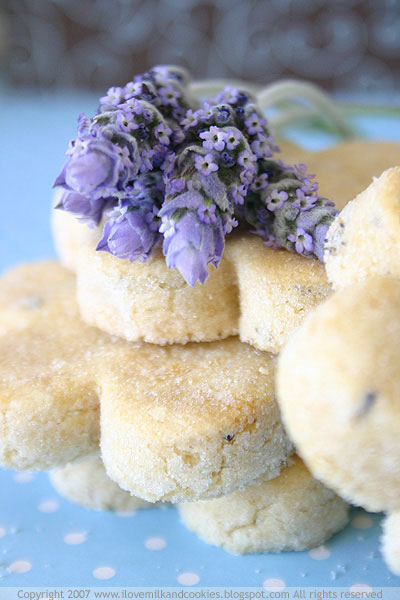
What's so good about her recipe? Well not only is it so simple to make, but the shortbread keeps it shape even after baking. Some shortbread recipes I have made, I've found, loses certain details in it shape because the cookies tend to spread. The great thing about this recipe is that the shortbread barely, if at all spreads in the oven while baking and keeps their shape perfectly, and so allows you to cut some more detailed shapes from your dough.
As for the taste. Well, I have been looking for a "go-to" shortbread recipe, and for some time, I did settle on a Donna Hay recipe, but its long reign is over because Kelli's shortbread recipe has toppled Miss Hay's off the throne. It's amazing how the combination of flour, sugar and butter, in slight variations and ratios can create something completely different. As essentially, shortbread, like many other cookies, are a combination of flour, sugar and butter, but it's the different ratios of these ingredients that create something either genius or inedible.
This combination of flour, sugar and butter not only tastes incredible, but it's has been deemed worthy of the title of best bakery recipe. And I can see why. The original green tea recipe, I found, is quite adaptable and I can just imagine endless variations, this probably isn't the last you have seen of these cookies.
And if you are looking for ideas for favours or presents, I think these cookies even have the sophistication to be used for weddings and birthdays. That's if you have the patience and the time to make them and wrap them up in pretty little pouches. It is definitely worth all the effort though. It beats the classical, yet worn out sugared almonds on your wedding day, I'm sure your guests would be delighted to receives these cookies as a gift.
As far as shortbreads go, this one is hard to beat. Its blissful buttery texture that melts in your mouth, its aromatic sweetness and its frosted sugar-coating, it's the perfect thing to satiate any sweet tooth's appetite. And what better way to share some love than with a bunch of these cookies, it's as good as getting a bunch of flowers.
Lavender Shortbread
adapted from this award-winning recipe
makes 15 flower shapes
¾ cup (2.25 oz) icing (confectioner’s) sugar
1 tbsp dried lavender
140g unsalted butter, cut into cubes
1 tsp lemon zest
1¾ cup (8.5 oz) plain all-purpose flour
3 large egg yolks
1 cup granulated sugar (for coating)
Preheat the oven to 180°C.
Line a baking sheet with parchment paper.
Whisk the confectioner’s sugar and lavender together in a bowl.
Add the butter, lemon zest and lavender/sugar mixture to the bowl of a stand mixer fitted with the paddle attachment. Mix until smooth and light in colour.
Add the flour and mix until well combined.
Add the egg yolks and mix just until the eggs are fully incorporated and a mass forms.
Form the dough into a disk and chill in the refrigerator until firm (about 30 minutes).
Roll the dough out to 1.5cm thickness.
Cut the dough with a cookie cutter.
Toss each cut cookie in a bowl of granulated sugar to coat.
Place the sugar-coated cookie on a parchment lined pan.
Bake for 12-15 minutes, or until slightly golden around the edges.
What? Another yeast concoction?
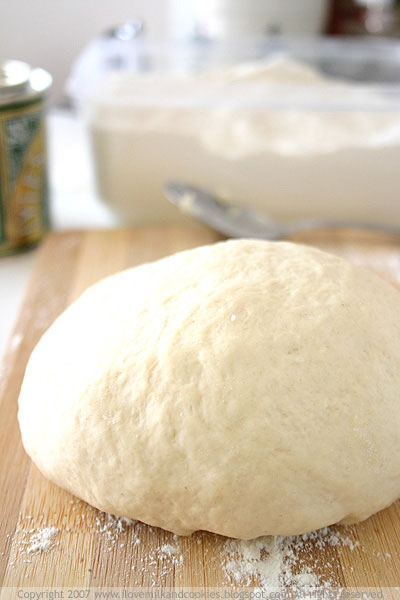
Yes, that's right, I am finally getting my yeast legs, and just like like that little mound of dough that expands and increases in size, more and more my confidence with working with yeast is growing. I've never been happier. I've never had this much repeated success with yeast before, it's unprecedented!
Now I know how it really feels to work that pliable dough in your very own hands, kneading, pulling and stretching those protein strands to elasticity, wow. I know it sounds awfully food-geeky of me but it was really thrilling, I can see why bakers are so willing to get up so early for their craft, this dough-business is definitely worth it.
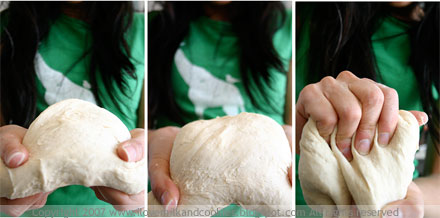
Okay, okay, I promise I will start to control my elation; I can feel most of you are slowly starting to back away from the crazy girl enthusing fanatically about dough and yeast. I'm dropping the ball of dough and my hands are up in the air.
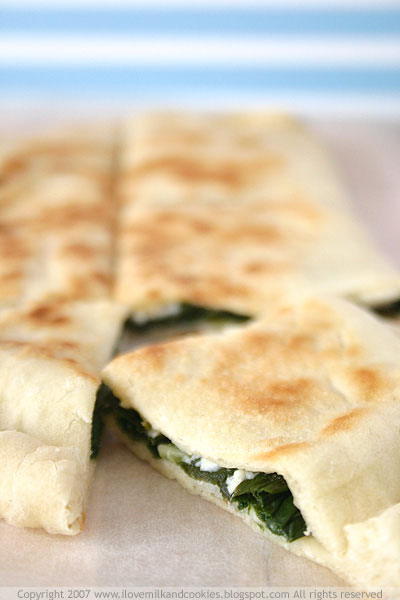
These new yeasty concoctions are Turkish Gozlemes, which are basically filled flat breads that are folded over and grilled on an oiled hotplate. If you go to any of the Sydney markets or festivals you will have most probably seen them there. They are ubiquitous; every event you attend, they seem to have a stand. And not that I am complaining because it is probably one of the cheapest most satisfying feeds you can get. And the great thing is you can even eat it standing up and there's plenty to share. Not that I have ever had to share, we all seem to understand that we get our own plate and are responsible for polishing off that entire plateful and no one has ever complained about it.
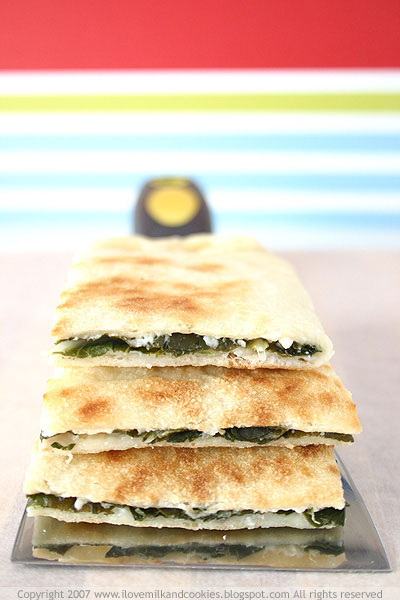
You watch those robust Turkish ladies rolling, folding, grilling those gozlemes, and it is almost mesmerising. Like a well-oiled machine their gozleme production line churns out one flat bread after another for the ravenous mob that still continue to queue up even when the line snakes past a few other other stalls. That picture is all too familiar because it seems to be the same thing at every market at every stall, hordes and hordes of people lining up for these beauties.
Well what if you wanted to make them at home? Skip the middle man, skip the long wait and cavalcade of other flat bread admirers. Can you get the same result, minus the Turkish ladies? My answer is yes indeed.
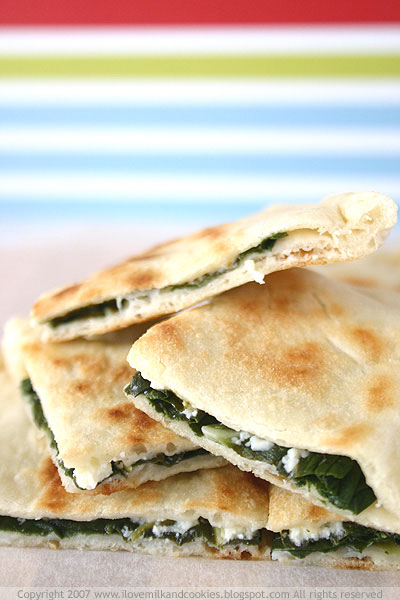
I never knew how easy it was to make these market favourites at home. Fair enough, the process might be a little labour intensive, as you have to roll out the dough and fill and grill every single one, but it is worth all that effort. And even when the effort expended to make the gozlemes far exceeds the effort it takes to eat them, they are still worth it.
Okay, now that I have told you about the gozlemes, let's have another look at that dough. Isn't she lovely? I still can't believe, it was I that made it.
Spinach and Feta Gozleme
Recipe adapted from Super Food Ideas, February 2006
Serves 4
3 cups “00” Italian flour
8g sachet instant dried yeast
pinch of salt
1 tsp caster sugar
1/3 cup olive oil (see tip)
1 bunch English spinach
200g feta cheese, crumbled
lemon wedges, to serve
In a large bowl, combine flour, yeast, salt and sugar.
Add 300ml tepid water and olive oil and stir with a fork until the liquid has taken up all the flour.
Knead the dough for 5 minutes until elastic and form into a ball.
Place back into the bowl and cover with plastic film.
Stand in a warm place and allow the dough to prove for 30 minutes to an hour or until the dough has doubled in size.
Once the dough has proved, cut the ball into four portions. Keep the dough you aren’t using under cover.
Roll each piece of dough out into a circle the size of a large dinner plate.
Place a quarter of the spinach over half of the circle and then top with feta.
Fold the dough over and enclose the filling by pinching the edges together.
Preheat a flat hotplate, or a large frypan on medium-high heat.
Brush the bottom of the gozleme with olive oil and place on the hotplate.
Cook for 2-3 minutes or until the dough becomes crisp and golden brown.
Turn over and cook for a further 2-3 minutes.
Remove from the oven and cut the gozleme into 6 pieces using a pizza cutter.
Serve with lemon wedges.
Tip: Try rice bran oil instead of olive oil. This versatile oil is high in antioxidants and cholesterol-lowering plant sterols.